 |
| 3rd Division unloading landing craft on exercises in and leaving New Caledonia, late 1943. |
The 3rd New Zealand Division was a division of the New Zealand Military Forces. Formed in 1942, it saw action against the Japanese in the Pacific Ocean Areas during the Second World War. The division saw action in the Solomon Islands campaign during 1943–44, but was later disbanded in October 1944. The majority of its manpower was returned to civilian employment, although around 4,000 men were sent to Italy to reinforce the 2nd Division.
The 3rd New Zealand Division began forming from New Zealand Military Forces units in Fiji in May 1942 and moved to New Zealand in the middle of the year. Major-General Harold Barrowclough was appointed to command the division on 12 August. By October the division consisted of the 8th and 14th Brigades, each of which consisted of three infantry battalions, along with artillery including the 33rd Heavy Coast Regiment, the 28th HAA Regiment, the 29th Light Anti-Aircraft Regiment and anti-tank batteries, two field companies plus a field park of engineers, medical, Army Service Corps and support units.
In October 1942, the 34th and 36th Battalions were detached from the division to garrison Tonga and Norfolk Island respectively. The 36th Battalion was accompanied by detachments from the divisional engineer, artillery and service units as N Force. After completing its initial training in New Zealand the 3rd NZ Division moved to New Caledonia for garrison duty and further training in December 1942 and January 1943. At that time, the third brigade, the 15th, came into being. Each of the brigades consisted of only two battalions, initially, although in March 1943 the New Zealand government approved the expansion of the division to 17,637 men all ranks and decided that the two battalions on Norfolk Island and Tonga would be assigned to the division. Almost immediately, however, manpower became an issue and during the early months of 1943 it became clear that it would not be possible to raise the division to full strength. Indeed, for a while it seemed that the division might be disbanded before it saw active service but its commander, Barrowclough urged the government to allow the division to see active service before any decision was made.
This request was accepted, however, on 30 June 1943 the government announced that the 15th Brigade would be disbanded along with its heavy artillery and anti-aircraft regiments (the 33rd Heavy Coast Regiment and the 28th Heavy Anti-Aircraft Regiment, Royal New Zealand Artillery). This was effected by 10 July 1943, after which the 1st Battalion, Ruahine Regiment, and 1st Battalion, NZ Scots, were disbanded. Subsequently, the division became a two-brigade division again, although due to Barrowclough's requests, the division retained all three of its engineer companies.
The 3rd NZ Division moved to Guadalcanal in August 1943. From this base, as part of the U.S. I Marine Amphibious Corps (I MAC), the division provided the ground component for three campaigns against small island groups in the Northern Solomons (in all operations the United States Navy provided the naval forces while squadrons from the Royal New Zealand Air Force formed only a small part of the US dominated air forces). While the islands were only lightly held by the Japanese and New Zealand casualties were relatively light, the Kiwi ground troops had to overcome challenging terrain and climatic conditions in these operations.
The 3rd NZ Division's operations on Vella Lavella ran from 21 September to 9 October 1943. The Americans had landed on the island in August, establishing a beachhead in the south. The division's 14th Brigade Group, under Brigadier Leslie Potter, landed at the US base a month later as a follow-on force. Upon arrival, they were given the task of clearing the remaining Japanese forces from the north of the island so that it could be used to establish a radar station and a motor torpedo boat base. The New Zealanders were outnumbered by the defenders, nevertheless, they had been well trained and this training ultimately led to their success. The 35th and 37th Battalions were dispatched along with supporting elements on two axes of advance: one up the east coast, the other up the west. The tactic proved successful and by early October the Japanese defenders were caught in a small pocket by the two New Zealand forces, having killed between 200 and 300 Japanese. Potter, however, failed to capitalize on the situation and due to over caution the remaining 589 Japanese were able to escape the island on the night of 6/7 October aboard ships of the Imperial Japanese Navy. Total New Zealand casualties in this operation were 32 killed and 32 wounded.
The main units involved were:
3rd NZ Division Headquarters
14th Brigade Group
30 Battalion
35 Battalion
37 Battalion
17 Field Regiment
207 Light AA Battery
53 Anti-Tank Battery
20 Field Company
The 3rd NZ Division's operations in the Treasury Islands ran from 25 October to 26 November 1943. The 8th Brigade Group, under the command of Brigadier Robert Row, landed on the islands on 27 October in New Zealand's first opposed amphibious operation since Gallipoli in 1915. The initial landing took place on Mono Island, the largest in the group, and after the landing the New Zealanders encountered only scattered opposition from the Japanese defenders, who withdrew to the northern coast of the island. On the night of 1/2 November the Japanese attempted a counterattack, launching a determined attack on the Allied line at Soanotalu. The attack was unsuccessful, however, as reinforcements had just arrived and the Japanese assault was beaten back. The last organized Japanese units were defeated on the night of 2/3 November. New Zealand casualties were 40 killed and 145 wounded.
The main units involved were:
8th Brigade Group
29 Battalion
34 Battalion
36 Battalion
38 Field Regiment
29 Light AA Regiment
54 Anti-Tank Battery
23 Field Company
The 3rd NZ Division's operations in the Green Islands ran from 15 February to 27 February 1944. Like the operation in the Treasury Islands, the heavily reinforced 14th Brigade made an opposed landing on Nissan Island against light Japanese resistance on 15 February. The small Japanese garrison resisted the invasion strongly but was overwhelmed by the much larger New Zealand force, with organized resistance coming to an end on 23 February. New Zealand casualties were 10 killed and 21 wounded.
The main units involved were:
3rd NZ Division Headquarters
Divisional Signals Regiment
3rd NZ Division Tank Squadron (Valentine tanks)
Divisional Artillery
17 Field Regiment
29 Light AA Regiment
144 Independent Battery
53 Anti-Tank Battery
Divisional Engineers
20 Field Company
26 Field Company
14th Infantry Brigade
30 Battalion
35 Battalion
37 Battalion
In early 1944, the New Zealand Government faced a manpower crisis caused by the demands of maintaining two divisions overseas while simultaneously maintaining agricultural and industrial production to meet the needs of the Allied countries. In order to cope with this crisis the NZ Government saw no option other than to disband one the country's two infantry divisions. The decision to disband the 3rd NZ Division was made after consulting with the British and United States governments, who were of the view that 2nd NZ Division's contribution to the campaign in Italy was of greater importance than 3rd NZ Division's contribution in the Pacific.
The 3rd NZ Division was withdrawn to New Caledonia in June 1944 and returned to New Zealand in August. The division was rapidly downsized and was formally disbanded on 20 October 1944. About 4,000 veterans of the 3rd NZ Division were dispatched to Italy to reinforce the 2nd NZ Division with the remaining men of the division returning to civilian employment.
In October 1942, the main elements of the 3rd NZ Division were:
Divisional Headquarters
8 Infantry Brigade
29 Battalion
34 Battalion
36 Battalion
14 Infantry Brigade
30 Battalion
35 Battalion
37 Battalion
Divisional Artillery
17 Field Regiment
33 Heavy Coast Regiment
28 Heavy Anti-Aircraft Regiment
144 Independent Battery
53 Anti-Tank Battery
54 Anti-Tank Battery
Divisional Engineers
20 Field Company
23 Field Company
37 Field Park
No. 1 Signals Company
Army Service Corps
4 ASC Company
16 ASC Company
10 Reserve Mechanical Transport Company
Medical
7 Field Ambulance
22 Field Ambulance
4 General Hospital
This organization was altered for the campaign in the Solomon Islands. Most notably, an armored regiment was added to the division in December 1942 (this unit was reduced to a squadron in June 1943) and the heavy coast artillery regiment was replaced by a field artillery regiment.
 |
| New Zealand troops onboard a transport as the ship moves to the combat area. |
 |
| The map indicates how the 8th Brigade made its assault on Mono and Stirling Islands. The principal landing by the 29th and 36th Battalions took place at Falamai. Stirling became an airfield. |
 |
| The Japanese were still machine-gunning the beaches when this photograph was taken of an LST near Falamai, Mono Island. Equipment and supplies were taken ashore as quickly as possible. Marsden matting, much used in unsuitable country for emergency airfields, roads and runways, lay among the undergrowth. |
 |
| On the map arrows indicate where 14th Brigade units landed on Nissan and established lines from coast to coast on the first day ashore. All landing craft entered the lagoon in single file through the only gap which would take them. |
 |
| Native guides accompanied patrols through much of the jungle. The above men of the 35th Battalion used coconut logs to bridge a stream on Vella Lavella. |
 |
| Last rites in the jungle on Vella Lavella. The battalion padre conducts a burial service after an action while the dead soldier's companions pay their last tributes. |
 |
| New Zealand soldiers of the 14th Brigade, 3rd Division, land at Baka Baka, Vella Lavella to relieve the U.S. 35th Infantry Regiment, 25th Division, on September 17, 1943. |
 |
| New Zealand soldiers of 3rd Division in Vella Lavella, Solomon Islands, during World War II, with a boat abandoned by the Japanese. This boat, abandoned by the Japanese, proved invaluable in enabling patrols to cross a deep river. |
 |
| 3rd NZ Division Engineers building a bridge, Vella Lavella, Solomon Islands. 23 December 1943. |
 |
| Malaria control sign attached to a tree at New Zealand Divisional Headquarters, Vella Lavella Island, Solomon Islands, 1943. Sign reads: "Malaria control 1730 tonight till tomorrow at 0700. Shirts on. Sleeves rolled down & use that repellent". |
 |
| Troops of the 3rd NZ Division checking equipment on Vella Lavella Island, Solomon Islands, circa 1944, before being moved north. |
 |
| Members of the New Zealand Expeditionary Force in the Pacific, during World War II, at Vella Lavella Island, Solomon Islands, circa 1944. |
 |
| Lance-corporal Brewster and Private Walker behind their guns in the jungle at Vella Lavella, Solomon Islands, 1943. |
 |
| Soldiers loading rations into small landing craft for transport to men in action on the other side of the island, 1943. |
 |
| NZ troops, Vella Lavella. |
 |
| Troops of the NZEF (IP) (New Zealand Expeditionary Force in the Pacific) using canoes for transportation on Vella Lavella. |
 |
| Troops of 3rd NZ Division on Vella Lavella Island 1943. |
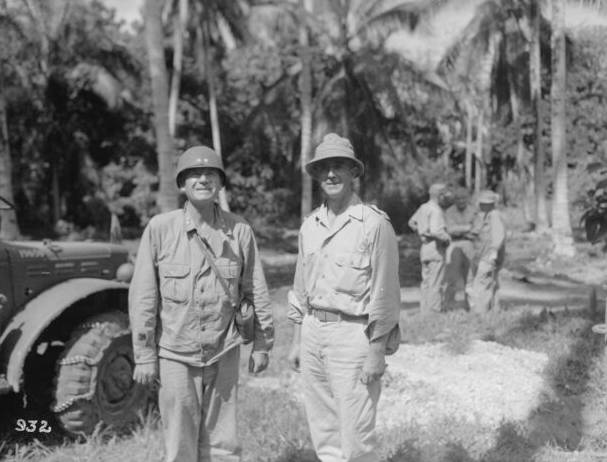 |
| Major General Harold Barrowclough, with General Griswald of the US Forces (on left) on Vella Lavella Island. |
 |
| Ration dump at Tambama, Vella Lavella 1943. |
 |
| New Zealand troops inspect a captured Japanese machine gun, Vella Lavella. |
 |
| New Zealand soldiers of the 3rd Division, NZEF (IP) loading stores into LCI's at Vella Lavella, for the Nissan Island landing. 1944. |
 |
| New Zealand troops of the 3rd NZ Division, 2nd NZ Expeditionary Force in the Pacific, with local guides, Vella Lavella, circa 1942-1945. One of the guides holds a captured Japanese rifle. |
 |
| New Zealand troops, of the 14th Infantry Brigade, 3rd New Zealand Division, 2nd New Zealand Expeditionary Force in the Pacific, in action on Vella Lavella. |
 |
| Army vehicles of the New Zealand Expeditionary Force on a muddy road in the bush, Vella Lavella. |
 |
| Soldiers of the 3rd NZ Division Engineers building a mahogany bridge, Vella Lavella, 23 December 1943. |
 |
| The Commander Regimental Engineers, inspecting a completed road between Barakoma and Joroneto, Vella Lavella, 1943. |
 |
| Troops of the 3 (NZ) Division drag a piece of heavy artillery across the beach on Vella Lavella to load it into a barge. 1943. |
 |
| Graves of New Zealand soldiers at a cemetery in the village of Bangarangara, Vella Lavella. |
 |
| New Zealand soldiers draining water from a jeep that was hauled from a stream, Vella Lavella. |
 |
| Soldiers of the 3rd NZ Division's 53rd Anti-tank Regiment, resting after hauling their heavy guns through the mud of the jungle on Vella Lavella. Two guns can be seen with mud up to the axles. |
 |
| New Zealand soldiers from 3rd Division reading letters from home at Vella Lavella. |
 |
| New Zealand troops, on Vella Lavella, Solomon Islands, preparing for the Green Island campaign, circa 1944. |
 |
| Third echelon, 2nd New Zealand Expeditionary Force, loading at Juno River, Vella Lavella, 1943. |
 |
| Brigadier General Neal C. Johnson, United States Army, and Brigadier Robert Amos Row, New Zealand Army, at Vella Lavella, 1943. |
 |
| Admiral Halsey visiting the New Zealand Headquarters on Vella Lavella. |
 |
| Troops of the 3rd NZ Division, 2nd NZ Expeditionary Force in the Pacific, Vella Lavella, Solomon Islands, circa 1943. |
 |
| New Zealand troops at a New Years Day sports meeting, on Vella Lavella. |
 |
| Group of Fijian scouts, Vella Lavella, 9 September 1943. |
 |
| New Zealand mortar crew of 30 Battalion, 3rd New Zealand Division, 2nd New Zealand Expeditionary Force in the Pacific, on Nissan Island, Papua New Guinea. They are firing at Japanese barges concealed on the shore. |
 |
| Local men taking an interest in a 3rd New Zealand division, 2nd NZEF (IP), Valentine tank on Nissan Island, Papua New Guinea. |
 |
| Green Island airstrip constructed in 1944 after 35th Battalion cleared the island. Photo taken by pilot of VMB-423 PBJ Mitchell medium bombers in early 1945. You can pick out some USN Catalina flying boats in mid left and some PBJ's closer, smaller aircraft in distance are Corsairs. |
 |
| An obelisk erected in memory of a New Zealand gun crew killed in action in Vella Lavella. |
 |
| The 3rd NZ Division developed its own camouflage uniform while in the Pacific. The New Zealand khaki drill shirt and trousers were sprayed in three fast color stain paints; dark brown, dark green and lime green. The dark green and brown were applied in irregular patches 3-6 inches long, allowing some of the khaki drill to show through and on top of these were oversprayed 2 inch diameter spots of lime green 9-12 inches apart. Each was allowed to dry so that no mixing occurred. Only the top surface was affected so that when the sleeves were rolled up the original khaki drill was evident. Under continual use the colors gave way to an overall blue-green shade and ended up lighter than the webbing. Headgear consisted of the US herringbone twill field cap or wide brimmed hat of New Zealand manufacture which could also be camouflaged. Some units continued to wear the steel helmet which was usually covered with dark green hessian or sacking with cloth loops for foliage. |


