 |
| Buffalo amphibious vehicles taking troops of the Canadian First Army across the Scheldt in Holland, September 1944. (Library and Archives Canada PA-136754) |
by C. P. Stacey
The Scheldt Estuary
operations made a vital contribution to Allied victory in the Second World War.
They provided logistical facilities essential to the final assault on Germany.
By the early autumn of 1944 the Allied Expeditionary Force in northwest Europe
was in serious administrative difficulties. Following its victory in Normandy
and rapid pursuit of the enemy across France and Belgium, its lines of
communication were stretched to the breaking point. It was still dependent on
supplies landed in the original bridgehead in Normandy, and the long haul from
the beaches there almost to the German frontier placed such a strain on
transport resources that not enough fuel was reaching the front to keep all the
Allied armies moving.
The problem could only
be solved by acquiring large port facilities closer to the front. Antwerp, the
greatest port in northwest Europe, capable of bringing in 30,000 tons a day,
was captured undamaged by the British 11th Armored Division on 4 September; but
the Germans still held both banks of the River Scheldt between Antwerp and the
sea, and the port could not be used until they were dislodged. They fully
realized how important their positions were to the security of the Fatherland,
and the First Canadian Army’s task in evicting them turned out to be very hard.
The clearing of the
Estuary was carried out by the 2nd Canadian Corps, employing four divisions
(one of which was armored) and a commando brigade. The Royal Navy and Royal Air
Force both played vital parts. Five water-borne assault landings were made. For
the first time in history large-scale inundations produced by aerial bombing
were used to harass an enemy’s troops in battle.
Background of the Battle
Although the
administrative significance of Antwerp was fully recognized, operations to open
the port were postponed while Field Marshal Montgomery’s 21st Army Group made a
bold attempt to thrust across the lower Rhine before the Germans could recover
themselves after the Normandy defeat (unfortunately, the Germans were becoming
quite well recovered from this defeat and sketchy spy and partisan reports
stated this, but Allied intelligence did not believe it). But the great
combined airborne-ground operation called Market-Garden failed of its main
objective, and on the night of 25-26 September, the remnants of the British 1st
Airborne Division were withdrawn across the Neder River from their precarious
foothold near Arnhem. Thereafter the opening of Antwerp was given first
priority. While Arnhem fighting was in progress, General Eisenhower and Field
Marshal Montgomery had been arguing over strategy, the latter emphasizing
strongly what he considered the importance of concentrating the available administrative
resources on his own front in the north for a blow at the great Ruhr industrial
area. Montgomery believed seriously that he could end the war before the end of
1944, but without the port of Antwerp this was an impossibility. To use
Antwerp, the Scheldt had to be cleared and Montgomery wasted precious time
arguing with Eisenhower. On 22 September Eisenhower sent Montgomery a letter
which concluded:
No one is more anxious than I to get to the Ruhr
quickly. It is for the campaign from there onward deep into the heart of
Germany for which I insist all other troops must be in position to support the
main drive. The main drive must logically go by the North. It is because I am
anxious to organize that final drive quickly upon the capture of the Ruhr that
I insist upon the importance of Antwerp. As I have told you I am prepared to
give you everything for the capture of the approaches to Antwerp, including all
the air forces and anything else you can support.
During September,
Lieutenant-General Henry D. G. Crerar’s First Canadian Army was occupied with
clearing the Channel ports. By 1 October it had captured Le Harve, Dieppe,
Boulogne, Calais and Ostend. All these ports were so badly damaged that it took
weeks to get them to work, and then their capacity was limited. The importance
of Antwerp was more and more evident.
The task of opening the
Scheldt was formally assigned to the First Canadian Army on 14 September. On
the 15th, General Crerar allotted the operation to the 2nd Canadian Corps,
commanded by Lieutenant-General G. G. Simonds. The task before the Corps
commander was formidable. The West Scheldt, a winding channel, extends some 50
miles from Antwerp to the sea. It was heavily mined throughout its length.
Along the south side the enemy still held a large bridgehead, protected on the
most of its land front by the Leopold Canal. On the north stood the fortified
island of Walcheren, joined by a causeway to the long peninsula of South
Beveland, above which the right bank of the Scheldt was also in enemy hands almost
to Antwerp. Most of the land about the estuary was reclaimed ground, low-lying
tilled fields, cut by ditches and dikes and easily flooded. Nearly all of Walcheren
and much of South Beveland lay so low that, if the seaward dikes were broken,
inundation would result.
General Simonds’
appreciation of 21 September envisaged airborne and waterborne attacks upon
Walcheren following heavy air bombardment. He recommended that Walcheren be
flooded by bomber attacks upon the sea dikes. He proposed that the 2nd Canadian
Infantry Division should push northward from Antwerp to cut off South Beveland
and exploit the land approach to Walcheren via South Beveland as far as
possible. The clearing of the bridgehead south of the Scheldt he assigned to
the 3rd Canadian Infantry Division.
The Army commander
agreed that the Walcheren dikes should be breached, provided that this was
technically feasible, and the higher authorities concurred. Army engineers
expressed the view that breaching the dikes was impracticable, and an officer
from the RAF Bomber Command who attended a conference at Army Headquarters on
23 September was not prepared to commit himself on the question. General
Simonds, after considering the matter again, was still of the opinion that the
attempt should be made; and Army Headquarters recommended the plan to the 21st
Army Group, which supported it. The RAF, while not guaranteeing success, was
willing to try. At this point illness forced General Crerar to hand over the
Army temporarily to General Simonds. Major-General Charles Foulkes took over
the 2nd Canadian Corps.
Supreme Headquarters
had refused an airborne operation against Walcheren, the terrain being
considered unsuitable. But the Supreme Commander now authorized the flooding
operation. On 3 October Bomber Command made the experiment at Westkapelle, and
the dike was successfully breached. The previous day General Simonds had issued
his directive. It required the 1st British Corps (now in the Antwerp area and
attached to the First Canadian Army) to use the 2nd Canadian Division to close
the eastern end of the South Beveland isthmus. The 2nd Canadian Corps would
clear the area south of the Scheldt and subsequently capture South Beveland and
Walcheren.
The 2nd Division Pushes
North
The 2nd Canadian
Infantry Division moved northward from the Antwerp area on 2 October, crossing
the Dutch border on the 5th. On the 7th the division reverted to the control of
the 2nd Canadian Corps. As the 1st British Corps had directed its main thrust
northeastward from Antwerp, the division’s right flank was exposed. It now
encountered fierce enemy opposition in the area of Woensdrecht, a village
blocking the entrance to the isthmus of South Beveland, and the advance was
checked. Very bitter fighting followed. On the 10th the 4th Canadian Infantry
Brigade temporarily cut one isthmus; on the 16th an attack by the same brigade
secured a tenuous hold on Woensdrecht; but the situation was still very
insecure. The Germans had committed here on 12 October one of their “fire
brigades,” “Battle Group Chill” (also known as the 85th Infantry Division),
whose backbone was a regiment of hard-fighting paratroopers.
At the same time, the
operation against the bridgehead south of the Scheldt was also meeting heavy
opposition and moving slowly. There was now a change of policy on the part of
the high command. So far, it would seem, both Eisenhower and Montgomery had
hoped that the 21st Army Group could open the Scheldt without abandoning
operations which the Second British Army was conducting against the enemy
bridgehead remaining west of the Maas—i.e., east of the salient created by
Market-Garden. It was now evident that this could not be done. On 13 October,
Eisenhower sent a strong directive to Montgomery emphasizing the extreme
importance of being able to use Antwerp soon, and offering assistance in troops
and supplies for the purpose. Eisenhower wrote that if after receiving his views,
Montgomery still regarded them as unsatisfactory, then an issue would exist
that would have to be settled by higher authority. Only then, on 16 October,
did Montgomery, reluctant still, force his attention away from the Ruhr and
issue a new directive to his Army commanders, closing down all operations
except those directed towards the Scheldt to provide a logistical base for
operations to come. The Second Army was to take over the right portion of the
Canadian Army’s line and push westward; the Canadian Army, with more troops
available, was to clear the country north of the South Beveland isthmus.
These new orders soon
transformed the situation. The 1st British Corps was now given the whole of the
4th Canadian Armored Division (of which some elements had already been
operating on the right of the 2nd Division) and also the 104th U.S. Infantry
Division; and it proceeded to push northward. On the 22nd the armored division
captured Esschen and attacked toward Bergen-op-Zoom, which fell on the 27th.
With the capture of Esschen, the right flank was secure. On the 23rd, the 2nd
Division attacked north of Woensdrecht, making only limited advances, but next
day operations went better; the vigorous action of the 4th Armored Division to
the east had caused the enemy to retire. The way into South Beveland was open.
On 20 October,
Montgomery sent a personal note to Simonds acknowledging a copy of his latest
directive. He wrote:
I think everything you are doing is excellent.
And your troops are doing wonders under the most appalling conditions of ground
and weather. I doubt if any other troops would do it so well, and I am very
glad the Canadians are on the business. Please tell all your chaps how pleased
I am with their good work.
Operation SWITCHBACK:
The Breskens Pocket
On 6 October the 3rd
Canadian Division commenced Operation SWITCHBACK, attacking the German pocket
south of the West Scheldt at the point where the Leopold Canal diverges from
the Canal de Derivation de la Lys. The Leopold Canal was a formidable obstacle,
about 60 feet wide and with steep banks. Inundations to the north of the canal
left only a narrow strip of land where we could develop our bridgehead. The 7th
Canadian Infantry Brigade made a sudden assault supported by
Wasps—flame-throwing carriers. The attack was made through the 4th Canadian
Armoured Division, which put in two diversionary attacks, one on either side of
the bridgehead. After acquiring a shallow foothold, the attack bogged down in
the face of strong opposition. General von Zangen, commanding the German
Fifteenth Army in the Netherlands, had allotted an efficient formation, the
64th Infantry Division, to the defense of what the Germans called “Scheldt
Fortress South.” This formation now held the 7th Brigade’s bridgehead to narrow
limits.
An amphibious assault
was now made against the rear of the pocket. The 9th Brigade’s assault force
embarked at Ghent in Buffalos (Landing Vehicles, Tracked) and sailed down the
canal leading to Terneuzen. At 2:00 a.m. on 9 October they set off across the
Braakman inlet, supported by fire from artillery of the 4th Canadian Armoured
Division. Both attacking battalions got ashore near Biervliet quickly and
reorganized against slight opposition. By 9:00 a.m. a bridgehead 1,500 yards
deep had been established and soon the reserve battalion was landed, advancing
to Hoofdplaat.
The attack over the
Braakman had met with so much success that it was now decided to reinforce
there instead of on the Leopold Canal as previously planned. The 3rd Division’s
reconnaissance regiment was sent over on the 11th, followed by the 8th Brigade.
The enemy had now moved up forces to face this threat at his left rear; the
going became tougher. On the 14th troops of the 4th Canadian Armoured Division
succeeded in crossing the Leopold near Watervliet and near the head of the
Braakman, making it possible to send supplies and artillery by road into
Scheldt Fortress South. The 8th and 9th Brigades advanced slowly westward
against opposition.
On the 16th resistance
before the 7th Brigade suddenly slackened. At last light on the 18th the
brigade was relieved by the 157th Brigade of the 52nd (Lowland) Division. The
157th pushed forward and on the 19th made contact with the force that had
crossed the Braakman.
The 3rd Division now moved
to cut the German forces off from the Scheldt. The 9th Brigade captured
Breskens on the 22nd in the face of heavy enemy artillery fire, particularly
from Flushing. The Germans’ communications with Walcheren were virtually
severed. Next day the 9th Brigade swung southwestward and captured Schoondijke.
After taking Fort Frederik Hendrik this formation was withdrawn into reserve
and the 7th Brigade struck out westward, capturing Cad-zand on the 29th. The
8th Brigade meanwhile had shifted southward, relieving the 157th. Sluis fell on
1 November. On the same day the German divisional commander was captured near
Knocke-sur-Mer. The 8th Brigade cleared westward along the Leopold Canal and on
3 November opposition was at an end in Scheldt Fortress South. Operation
SWITCHBACK was over.
Operation VITALITY:
South Beveland
Meanwhile, on 24
October the 4th Brigade had led the advance west down the isthmus of South
Beveland, thus beginning Operation VITALITY. The entire German force west of
the isthmus consisted of the weak 70th Infantry Division, less one grenadier
regiment with some other troops and naval coast artillery units. To dislodge
enemy rearguards from the line of the Beveland Canal, Simonds mounted another
amphibious operation. Carried in some 120 tracked landing craft, the 156th
Infantry Brigade of the 52nd Division crossed from Terneuzen on the night of
25-26 October, landing in South Beveland. A good bridgehead was immediately
established. On the 26th the 6th Brigade attacked towards the Beveland Canal.
One battalion reached the canal late on the 27th after wading waist-deep water
and seized a bridgehead on the far side. Another gained a crossing in the
middle of the isthmus. By the 29th the 2nd Division had two brigades over the
canal. The 157th Brigade, which had landed in the 156th Brigade’s bridgehead on
the West Scheldt, moved on the southern flank. Goes fell on the 29th, and by
the 30th the 5th Brigade had a battalion within two miles of the causeway leading
to Walcheren.
The 4th Brigade now put
in a night attack, clearing the eastern end of the causeway.
The Lowland Division
came up on the left and by morning of 31 October the German hold on South
Beveland was ended. The causeway, however, was strongly defended. On the
afternoon of the 31st the 5th Brigade took over from the 4th and attempted to
cross the 1,100-yard cratered, fire-swept roadway to Walcheren. The leading
troops finally forced their way across and gained a precarious foothold, which
was lost and then restored. The decision was now made to relieve the brigade
with the 157th Brigade, and the 2nd Canadian Division was withdrawn for rest.
Meanwhile, troops of the 2nd Division’s reconnaissance regiment captured the
island of North Beveland on 2 November. The attack on Walcheren had already
begun.
Operation INFATUATE:
Walcheren
Like a half-drawn cork
in the very mouth of the Scheldt River, the island of Walcheren is roughly
rectangular in shape, about ten miles long by eight miles broad. The village of
Westkapelle lies at the westerly corner, the port of Flushing at the southerly
one. The island is low-lying, most of it below mean sea level. Only the coastal
strip of dunes on the northwest and southwest sides, and the eastern-most
section of the island, are higher than the sea.
The island was heavily
fortified. There were coast-defense guns up to 8.7-inch including a dozen
5.9-inch. The island was garrisoned by remnants of a German division and other
elements of the German Fifteenth Army, the total being estimated at between
6,000 and 7,000 (to the surprise of the Allies, the number of prisoners taken
exceeded the number of German troops estimated to be on Walcheren). In the
period 3-17 October the heavy bombers of the RAF made four heavy attacks on the
sea dikes of Walcheren, breaching them in four places and allowing the sea to
pour in. These bombers did not wipe out the defensive positions but put most of
the island waist-deep in water, making operations all the more difficult. The
island was now like an immersed saucer with only the rim showing.
The first waterborne
attack in Operation INFATUATE, the assault on Walcheren, went in against
Flushing before daylight on 1 November, when the 4th Commandos crossed the West
Scheldt from Breskens following a bombing attack by the RAF. German gunfire
destroyed nineteen out of twenty-five landing craft, killing and wounding 382
men. Three hundred guns, including those of two Canadian Army Groups Royal
Artillery, hammered German defenses in the town from across the West Scheldt.
The commandos were soon ashore and in possession of a bridgehead. The 155th
Infantry Brigade now sent a battalion across to assist in clearing Flushing.
Next morning the rest of the brigade crossed over and one battalion advanced
toward Middelburg. On the 3rd the headquarters of the Flushing garrison was
captured, after an advance through deep flood waters; and by nightfall the city
was clear.
The climax of the
Walcheren operation came at Westkapelle. Soon after first light on 1 November a
seaborne attack was delivered at that point. The assault force, consisting of
units of the 4th Commandos under command of the 2nd Canadian Corps, a naval
bombarding force and a support squadron, approached the island from the west.
When the support squadron, made up of twenty-seven landing craft armed with
guns, rockets and smoke projectors, deployed five miles from shore it was
immediately engaged by every German battery within range and began to suffer
heavy losses. Four hours later nine craft had been lost and eleven were more or
less badly damaged by gunfire. There were 372 casualties among the crews. Their
gallantry and their sacrifices had purchased victory. British tactical
investigators later came to the conclusion that the landing would have failed
but for two facts: the German batteries fired at the craft that were firing at
them, not at the personnel carriers; and one of the 5.9-inch batteries ran out
of ammunition at a critical moment.
It had been planned
that close air support would be given by fighter-bombers and rocket-firing
Typhoons immediately before and after H-hour. Bad flying weather, however,
prevented the fighter-bombers from taking off. It also interfered with air
spotting for the naval bombardment ships, the aircraft being fog-bound in England.
Fortunately, the Typhoons were able to come into action against the German
defenses just as the first assault landing craft touched down on each side of
the gap in the dike. One Commando landed, seized the town and nearby battery
and advanced northeastwards. Another Commando, landing south of the gap, went
on to the southeast along the dunes. During the next two days good progress was
made in both directions.
The last landing on
Walcheren was made on the eastern side south of the causeway, where the 156th
Brigade sent a battalion across on the night of 2-3 November. Using assault
boats and wading in the salt marshes, this unit established a secure bridgehead
by nightfall. Next day another battalion followed and the troops at the west
end of the causeway began to advance. On 6 November Middelburg fell to troops
advancing from Flushing and the German general surrendered. By the 7th only the
northern coast remained to be cleared. On the morning of the 8th German
resistance on Walcheren came to an end. The fighting on Walcheren was done by
British units, but medical service was provided by a unit of the Royal Canadian
Army Medical Corps.
Both Naval and Army
authorities blamed the heavy losses in the Westkapelle assault on the limited
scale of bomber effort employed against the German batteries. It is true that
many Allied air officers were reluctant to divert forces to these targets from
the offensive against the German industrial complex; but a considerable number
of attacks were actually made on Walcheren. It was particularly unfortunate
that bad weather compelled the air force to cancel the attacks which had been
planned for 31 October (D minus one).
The effect of the
flooding—which, of course, meant much misery for the population of Walcheren—merits
a word. While the German coastal batteries were on high ground and were not
directly affected (though many of the anti-aircraft positions were put out of
action), they were isolated by the waters, their communications were seriously
interfered with and the German defense generally was greatly harassed. The
attackers on the other hand were offered the advantage of being able to use
amphibious vehicles throughout (not having to transport land vehicles for use
on Walcheren) and thanks in part to these the operations went faster than those
south of the Scheldt.
During the operations
of the First Canadian Army from 1 October to 8 November, 41,043 German
prisoners were taken, and the enemy suffered correspondingly heavy losses in
killed and wounded. Commonwealth casualties exceeded 27,000 men (more than the
total number of Allied casualties sustained in the invasion of Sicily in 1943).
With the clearing of
Walcheren, the Germans no longer commanded the sea approach to Antwerp.
However, the West Scheldt was thickly sown with mines which the Navy had to
clear (sixteen sweepings were required before the channel was finally usable).
Not until 28 November did the first Allied convoy arrive in the port. But with
cargo ships unloading at Antwerp a firm logistical foundation at last existed
for the final drive into Germany.
 |
| Loading in Ostend. |
 |
| A member of the Canadian Provost Corps talking to members of the Belgian Resistance in Bruges during the Battle of the Scheldt, September 1944. |
 |
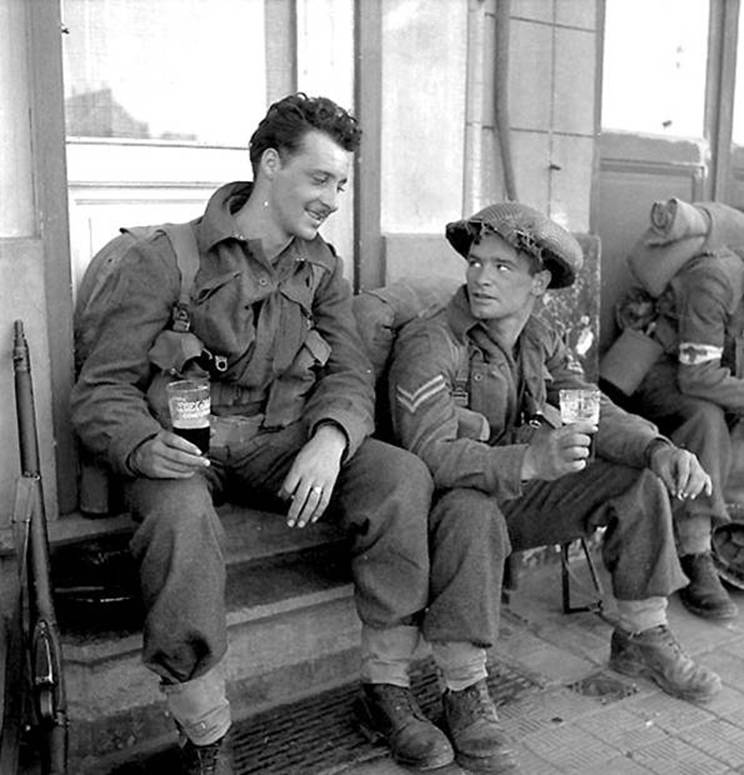
| Soldiers of the Royal Regiment of Canada rest in Blankenberge, September 1944. |
 |
| A column of Alligator amphibious vehicles passing Terrepin amphibious vehicles on the Scheldt River near Terneuzen, October 13, 1944. |
 |
| Canadian combat medics constructing a field hospital. Battle of the Scheldt, 1944. |
 |
| On the landing beach, Battle of the Scheldt, 1944. |
 |
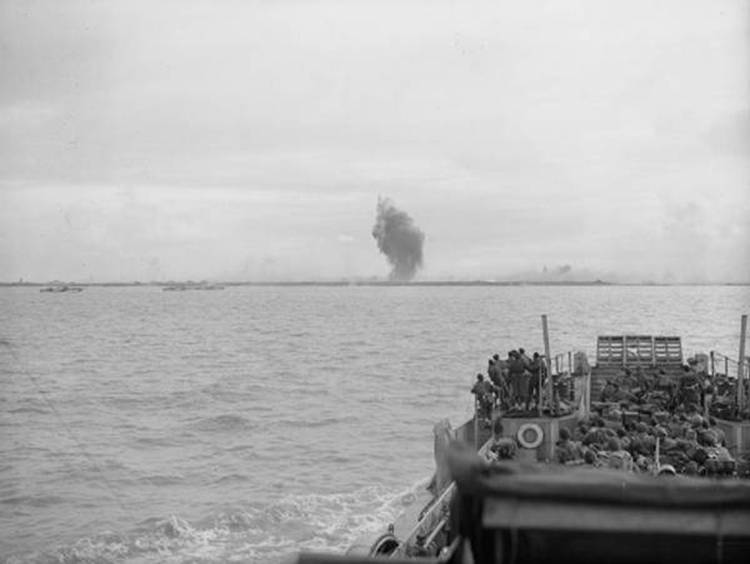
| Buffalos can be seen on the beach. Shelling was still heavy. In the background smoke from Westkapelle can be seen rising as assault troops attacked German defensive positions. |
 |
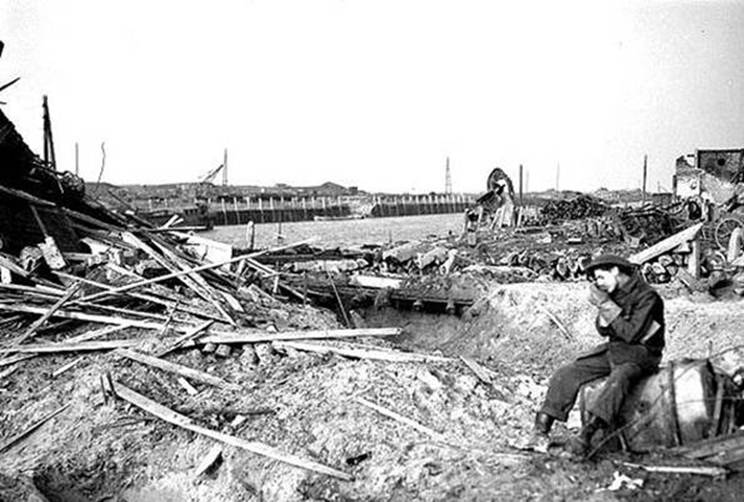
| Sapper M.J. Barratt of the 3rd Canadian Infantry Division’s Royal Canadian Engineers sits amid rubble at the east end of the Leopold Canal on October 16, 1944. |
 |
| The 7th Brigade is moving through a village in the vicinity of Leopold canal, October 18, 1944. |
 |
| Royal Hamilton Light Infantry carriers move through the Dutch village of Krabbendijke on the Beveland Causeway, 27 October 1944. |
 |
| A gun-tractor skidded off the road on the flooded island of Beveland, October 28, 1944. |
 |
| Churchill tanks of 34th Tank Brigade cross a temporary bridge in Roosendaal, Netherlands, October 30, 1944. |
 |
| Scouts of the Calgary Highlanders advancing north of Kapellen, October 1944. |
 |
| Scheldt Embarkation Point, West of Terneuzen, October 1944. |
 |
| Village of Biervliet in the Breskens Pocket, October 1944. |
 |
| 4th Canadian Armoured Division demonstrating the use of flame throwers across a canal, Balgerhocke, October 1944. |
 |
| Forces of the Royal Hamilton Light Infantry, part of the 2nd Canadian Infantry Division, move towards South Beveland during the Battle of the Scheldt. |
 |
| LVT Buffalo amphibians during the invasion of Walcheren Island, the Netherlands, November 1, 1944. |
 |
| A Sherman Crab flail tank comes ashore during the Allied invasion of Walcheren Island on November 1, 1944. |
 |
| The Battle for Walcheren Island: Men of the 4th Special Service Brigade wade ashore from landing craft near Flushing to complete the occupation of Walcheren, November 1, 1944. |
 |
| LCG survivors being picked up by an LCI(S) acting as a hospital ship. Smoke of battle ashore is in the background. |
 |
| British assault troops landed on Walcheren at dawn on November 1, 1944 and most of Flushing was included in the first bridgehead. The landings were supported by fire from British warships. The object of the assault was to silence the enemy guns menacing the Scheldt passage to the port of Antwerp. This image shows British assault troops operating in Flushing. |
 |
| British assault troops advancing through the streets at Flushing where there was sharp fighting. |
 |
| British assault troops advancing through the streets at Flushing where there was sharp fighting. |
 |
| The wounded being attended to by a British medical officer. |
 |
| This scene on the Walcheren coast after the British landing had been affected. German POWs assisting movement of stores. |
 |
| Stores being landed with the assistance of German POWs near Flushing after the landing. |
 |
| Troops advancing along the waterfront near Flushing with shells bursting ahead. Note German POWs. |
 |
| Troops advancing along the waterfront near Flushing with shells bursting ahead. |
 |
| An Officer returns to his R.A.F. reconnaissance squadron by ferry after carrying out an inspection of Middelburg. The crossing by water was made because of a bridge that was mined, November 1944. |
 |
| German coastal guns and blockhouses which the British forces quickly put out of action on Walcheren Island. |
 |
| German prisoners on Walcheren, in a Prisoner of War cage. |
 |
| Wrecked LCT landing craft on the beach of Walcheren. |
 |
| The naval crew of an Landing Craft Tank (LCT) at work erecting tents and shelters after their ship had been wrecked. |
 |
| Humber light reconnaissance cars of No. 2777 Field Squadron, RAF Regiment at the ‘ready position’ outside the railway station in Middleburg, Holland, as Allied forces enter the town, November 1944. |
 |
| Temporary headquarters of the Army Film and Photographic Unit (AFPU) on Walcheren Island in the Netherlands, November 1-3 , 1944. |
 |
| A British medical officer and German POW attend to a casualty during the landings on Walcheren, 1 November 1944. Note the AFPU cameraman filming the incident. |
 |
| Wounded at Breskens await transport to hospital after being evacuated from Flushing during the assault on Walcheren, November 2, 1944. |
 |
| Canadians enter Bergen-op-Zoom, early November 1944. |
 |
| Allied bomb damage to railway sidings at Middleburg station in Holland, November 1944. |
 |
| The remains of the heavily-bombed railway station in Holland, November 1944. |
 |
| Private J. Gustilov of the Canadian Scottish Regiment examining wreckage of fishing vessels. |
 |
| A German 75mm anti-tank gun emplaced in a bandstand at Nieuland, near Middelburg in Holland, November 1944. |
 |
| Landing craft tanks (LCTs) carrying Royal Marine Commandos to their landing beach on the island of Walcheren at Westkapelle, the most western point of the island. This was during the final phase of the battle to free the River Scheldt to allow Allied ships to use the Belgian port of Antwerp, already in Allied hands. In the foreground is LCT 979 followed by LCT 980; further LCTs are behind whilst another long line of LSTs can be seen in the background. |
 |
| An infantry landing craft (LCI) approaching the shore to take off wounded from Walcheren, Holland, November 1944. |
 |
| Smoke rising up in the distance after a Hawker Typhoon attack as landing craft move in during the landing by Royal Marine commandos on the island of Walcheren at Westkapelle the most western point of the island, during the final phase of the battle to free the Belgian port of Antwerp. |
 |
| Royal Marine Commandos leaving a landing ship infantry (small) on the beach during the landing by Royal Marine commandos on the island of Walcheren at Westkapelle the most western point of the island, during the final phase of the battle to free the Belgian port of Antwerp. |
 |
| In the distance a landing craft support (rocket) firing at enemy strong points during the landing by Royal Marine commandos on the island of Walcheren at Westkapelle the most western point of the island, during the final phase of the battle to free the Belgian port of Antwerp. |
 |
| Bombardment and shelling of Walcheren Island. |
 |
| A direct hit on a pillbox by a salvo of rockets from an RAF Typhoon. |
 |
| HMS Warspite firing a salvo of 15-inch shells. She was launched in 1913 and fired her last round at Walcheren on November 1, 1944. |
 |
| A landing craft tank entering the beach area during the landing by Royal Marine commandos on the island of Walcheren at Westkapelle the most western point of the island, during the final phase of the battle to free the Belgian port of Antwerp. In the hold of the LCT are vehicles carrying various supplies for the landings. |
 |
| Landing craft tanks carrying Royal Marine Commandos on way to beach during the landing by Royal Marine commandos on the island of Walcheren at Westkapelle, the most western point of the island, during the final phase of the battle to free the Belgian port of Antwerp. Men in the bows of the LCT can be seen in the foreground whilst several landing craft can be seen ahead of the LCT. |
 |
| Royal Marine Commandos in Alligators and Weasels nearing the landing beach in a landing craft tank during the landing by Royal Marine commandos on the island of Walcheren at Westkapelle the most western point of the island, during the final phase of the battle to free the Belgian port of Antwerp. |
 |
| Royal Marine Commandos going down the ramp of a landing craft tank in an Alligator amphibious personnel carrier, whilst some more men in a Weasel amphibious carrier are about to follow. The LCT has just beached on the island of Walcheren at Westkapelle, the most western point of the island, during the final phase of the battle to free the Belgian port of Antwerp. Note the badly damaged buildings and sea defenses in the background. |
 |
| LCT 532 unloading amphibious tanks. |
 |
| Commandos and Pioneer Corps, Beach Company, unload stores at Walcheren. |
 |
| LCAs at Flushing, November 2, 1944. |
 |
| Captured German gun, Flushing, November 1944. |
 |
| DUKWs or “Ducks” head towards the shore from a landing craft tank (LCT 952) whilst an Alligator personnel carrier can be seen on the beach. A large plume of smoke is rising high into the air from an enemy strongpoint on fire in the background during the landing by Royal Marine commandos on the island of Walcheren at Westkapelle, the most western point of the island, the final phase of the battle to free the Belgian port of Antwerp. |
 |
| The Coxswain, Leading Seaman Tony Cole (Walthamstow) at the wheel in the Wheelhouse of Landing Craft Tank 532 which helped land Royal Marine Commandos on Westkapelle, the western most point of the island of Walcheren during the final phase of the battle to free the Belgian port of Antwerp. |
 |
| A landing craft infantry (small) going to the aid of LCI (S) 532 which was hit by enemy shells below the waterline during the landing by Royal Marine commandos on the island of Walcheren at Westkapelle, the most western point of the island, the final phase of the battle to free the Belgian port of Antwerp. |
 |
| Wounded men being transferred from a landing craft to another acting as a hospital ship during the landing by Royal Marine commandos on the island of Walcheren at Westkapelle, the most western point of the island, the final phase of the battle to free the Belgian port of Antwerp. |
 |
| Fighting to get a fire under control on board a shell-ridden landing craft gun during the landing by Royal Marine commandos on the island of Walcheren, at Westkapelle the most western point of the island, during the final phase of the battle to free the Belgian port of Antwerp. |
 |
| A landing craft gun (medium) (almost certainly LCG (M) 101) crew fighting to save their shell ridden and sinking craft during the landing by Royal Marine commandos on the island of Walcheren at Westkapelle the most western point of the island, during the final phase of the battle to free the Belgian port of Antwerp. |
 |
| A landing craft gun (medium) (almost certainly LCG (M) 101) sinking with crew abandoning ship after she was hit by shore batteries during the landing by Royal Marine commandos on the island of Walcheren at Westkapelle, the most western point of the island. Smoke of the battle on shore is in the background. One of the LCG’s 17 pounder gun turrets can be clearly seen; also note the man just about to strike the water and another preparing to jump, near the turret. |
 |
| An RAF Humber light reconnaissance car in Middelburg, Holland, November 1944. |
 |
| An RAF sergeant shares an alfresco lunch with two Dutch women at Nieuland, near Middelburg, soon after the town had been liberated by Allied forces, November 1944. |
 |
| Soldiers of the Royal Canadian Corps of Signals inspect a well-camouflaged German anti-tank gun position on a dyke near the Walcheren Causeway. Soldier at right wears a German parka and holds what appears to be a “sporterized” Mauser rifle. |
 |
| British landings on Walcheren. This particular image shows some of the first prisoners captured after the landing. |
 |
| A German POW captured during the Allied assault on Walcheren Island in Holland, November 1944. |
 |
| German Unteroffizier (Sergeant) being given a tetanus shot by a Royal Canadian Army Medical Corps soldier. |
 |
| Sweepers returning to Antwerp docks, November 26, 1944. |
 |
| Oil being unloaded from the SS Fort Cataraqui in the Belgian port of Antwerp, November 30, 1944; this was the first ship to berth at the port following the opening of the Scheldt Estuary. |
 |
| The Royal Navy sweeping the Scheldt Channel clear of mines to allow access to Antwerp. The first coaster entering Antwerp Docks, 20 to 30 November 1944. |
 |
| Sailors hoisting up the float after a sweep had parted on an underwater obstruction. |
 |
| Motor minesweepers at work sweeping the River Scheldt and entrances to Antwerp. |
 |
| Three British Yard minesweepers (including BYMS 2058) sweeping abreast in the Scheldt estuary to allow access to Antwerp. Photograph taken from BYMS 2189. |
 |
| Crew of the British Yard Minesweeper BYMS 2189 firing at a floating mine during the Royal Navy’s clearing of the Scheldt to Antwerp. |
 |
| A British minesweeper, firing at a floating mine during the clearing of the Scheldt Channel into the port of Antwerp. |
 |
| Members of the King’s Own Scottish Borderers advance warily down a rubble-strewn Flushing street. The Germans defended building by building. |
 |
| German prisoners are marched off on Walcheren. |
 |
| Walcheren Island, Battle of the Scheldt, 1944. |
 |
| The almost 100-year-old fishing pier in Breskens, just before the attack on Vlissingen, November 1944. |
 |
| Oranjemolen (Orange Mill) at Flushing (Vlissingen) where No. 4 Commando landed early on November 1, 1944. |
 |
| French Commando officers in Flushing. Left to right: Lt. Guy de Montlaur, Lt. Guy Hattu, Commandant Phillippe Kieffer & Lt Jacques Senée. |
 |
| As the storming of the Sloe Causeway got stuck the diversionary operation Mallard was carried out, crossing the Sloe by wading and storm boats. Here German POWs and wounded brought back. Storm boats can be seen in the background. |
 |
| Bunkers of the German coastal battery at Westkapelle. The first two are for 9.4 cm artillery and the third for fire direction. |
 |
| The beach on Walcheren Island during the Battle of the Scheldt. |
 |
| Beach front at Flushing showing the damage done by the pre-invasion bombardment, 1944. |
 |
| Allied camp, Walcheren Island. |
 |
| Supply depot and British commandos, Walcheren Island. |
 |
| Walcheren Island flooded by the British. |
 |
| German prisoners of war, Walcheren Island. |
 |
| Destroyed equipment, Walcheren Island. |
 |
| Walcheren Island, tide in. |
 |
| Walcheren Island, tide in. |
 |
| Walcheren Island, tide out. |
 |
| German prisoners of war in a stockade, Walcheren Island. |
 |
| Landing beach, Walcheren Island. |
 |
| Column of German prisoners of war, Walcheren Island. |
 |
| Allied soldiers making a fire, Walcheren Island. |
 |
| Destroyed German radar station on Walcheren Island. |
 |
| German prisoners of war captured during the Battle of the Scheldt, Walcheren Island. |
 |
| Allied camp, Walcheren Island. |
 |
| Cemetery for German soldiers killed in the Battle of the Scheldt, Walcheren Island. |
 |
| Landing beach, Walcheren Island. |
 |
| Alligator tank used by the Royal Canadian Army Medical Corps for transporting wounded soldiers during the Battle of the Scheldt. |
 |
| Canadian soldiers on the beach, battle of the Scheldt. |
 |
| A Terrapin amphibious vehicle arriving at the Scheldt River embarkation point near Terneuzen, Netherlands. |
 |
| Sappers of the 3rd Canadian Infantry Division preparing to sweep for mines along the border between Belgium and the Netherlands, battle of the Scheldt, 16 October 1944. |
 |
| St. Maartensdijk under water on the island of Tholen, August 2, 1944. |
 |
| Aerial photograph taken shortly after the daylight attack on the sea-wall at Westkapelle, Walcheren (the Netherlands), showing a breach in the wall at the most westerly tip of the island. The Allies decided that the dykes had to be breached before the Allied assault in order to flood the inland areas and restrict movement by the German defenders. On October 3, 1944, 252 Avro Lancasters and seven De Havilland Mosquitoes of the RAF Bomber Command attacked the sea wall and dykes at Westkapelle, Flushing and Veere. |
 |
| RAF Bomber Command Walcheren showing a major breach in the dyke with flooding in the hinterland. |
 |
| An aerial photograph of bombs exploding on the Walcheren dyke, Holland during RAF Bomber Command’s raid on the island, October 3, 1944. |
 |
| The dike bombed by the Allies on October 7, 1944 near the Nollebos northwest of Vlissingen. |
 |
| The bombed dyke at Westkapelle, October 14, 1944. |
 |
| Allied bombing of the dike at Fort Rammeens, October 18, 1944. |
 |
| Souburg on Walcheren during inundation, October 18, 1944. |
 |
| The dike bombed by the Allies on October 7, 1944 near the Nollebos northwest of Vlissingen, photographed on October 28, 1944. |
 |
| What the Spitfire dive-bombers could do. Explosions straddle German flak positions close to the shoreline on Walcheren Island. This attack, carried out by Spitfire XVIs of one of the squadrons of the No 131 (Polish) Wing, was part of a sustained ‘softening-up’ campaign by No 84 Group and the bomber forces in advance of an amphibious assault on the fortified island. |
 |
| Hole at the Nolle, Vlissingen, November 4, 1944. |
 |
| The island of Tholen under water, November 18, 1944. |
 |
| The closure of the dike breach near Fort Rammekens in Zeeland, the Netherlands on December 1, 1945, with help of a Phoenix caisson. |
 |
| ML patrolling the Scheldt, probably December 1944. |
 |
| ML 1476 patrolling the Scheldt, probably December 1944. |
 |
| ML 1476 patrolling the Scheldt, probably December 1944. |
 |
| ML patrolling the Scheldt, probably December 1944. |
 |
| MLs patrolling the Scheldt, probably December 1944. |
 |
| ML 1401 patrolling the Scheldt, probably December 1944. |
 |
| Monument to No 4 Commando near the Orange Mill (where they landed). Flushing, Walcheren Island, Scheldt Estuary, Holland. |
 |
| Lieutenant Colonel Mike Vernon, CD, Commanding Officer of The Calgary Highlanders, ponders the monument to the 5th Canadian Infantry Brigade erected at the site of the Walcheren Island Causeway, in memory of the sacrifice of the three Canadian regiments, as well as soldiers of the 52nd (Lowland) Division of the British Army who fought a pitched battle there beginning on Hallowe’en night 1944. The Calgary Highlanders sent a contingent to visit European battlefields in June 2010 to mark the centennial year of the regiment. In the background, the Regimental Pipes and Drums play at the site of monuments erected to the memory of Allied soldiers who fell fighting the Germans in the vicinity during the invasion of 1940. |


No comments:
Post a Comment