|
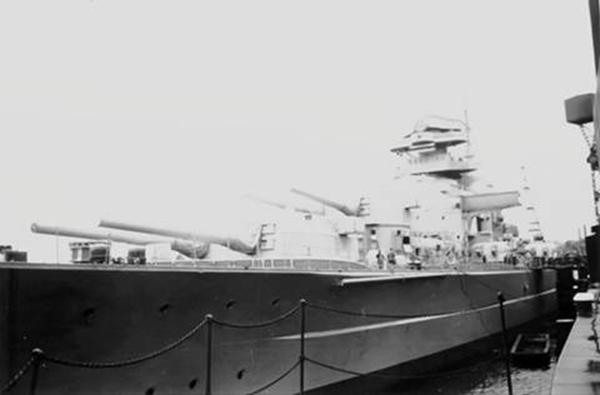
| The Bismarck in the Bay of Kiel on 6 December 1940. After completing the preliminary trials in the Baltic, the Bismarck returned to Hamburg to finish her outfitting. This photo was subjected to censorship; note the missing FuMO 23 antenna on the 10.5-m rangefinder in the foretop. The entire forward 7-meter rangefinder is missing too, although not due to censorship, but because it was not installed until March 1941 at Kiel. |
Bismarck was the first of two Bismarck-class battleships built
for Nazi Germany's Kriegsmarine. Named after Chancellor Otto von Bismarck, the primary
force behind the unification of Germany in 1871, the ship was laid down at the
Blohm & Voss shipyard in Hamburg in July 1936 and launched in February
1939. Work was completed in August 1940, when she was commissioned into the
German fleet. Bismarck and her sister ship Tirpitz were the largest battleships
ever built by Germany, and two of the largest built by any European power.
In the course of the warship's eight-month career under its
sole commanding officer, Capt. Ernst Lindemann, Bismarck conducted only one
offensive operation, in May 1941, codenamed Rheinübung. The ship, along with
the heavy cruiser Prinz Eugen, was to break into the Atlantic Ocean and raid Allied
shipping from North America to Great Britain. The two ships were detected
several times off Scandinavia, and British naval units were deployed to block
their route. At the Battle of the Denmark Strait, Bismarck engaged and
destroyed the battlecruiser HMS Hood, the pride of the Royal Navy, and forced
the battleship HMS Prince of Wales to retreat; Bismarck was hit three times and
suffered an oil leak from a ruptured tank.
The destruction of Hood spurred a relentless pursuit by the
Royal Navy involving dozens of warships. Two days later, while heading for the
relative safety of occupied France, Bismarck was attacked by obsolescent Fairey
Swordfish biplane torpedo bombers from the aircraft carrier HMS Ark Royal; one
scored a hit that rendered the battleship's steering gear inoperable. In her
final battle the following morning, Bismarck was neutralized by a sustained
bombardment from a British fleet, was scuttled by her crew, and sank with heavy
loss of life. Most experts agree that the battle damage would have caused her
to sink eventually. The wreck was located in June 1989 by Robert Ballard, and
has since been further surveyed by several other expeditions.
Bismarck was ordered under the name Ersatz Hannover ("Hannover
replacement"), a replacement for the old pre-dreadnought SMS Hannover,
under contract "F." The contract was awarded to the Blohm & Voss
shipyard in Hamburg, where the keel was laid on 1 July 1936 at Helgen IX. The
ship was launched on 14 February 1939 and during the elaborate ceremonies was
christened by Dorothee von Löwenfeld, granddaughter of Chancellor Otto von
Bismarck, the ship's namesake. Adolf Hitler made the christening speech.
Fitting-out work followed the launch, during which time the original straight
stem was replaced with a raked "Atlantic bow" similar to those of the
Scharnhorst-class battleships. Bismarck was commissioned into the fleet on 24
August 1940 for sea trials, which were conducted in the Baltic. Kapitän zur See
Ernst Lindemann took command of the ship at the time of commissioning.
Bismarck displaced 41,700 t (41,000 long tons) as built and
50,300 t (49,500 long tons) fully loaded, with an overall length of 251 m (823
ft 6 in), a beam of 36 m (118 ft 1 in) and a maximum draft of 9.9 m (32 ft 6
in). The battleship was Germany's largest warship, and displaced more than any
other European battleship, with the exception of HMS Vanguard, commissioned
after the end of the war. Bismarck was powered by three Blohm & Voss geared
steam turbines and twelve oil-fired Wagner superheated boilers, which developed
a total of 148,116 shp (110,450 kW) and yielded a maximum speed of 30.01 knots
(55.58 km/h; 34.53 mph) on speed trials. The ship had a cruising range of 8,870
nautical miles (16,430 km; 10,210 mi) at 19 knots (35 km/h; 22 mph). Bismarck
was equipped with three FuMO 23 search radar sets, mounted on the forward and stern
rangefinders and foretop.
The standard crew numbered 103 officers and 1,962 enlisted
men. The crew was divided into twelve divisions of between 180 and 220 men. The
first six divisions were assigned to the ship's armaments, divisions one
through four for the main and secondary batteries and five and six manning
anti-aircraft guns. The seventh division consisted of specialists, including
cooks and carpenters, and the eighth division consisted of ammunition handlers.
The radio operators, signalmen, and quartermasters were assigned to the ninth
division. The last three divisions were the engine room personnel. When Bismarck
left port, fleet staff, prize crews, and war correspondents increased the crew
complement to over 2,200 men. Roughly 200 of the engine room personnel came
from the light cruiser Karlsruhe, which had been lost during Operation
Weserübung, the German invasion of Norway. Bismarck 's crew published a ship's newspaper titled Die Schiffsglocke (The
Ship's Bell); this paper was only published once, on 23 April 1941, by the
commander of the engineering department, Gerhard Junack.
Bismarck was armed with eight 38 cm (15 in) SK C/34 guns
arranged in four twin gun turrets: two super-firing turrets forward—"Anton"
and "Bruno"—and two aft—"Caesar" and "Dora."
Secondary armament consisted of twelve 15 cm (5.9 in) L/55 guns, sixteen 10.5
cm (4.1 in) L/65 and sixteen 3.7 cm (1.5 in) L/83, and twelve 2 cm (0.79 in)
anti-aircraft guns. Bismarck also carried four Arado Ar 196 reconnaissance
floatplanes, with a single large hangar and a double-ended catapult. The ship's
main belt was 320 mm (12.6 in) thick and was covered by a pair of upper and
main armored decks that were 50 mm (2.0 in) and 100 to 120 mm (3.9 to 4.7 in)
thick, respectively. The 38 cm (15 in) turrets were protected by 360 mm (14.2
in) thick faces and 220 mm (8.7 in) thick sides.
Laid
down: 1 July 1936
Launched:
14 February 1939
Commissioned:
24 August 1940
Construction
cost: RM. 196.8 million
Displacement:
Empty ship: 40,250 metric tons
Standard: 43,978 metric tons
Construction: 47,870 metric tons
Full load: 51,760 metric tons
Maximum: 53,486 metric tons
Dimensions:
Waterline length: 241.55 meters
Overall length: 251 meters
Beam: 36 meters
Standard draught: 9.33 meters
Maximum draught: 10.55 meters
Freeboard amidships: between 4.45 - 5.67
meters
Height of hull sides (depth): 15 meters
Waterplane area: 5,740 m²
Armor
Protection:
Upper belt: 145 mm
Main belt: 320 mm
Main battery turrets: 130-360 mm
Secondary battery turrets: 40-100 mm
Upper deck: 50-80 mm
Third armor deck: 80-120 mm
Conning tower: 220-350 mm
Torpedo bulkhead: 45 mm
Protected length (part of the ship within
the citadel with the maximum amount of armor and underwater protection): 70%
(170.7 meters)
PC/TC (Protected Compartments/Total
Compartments. The protected compartments are those within the citadel): 17/22
Armor's weight: 19,082 metric tons
Armament:
Main: 8 x 38cm/L52
Secondary: 12 x 15cm/L55
Anti-aircraft: 16 x 10.5cm/L65; 16 x
3.7cm/L83; 18 x 2cm/L65
Fire
control: 5 x 10.5-m base rangefinders; 1 x 7-m base rangefinder; 2 x
6.5-m base rangefinders; 4 x 4-m Type SL-8 rangefinders; 2 x 3-m rangefinders
Radar
Equipment: 3 x FuMO 23
Propulsion
plant: 12 Wagner boilers; three Blohm & Voss turbine sets ; 150,170
hp (maximum obtained)
Speed:
30.12 knots (maximum obtained)
Endurance:
9,280 nautical miles at 16 knots; 8,900 nautical miles at 17 knots;
8,525 nautical miles at 19 knots; 6,640 nautical miles at 24 knots; 4,500
nautical miles at 28 knots
Fuel
oil capacity: 7,400 metric tons
Aircraft:
4 x Arado Ar 196
Crew:
2,200+
Hull
Coefficients and Ratios:
Ratio length/beam: 6.71
Ratio beam/draught: 3.85
Ratio draught/depth: 0.62
Ratio length/depth: 16.10
Block coefficient: 0.55 (The block
coefficient (CB) is the ratio of the underwater hull volume of a ship at a
particular draft to the volume of a rectangular prism (the circumscribing
prism) of the same length, breadth, and draught as the ship. CB = V/(L x B x
T). Bismarck block coefficient is calculated as follows: CB = 45,000 mt /
(241.55 m x 36 m x 9.3 m) = 0.55)
Midship coefficient: 0.97 (The midship
section coefficient (CM) is the ratio of the area of the underwater midship
section (Am) of a ship at a particular draft to the area of a rectangle (the
circumscribing rectangle) of the same breadth and draught as the ship. CM =
Am/(B x T). Bismarck midship section coefficient is calculated as follows: CM =
305 m² / (36 m x 8.7 m) = 0.97)
Waterplane coefficient: 0.66 (The
waterplane coefficient (CWP) is the ratio of the area of a ship's waterplane
(AWP) to the area of a rectangle (the circumscribing rectangle) of the same
length and breadth as the ship. CWP = AWP/(L x B). Bismarck waterplane coefficient
is calculated as follows: CWP = 5,740 m² / (241.55 m x 36 m) = 0.66)
Prismatic coefficient: 0.56 (The
longitudinal prismatic coefficient (CP) is the ratio of the underwater hull
volume of a ship to the volume of a prism with length equal to the ship's and
cross-section area identical to the midship section. In other words, the
prismatic coefficient is equal to the block coefficient (CB) divided by the
midship section coefficient (CM). CP = V/(Am x L) = CB/CM. Bismarck prismatic
coefficient is calculated as follows: CP = 0.55 / 0.97 = 0.56)
Metacentric height (GM): 4.00 meters
Service History
On 15 September 1940, three weeks after her commissioning,
Bismarck left Hamburg to begin sea trials in Kiel Bay. Sperrbrecher 13 escorted
the ship to Arcona on 28 September, and then on to Gotenhafen for trials in the
Gulf of Danzig. The ship's power-plant was given a thorough workout; Bismarck
made measured-mile and high speed runs. While her stability and maneuverability
were being tested, a flaw in the ship's design was discovered. While attempting
to steer the ship solely through altering propeller revolutions, the crew
learned that Bismarck could be kept on course only with great difficulty. Even
with the outboard screws running at full power in opposite directions, they
generated only a slight turning ability. Bismarck 's main battery guns were first test-fired in late November. The tests
proved she was a very stable gun platform. Trials lasted until December;
Bismarck returned to Hamburg, arriving on 9 December, for minor alterations and
the completion of the fitting-out process.
The ship was scheduled to return to Kiel on 24 January 1941,
but a merchant vessel had been sunk in the Kiel Canal and prevented usage of
the waterway. Severe weather hampered efforts to remove the wreck, and Bismarck
was not able to reach Kiel until March. The delay greatly frustrated Lindemann,
who remarked that "[Bismarck] had been tied down at Hamburg for five weeks
... the precious time at sea lost as a result cannot be made up, and a
significant delay in the final war deployment of the ship thus is unavoidable."
While waiting to reach Kiel, Bismarck hosted Captain Anders Forshell, the Swedish
naval attaché to Berlin. He returned to Sweden with a detailed description of
the ship, which was subsequently leaked to Britain by pro-British elements in
the Swedish Navy. The information provided the Royal Navy with its first full
description of the vessel, although it lacked specificity on important facts,
including top speed, radius of action, and displacement.
On 6 March, Bismarck received the order to steam to Kiel.
While en route, the ship was escorted by several Messerschmitt Bf 109 fighters
and a pair of armed merchant vessels, along with an icebreaker. At 08:45 on 8
March, Bismarck briefly ran aground on the southern shore of the Kiel Canal,
though she was freed within an hour. The ship reached Kiel the following day,
where her crew stocked ammunition, fuel, and other supplies and applied a coat
of dazzle paint to camouflage her. British bombers attacked the harbor without
success on 12 March. On 17 March, the old battleship Schlesien, now used as an
icebreaker, escorted Bismarck through the ice to Gotenhafen, where the latter
continued combat readiness training.
The Naval High Command (Oberkommando der Marine or OKM),
commanded by Admiral Erich Raeder, intended to continue the practice of using
heavy ships as surface raiders against Allied merchant traffic in the Atlantic
Ocean. The two Scharnhorst-class battleships were based in Brest, France, at
the time, having just completed Operation Berlin, a major raid into the
Atlantic. Bismarck 's sister
ship Tirpitz rapidly approached completion. Bismarck and Tirpitz were to sortie
from the Baltic and rendezvous with the two Scharnhorst-class ships in the
Atlantic; the operation was initially scheduled for around 25 April
1941, when a new moon period would make conditions more favorable.
Work on Tirpitz was completed later than anticipated, and she
was not commissioned until 25 February; the ship was not ready for combat until
late in the year. To further complicate the situation, Gneisenau was torpedoed
while in Brest and damaged further by bombs when in drydock. Scharnhorst
required a boiler overhaul following Operation Berlin; the workers discovered
during the overhaul that the boilers were in worse condition than expected. She
would also be unavailable for the planned sortie. Attacks by British bombers on
supply depots in Kiel delayed repairs to the heavy cruisers Admiral Scheer and
Admiral Hipper. The two ships would not be ready for action until July or
August. Admiral Günther Lütjens, Flottenchef (Fleet Chief) of the Kriegsmarine,
chosen to lead the operation, wished to delay the operation at least until
either Scharnhorst or Tirpitz became available, but the OKM decided to proceed
with the operation, codenamed Operation Rheinübung, with a force consisting of
only Bismarck and the heavy cruiser Prinz Eugen. At a final meeting with Raeder
in Paris on 26 April, Lütjens was encouraged by his commander-in-chief to
proceed and he eventually decided that an operation should begin as soon as
possible to prevent the enemy gaining any respite.
On 5 May, Adolf Hitler and Wilhelm Keitel, with a large
entourage, arrived to view Bismarck and Tirpitz in Gotenhafen. The men were
given an extensive tour of the ships, after which Hitler met with Lütjens to
discuss the upcoming mission. On 16 May, Lütjens reported that Bismarck and
Prinz Eugen were fully prepared for Operation Rheinübung; he was therefore
ordered to proceed with the mission on the evening of 19 May. As part of the
operational plans, a group of eighteen supply ships would be positioned to
support Bismarck and Prinz Eugen. Four U-boats would be placed along the convoy
routes between Halifax and Britain to scout for the raiders.
By the start of the operation, Bismarck 's crew had increased to 2,221 officers
and enlisted men. This included an admiral's staff of nearly 65 and a prize
crew of 80 sailors, which could be used to crew transports captured
during the mission. At 02:00 on 19 May, Bismarck departed Gotenhafen and made
for the Danish straits. She was joined at 11:25 by Prinz Eugen, which had
departed the previous night at 21:18, off Cape Arkona. The two ships were
escorted by three destroyers—Z10 Hans Lody, Z16 Friedrich Eckoldt, and Z23—and
a flotilla of minesweepers. The Luftwaffe provided air cover during the voyage
out of German waters. At around noon on 20 May, Lindemann informed the ship's
crew via loudspeaker of the ship's mission. At approximately the same time, a
group of ten or twelve Swedish aircraft flying reconnaissance encountered the
German force and reported its composition and heading, though the Germans did
not see the Swedes.
An hour later, the German flotilla encountered the Swedish
cruiser HSwMS Gotland; the cruiser shadowed the Germans for two hours in the
Kattegat. Gotland transmitted a report to naval headquarters, stating: "Two
large ships, three destroyers, five escort vessels, and 10–12 aircraft passed
Marstrand, course 205°/20.'" The OKM was not concerned about the security
risk posed by Gotland, though both Lütjens and Lindemann believed operational
secrecy had been lost. The report eventually made its way to Captain Henry
Denham, the British naval attaché to Sweden, who transmitted the information to
the Admiralty. The code-breakers at Bletchley Park confirmed that an Atlantic
raid was imminent, as they had decrypted reports that Bismarck and Prinz Eugen
had taken on prize crews and requested additional navigational charts from
headquarters. A pair of Supermarine Spitfires was ordered to search the
Norwegian coast for the flotilla.
German aerial reconnaissance confirmed that one aircraft
carrier, three battleships, and four cruisers remained at anchor in the main
British naval base at Scapa Flow, which confirmed to Lütjens that the British
were at that point unaware of his operation. On the evening of 20 May, Bismarck
and the rest of the flotilla reached the Norwegian coast; the minesweepers were
detached and the two raiders and their destroyer escorts continued north. The
following morning, radio-intercept officers on board Prinz Eugen picked up a
signal ordering British reconnaissance aircraft to search for two battleships
and three destroyers northbound off the Norwegian coast. At 7:00 on the 21st,
the Germans spotted four unidentified aircraft, though they quickly departed.
Shortly after 12:00, the flotilla reached Bergen and anchored at Grimstadfjord.
While there, the ships' crews painted over the Baltic camouflage with the
standard "outboard grey" worn by German warships operating in the
Atlantic.
While Bismarck was in Norway, a pair of Bf 109 fighters
circled over her to protect her from British air attacks, but Flying Officer
Michael Suckling managed to fly his Spitfire directly over the German flotilla
at a height of 8,000 m (26,000 ft) and take photos of Bismarck and her
consorts. Upon receipt of the information, Admiral John Tovey ordered the
battlecruiser HMS Hood, the newly commissioned battleship HMS Prince of Wales,
and six destroyers to reinforce the pair of cruisers patrolling the Denmark
Strait. The rest of the Home Fleet was placed on high alert in Scapa Flow.
Eighteen bombers were dispatched to attack the Germans, but weather over the
fjord had worsened and they were unable to find the German warships.
Bismarck failed to replenish her fuel stores while anchored in
Norway, as her operational orders did not require her to do so. She had left
port 200 t (200 long tons) short of a full load, and had since expended another
1,000 t (980 long tons) on the voyage from Gotenhafen. Prinz Eugen, meanwhile,
took on 764 t (752 long tons) of fuel. At 19:30 on 21 May, Bismarck, Prinz
Eugen, and the three escorting destroyers left Bergen. At midnight, when the
force was in the open sea and headed toward the Arctic Ocean, Raeder finally
disclosed the operation to Hitler, who only reluctantly consented to the raid.
The three escorting destroyers were detached at 04:14 on 22 May, while the
force steamed off Trondheim. At around 12:00, Lütjens ordered his two ships to
turn toward the Denmark Strait to attempt the break-out into the open Atlantic.
By 04:00 on 23 May, Lütjens ordered Bismarck and Prinz Eugen
to increase speed to 27 knots (50 km/h; 31 mph) to make the dash through the
Denmark Strait. Upon entering the Strait, both ships activated their FuMO radar
detection equipment sets. Bismarck led Prinz Eugen by about 700 m (770 yd);
mist reduced visibility to 3,000 to 4,000 m (3,300 to 4,400 yd). The Germans
encountered some ice at around 10:00, which necessitated a reduction in speed
to 24 knots (44 km/h; 28 mph). Two hours later, the pair had reached a point
north of Iceland. The ships were forced to zigzag to avoid ice floes. At 19:22,
hydrophone and radar operators aboard the German warships detected the cruiser
HMS Suffolk at a range of approximately 12,500 m (13,700 yd). Prinz Eugen 's radio-intercept team decrypted the
radio signals being sent by Suffolk and learned that their location had
been reported.
Lütjens gave permission for Prinz Eugen to engage Suffolk, though
the captain of the German cruiser could not clearly make out his target and so
held fire. Suffolk quickly retreated to a safe distance and shadowed the German
ships. At 20:30, the heavy cruiser HMS Norfolk joined Suffolk, but approached
the German raiders too closely. Lütjens ordered his ships to engage the British
cruiser; Bismarck fired five salvoes, three of which straddled Norfolk and
rained shell splinters on her decks. The cruiser laid a smoke screen and fled
into a fog bank, ending the brief engagement. The concussion from the 38 cm
guns' firing disabled Bismarck 's FuMO 23
radar set; this prompted Lütjens to order Prinz Eugen to take station
ahead so she could use her functioning radar to scout for the formation.
At around 22:00, Lütjens ordered Bismarck to make a 180-degree
turn in an effort to surprise the two heavy cruisers shadowing him. Although
Bismarck was visually obscured in a rain squall, Suffolk 's radar quickly detected the maneuver,
allowing the cruiser to evade. The cruisers remained on station through the
night, continually relaying the location and bearing of the German ships.
The harsh weather broke on the morning of 24 May, revealing a clear sky. At
05:07, hydrophone operators aboard Prinz Eugen detected a pair of unidentified
vessels approaching the German formation at a range of 20 nmi (37 km; 23 mi),
reporting "Noise of two fast-moving turbine ships at 280° relative
bearing!"
At 05:45, German lookouts spotted smoke on the horizon; this
turned out to be from Hood and Prince of Wales, under the command of Vice
Admiral Lancelot Holland. Lütjens ordered his ships' crews to battle stations.
By 05:52, the range had fallen to 26,000 m (28,000 yd) and Hood opened fire,
followed by Prince of Wales a minute later. Hood engaged Prinz Eugen, which the
British thought to be Bismarck, while Prince of Wales fired on Bismarck.
Adalbert Schneider, the first gunnery officer aboard Bismarck, twice requested
permission to return fire, but Lütjens hesitated. Lindemann intervened,
muttering "I will not let my ship be shot out from under my ass." He
demanded permission to fire from Lütjens, who relented and at 05:55 ordered his
ships to engage the British.
The British ships approached the German ships head on, which
permitted them to use only their forward guns, while Bismarck and Prinz Eugen
could fire full broadsides. Several minutes after opening fire, Holland ordered
a 20° turn to port, which would allow his ships to engage with their rear gun
turrets. Both German ships concentrated their fire on Hood. About a minute
after opening fire, Prinz Eugen scored a hit with a high-explosive 20.3 cm (8.0
in) shell; the explosion detonated unrotated projectile ammunition and started
a large fire, which was quickly extinguished. After firing three four-gun salvos,
Schneider had found the range to Hood; he immediately ordered rapid-fire salvos
from Bismarck 's eight 38
cm guns. He also ordered the ship's 15 cm secondary guns to engage Prince of
Wales. Holland then ordered a second 20° turn to port, to bring his ships on a
parallel course with Bismarck and Prinz Eugen. Lütjens ordered Prinz
Eugen to shift fire and target Prince of Wales, to keep both of his opponents
under fire. Within a few minutes, Prinz Eugen scored a pair of hits on the
battleship that started a small fire.
Lütjens then ordered Prinz Eugen to drop behind Bismarck, so
she could continue to monitor the location of Norfolk and Suffolk, which were
still some 10 to 12 nmi (19 to 22 km; 12 to 14 mi) to the east. At 06:00, Hood
was completing the second turn to port when Bismarck 's fifth salvo hit. Two of the shells landed short, striking the water
close to the ship, but at least one of the 38 cm armor-piercing shells struck
Hood and penetrated her thin deck armor. The shell reached Hood 's rear ammunition magazine and
detonated 112 t (110 long tons) of cordite propellant. The massive explosion
broke the back of the ship between the main mast and the rear funnel; the
forward section continued to move forward briefly before the in-rushing water caused
the bow to rise into the air at a steep angle. The stern similarly rose upward
as water rushed into the ripped-open compartments. Schneider exclaimed "He
is sinking!" over the ship's loudspeakers. In only eight minutes of
firing, Hood had disappeared, taking all but three of her crew of 1,419 men
with her.
Bismarck then shifted fire to Prince of Wales. The British
battleship scored a hit on Bismarck with her sixth salvo, but the German ship
found her mark with her first salvo. One of the shells struck the bridge on
Prince of Wales, though it did not explode and instead exited the other side,
killing everyone in the ship's command center, save Captain John Leach, the
ship's commanding officer, and one other. The two German ships continued to
fire upon Prince of Wales, causing serious damage. Guns malfunctioned on the
recently commissioned British ship, which still had civilian technicians
aboard. Despite the technical faults in the main battery, Prince of Wales
scored three hits on Bismarck in the engagement. The first struck her in the
forecastle above the waterline but low enough to allow the crashing waves to
enter the hull. The second shell struck below the armored belt and exploded on
contact with the torpedo bulkhead, inflicting minimal damage. The third shell
passed through one of the boats carried aboard the ship and then went through
the floatplane catapult without exploding.
At 06:13, Leach gave the order to retreat; only two of his
ship's ten 14 in (360 mm) guns were still firing and his ship had sustained
significant damage. Prince of Wales made a 160° turn and laid a smoke screen to
cover her withdrawal. The Germans ceased fire as the range widened. Though
Lindemann strongly advocated chasing Prince of Wales and destroying her,
Lütjens obeyed operational orders to shun any avoidable engagement with enemy
forces that were not protecting a convoy, firmly rejecting the request, and
instead ordered Bismarck and Prinz Eugen to head for the North Atlantic. In the
engagement, Bismarck had fired 93 armor-piercing shells and had been hit by
three shells in return. The forecastle hit allowed 1,000 to 2,000 t (980 to
1,970 long tons) of water to flood into the ship, which contaminated fuel oil
stored in the bow. Lütjens refused to reduce speed to allow damage control
teams to repair the shell hole which widened and allowed more water into the
ship. The second hit caused some additional flooding. Shell-splinters from the
second hit also damaged a steam line in the turbo-generator room, but this was
not serious, as Bismarck had sufficient other generator reserves. The combined
flooding from these two hits caused a 9-degree list to port and a 3-degree trim
by the bow.
After the engagement, Lütjens reported, "Battlecruiser,
probably Hood, sunk. Another battleship, King George V or Renown, turned away
damaged. Two heavy cruisers maintain contact." At 08:01, he transmitted a
damage report and his intentions to OKM, which were to detach Prinz Eugen for
commerce raiding and to make for Saint-Nazaire for repairs. Shortly after
10:00, Lütjens ordered Prinz Eugen to fall behind Bismarck to discern the
severity of the oil leakage from the bow hit. After confirming "broad
streams of oil on both sides of [Bismarck 's] wake," Prinz Eugen returned to the forward position.
About an hour later, a British Short Sunderland flying boat reported the oil
slick to Suffolk and Norfolk, which had been joined by the damaged Prince of
Wales. Rear Admiral Frederic Wake-Walker, the commander of the two cruisers,
ordered Prince of Wales to remain behind his ships.
The Royal Navy ordered all warships in the area to join the
pursuit of Bismarck and Prinz Eugen. Tovey's Home Fleet was steaming to
intercept the German raiders, but on the morning of 24 May was still over 350
nmi (650 km; 400 mi) away. The Admiralty ordered the light cruisers Manchester,
Birmingham, and Arethusa to patrol the Denmark Strait in the event that Lütjens
attempted to retrace his route. The battleship Rodney, which had been escorting
RMS Britannic and was due for a refit in the Boston Navy Yard, joined Tovey.
Two old Revenge-class battleships were ordered into the hunt: Revenge, from
Halifax, and Ramillies, which was escorting Convoy HX 127. In all, six
battleships and battlecruisers, two aircraft carriers, thirteen cruisers, and
twenty-one destroyers were committed to the chase. By around 17:00, the crew
aboard Prince of Wales restored nine of her ten main guns to working order,
which permitted Wake-Walker to place her in the front of his formation to
attack Bismarck if the opportunity arose.
With the weather worsening, Lütjens attempted to detach Prinz
Eugen at 16:40. The squall was not heavy enough to cover her withdrawal from
Wake-Walker's cruisers, which continued to maintain radar contact. Prinz Eugen
was therefore recalled temporarily. The cruiser was successfully detached at
18:14. Bismarck turned around to face Wake-Walker's formation, forcing Suffolk
to turn away at high speed. Prince of Wales fired twelve salvos at Bismarck,
which responded with nine salvos, none of which hit. The action diverted
British attention and permitted Prinz Eugen to slip away. After Bismarck
resumed her previous heading, Wake-Walker's three ships took up station on
Bismarck 's port
side.
Although Bismarck had been damaged in the engagement and
forced to reduce speed, she was still capable of reaching 27 to 28 knots (50 to
52 km/h; 31 to 32 mph), the maximum speed as Tovey's King George V. Unless
Bismarck could be slowed, the British would be unable to prevent her from
reaching Saint-Nazaire. Shortly before 16:00 on 25 May, Tovey detached the
aircraft carrier Victorious and four light cruisers to shape a course that
would position her to launch her torpedo bombers. At 22:00, Victorious launched
the strike, which comprised six Fairey Fulmar fighters and nine Fairey
Swordfish torpedo bombers. The inexperienced aviators nearly attacked Norfolk
on their approach; the confusion alerted Bismarck 's anti-aircraft gunners.
Bismarck also used her main and secondary batteries to fire at
maximum depression to create giant splashes in the paths of the incoming
torpedo bombers. None of the attacking aircraft were shot down. Bismarck evaded
eight of the torpedoes launched at her, but the ninth struck amidships on the
main armored belt, throwing one man into a bulkhead and killing him and
injuring five others. The explosion also caused minor damage to electrical
equipment. The ship suffered more serious damage from maneuvers to evade the
torpedoes: rapid shifts in speed and course loosened collision mats, which increased
the flooding from the forward shell hole and eventually forcing abandonment of
the port number 2 boiler room. This loss of a second boiler, combined with fuel
losses and increasing bow trim, forced the ship to slow to 16 knots (30 km/h; 18
mph). Divers repaired the collision mats in the bow, after which speed
increased to 20 knots (37 km/h; 23 mph), the speed that the command staff determined
was the most economical for the voyage to occupied France.
Shortly after the Swordfish departed the scene, Bismarck and
Prince of Wales engaged in a brief artillery duel. Neither scored a hit.
Bismarck 's damage
control teams resumed work after the short engagement. The sea water
that had flooded the number 2 port side boiler threatened to enter the number 4
turbo-generator feedwater system, which would have permitted saltwater to reach
the turbines. The saltwater would have destroyed the turbine blades and thus
greatly reduced the ship's speed. By morning on 25 May, the danger had passed.
The ship slowed to 12 knots (22 km/h; 14 mph) to allow divers to pump fuel from
the forward compartments to the rear tanks; two hoses were successfully
connected and a few hundred tons of fuel were transferred.
As the chase entered open waters, Wake-Walker's ships were
compelled to zig-zag to avoid German U-boats that might be in the area. This
required the ships to steam for ten minutes to port, then ten minutes to
starboard, to keep the ships on the same base course. For the last few minutes
of the turn to port, Bismarck was out of range of Suffolk 's radar. At 03:00 on 25 May, Lütjens
ordered an increase to maximum speed, which at this point was 28 knots
(52 km/h; 32 mph). He then ordered the ship to circle away to the west and then
north. This maneuver coincided with the period during which his ship was out of
radar range; Bismarck successfully broke radar contact and circled back behind
her pursuers. Suffolk 's captain
assumed that Bismarck had broken off to the west and attempted to find her by
also steaming west. After half an hour, he informed Wake-Walker, who ordered
the three ships to disperse at daylight to search visually.
The Royal Navy search became frantic, as many of the British
ships were low on fuel. Victorious and her escorting cruisers were sent west,
Wake-Walker's ships continued to the south and west, and Tovey continued to
steam toward the mid-Atlantic. Force H, with the aircraft carrier Ark Royal and
steaming up from Gibraltar, was still at least a day away. Unaware that he had
shaken off Wake-Walker, Lütjens sent long radio messages to Naval Group West
headquarters in Paris. The signals were intercepted by the British, from which
bearings were determined. They were wrongly plotted on board King George V,
leading Tovey to believe that Bismarck was heading back to Germany through the
Iceland-Faeroe gap, which kept his fleet on the wrong course for seven hours.
By the time the mistake had been discovered, Bismarck had put a sizeable gap
between herself and the British ships.
British code-breakers were able to decrypt some of the German
signals, including an order to the Luftwaffe to provide support for Bismarck
making for Brest, and the French Resistance provided the British with
confirmation that Luftwaffe units were relocating there. Tovey could now turn
his forces toward France to converge in areas through which Bismarck would have
to pass. A squadron of Coastal Command PBY Catalinas based in Northern Ireland
joined the search, covering areas where Bismarck might be headed in her attempt
to reach occupied France. At 10:30 on 26 May, a Catalina piloted by Ensign
Leonard B. Smith of the US Navy located her, some 690 nmi (1,280 km; 790 mi)
northwest of Brest. At her current speed, she would have been close enough to
reach the protection of U-boats and the Luftwaffe in less than a day. Most
British forces were not close enough to stop her.
The only possibility for the Royal Navy was Ark Royal with
Force H, under the command of Admiral James Somerville. Victorious, Prince of
Wales, Suffolk and Repulse were forced to break off the search due to fuel
shortage; the only heavy ships remaining apart from Force H were King George V
and Rodney, but they were too distant. Ark Royal 's Swordfish were already searching nearby when the Catalina found
her. Several torpedo bombers also located the battleship, about 60 nmi (110 km;
69 mi) away from Ark Royal. Somerville ordered an attack as soon as the
Swordfish returned and were rearmed with torpedoes. He detached the cruiser
Sheffield to shadow Bismarck, though Ark Royal 's aviators were not informed of this. As a result, the Swordfish,
which were armed with torpedoes equipped with new magnetic detonators,
accidentally attacked Sheffield. The magnetic detonators failed to work
properly and Sheffield emerged unscathed.
Upon returning to Ark Royal, the Swordfish loaded torpedoes
equipped with contact detonators. The second attack comprised fifteen aircraft
and was launched at 19:10. At 20:47, the torpedo bombers began their attack
descent through the clouds. While the Swordfish approached, Bismarck fired her
main battery at Sheffield, straddling the cruiser with her second salvo. Shell
fragments rained down on Sheffield, killing three men and wounding several
others. Sheffield quickly retreated under cover of a smoke screen. The
Swordfish then attacked; Bismarck began to turn violently while her
anti-aircraft batteries engaged the bombers. One torpedo hit amidships on the
port side, just below the bottom edge of the main armor belt. The force of the
explosion was largely contained by the underwater protection system and the
belt armor but some structural damage caused minor flooding.
The second torpedo—fired by pilot John Moffat—struck Bismarck
in her stern on the port side, near the port rudder shaft. The coupling on the
port rudder assembly was badly damaged and the rudder could not be disengaged,
locked in a 12° turn to port. The explosion also caused much shock damage. The
crew eventually managed to repair the starboard rudder but the port rudder
remained jammed. A suggestion to sever the port rudder with explosives was
dismissed by Lütjens, as damage to the screws would have left the battleship
helpless. At 21:15, Lütjens reported that the ship was unmaneuverable.
With the port rudder jammed, Bismarck was now steaming in a
large circle, unable to escape from Tovey's forces. Though fuel shortages had
reduced the number of ships available to the British, the battleships King
George V and Rodney were still available, along with the heavy cruisers
Dorsetshire and Norfolk. Lütjens signaled headquarters at 21:40 on the 26th: "Ship
unmaneuverable. We will fight to the last shell. Long live the Führer."
The mood of the crew became increasingly depressed, especially as messages from
the naval command reached the ship. Intended to boost morale, the messages only
highlighted the desperate situation in which the crew found itself. As dark
fell, Bismarck briefly fired on Sheffield, though the cruiser quickly fled.
Sheffield lost contact in the low visibility and Captain Philip Vian's group of
five destroyers was ordered to keep contact with Bismarck through the night.
The ships encountered Bismarck at 22:38; the battleship
quickly engaged them with her main battery. After firing three salvos, she
straddled the Polish destroyer ORP Piorun. The destroyer continued to close the
range until a near miss at around 12,000 m (39,000 ft) forced her to turn away.
Throughout the night and into the morning, Vian's destroyers harried Bismarck,
illuminating her with star shells and firing dozens of torpedoes, none of which
hit. Between 05:00 and 06:00, Bismarck 's crew attempted
to launch one of the Arado 196 float planes to carry away the ship's war diary,
footage of the engagement with Hood, and other important documents. The third
shell hit from Prince of Wales had damaged the steam line on the
aircraft catapult, rendering it inoperative. As it was not possible to launch
the aircraft it had become a fire hazard, and was pushed overboard.
After daybreak on 27 May, King George V led the attack. Rodney
followed off her port quarter; Tovey intended to steam directly at Bismarck
until he was about 8 nmi (15 km; 9.2 mi) away. At that point, he would turn
south to put his ships parallel to his target. At 08:43, lookouts on King
George V spotted her, some 23,000 m (25,000 yd) away. Four minutes later,
Rodney 's two
forward turrets, comprising six 16 in (406 mm) guns, opened fire, then King
George V 's 14 in
(356 mm) guns began firing. Bismarck returned fire at 08:50 with her forward
guns; with her second salvo, she straddled Rodney.
As the range fell, the ships' secondary batteries joined the
battle. Norfolk and Dorsetshire closed and began firing with their 8 in (203
mm) guns. At 09:02, a 16-inch shell from Rodney struck Bismarck 's forward superstructure, killing
hundreds of men and severely damaging the two forward turrets. According to
survivors, this salvo probably killed both Lindemann and Lütjens and the rest
of the bridge staff. The forward main battery was disabled, though it would
manage to fire one last salvo at 09:27. One of Bismarck 's shells exploded 20 feet off Rodney 's bow and damaged her starboard torpedo tube—the closest Bismarck
came to a direct hit on her opponents. The main gunnery control station was
quickly destroyed. Lieutenant von Müllenheim-Rechberg, in the rear
control station, took over firing control for the rear turrets. He managed to
fire three salvos before a shell destroyed the gun director, disabling his
equipment. He gave the order for the guns to fire independently, but by 09:31,
all four main battery turrets had been put out of action.
By 10:00, Tovey's two battleships had fired over 700 main
battery shells, many at very close range; Bismarck had been reduced to a
shambles, aflame from stem to stern. She suffered from a 20° list to port and
was low in the water by the stern. Rodney closed to 2,700 m (3,000 yd),
point-blank range for guns of that size, and continued to fire. Tovey could not
cease fire until the Germans struck their ensigns or it became clear they were
abandoning ship. Rodney fired two torpedoes from her port-side tube and claimed
one hit. According to Ludovic Kennedy, "if true, [this is] the only
instance in history of one battleship torpedoing another."
First Officer Hans Oels ordered the men below decks to abandon
ship; he instructed the engine room crews to open the ship's watertight doors
and prepare scuttling charges. Gerhard Junack, the chief engineering officer,
ordered his men to set the demolition charges with a 9-minute fuse but the
intercom system broke down and he sent a messenger to confirm the order to
scuttle the ship. The messenger never returned and Junack primed the charges
and ordered the crew to abandon the ship. Junack and his comrades heard the
demolition charges detonate as they made their way up through the various
levels. Oels rushed throughout the ship, ordering men to abandon their posts.
After he reached the deck a huge explosion killed him and about a hundred
others.
The four British ships fired more than 2,800 shells at
Bismarck, and scored more than 400 hits, but were unable to sink Bismarck by
gunfire. At around 10:20, running low on fuel, Tovey ordered the cruiser
Dorsetshire to sink Bismarck with torpedoes and sent his battleships back to
port. Dorsetshire fired a pair of torpedoes into Bismarck 's starboard side, one of which hit.
Dorsetshire then moved around to her port side and fired another torpedo, which
also hit. By the time that these torpedo attacks took place, the ship
was already listing so badly that the deck was partly awash. It appears that
the final torpedo may have detonated against Bismarck 's port side superstructure, which was by then already underwater.
Around 10:35, Bismarck capsized to port and slowly sank by the stern,
disappearing from the surface at 10:40. Some survivors reported they saw
Captain Lindemann standing at attention at the stem of the ship as she sank.
Junack, who had abandoned ship by the time it capsized,
observed no underwater damage to the ship's starboard side. Von Müllenheim-Rechberg
reported the same but assumed that the port side, which was then under water,
had been more significantly damaged. Around 400 men were now in the water;
Dorsetshire and the destroyer Maori moved in and lowered ropes to pull the
survivors aboard. At 11:40, Dorsetshire 's captain
ordered the rescue effort abandoned after lookouts spotted what they thought
was a U-boat. Dorsetshire had rescued 85 men and Maori had picked up 25 by the
time they left the scene. A U-boat later reached the survivors and found three
men, and a German trawler rescued another two. One of the men picked up by the
British died of his wounds the following day. Out of a crew of over 2,200 men,
only 114 survived.
Bismarck was mentioned in the Wehrmachtbericht (armed forces
report) three times during Operation Rheinübung. The first was an account of
the Battle of the Denmark Strait; the second was a brief account of the ship's
destruction, and the third was an exaggerated claim that Bismarck had sunk a
British destroyer and shot down five aircraft. In 1959, C. S. Forester
published his novel Last Nine Days of the Bismarck. The book was adapted for
the movie Sink the Bismarck!, released the following year. For dramatic effect
the film showed Bismarck sinking a British destroyer and shooting down two
aircraft, neither of which happened. That same year, Johnny Horton released the
song "Sink the Bismarck."
The wreck of Bismarck was discovered on 8 June 1989 by Dr.
Robert Ballard, the oceanographer responsible for finding RMS Titanic. Bismarck
was found to be resting upright at a depth of approximately 4,791 m (15,719
ft), about 650 km (400 mi) west of Brest. The ship struck an extinct underwater
volcano, which rose some 1,000 m (3,300 ft) above the surrounding abyssal
plain, triggering a 2 km (1.2 mi) landslide. Bismarck slid down the mountain,
coming to a stop two-thirds down.
Ballard's survey found no underwater penetrations of the ship's
fully armored citadel. Eight holes were found in the hull, one on the starboard
side and seven on the port side, all above the waterline. One of the holes is
in the deck, on the bow's starboard side. The angle and shape indicates the
shell that created the hole was fired from Bismarck 's port side and struck the starboard anchor chain. The anchor chain
has disappeared down this hole. Six holes are amidships, three shell
fragments pierced the upper splinter belt, and one made a hole in the main
armor belt. Further aft a huge hole is visible, parallel to the aircraft
catapult, on the deck. The submersibles recorded no sign of a shell penetration
through the main or side armor here, and it is likely that the shell penetrated
the deck armor only. Huge dents showed that many of the 14 inch shells fired by
King George V bounced off the German belt armor.
Ballard noted that he found no evidence of the internal implosions
that occur when a hull that is not fully flooded sinks. The surrounding water,
which has much greater pressure than the air in the hull, would crush the ship.
Instead, Ballard points out that the hull is in relatively good condition; he
states simply that "Bismarck did not implode." This suggests that
Bismarck 's
compartments were flooded when the ship sank, supporting the scuttling theory.
Ballard added "we found a hull that appears whole and relatively undamaged
by the descent and impact." They concluded that the direct cause of
sinking was scuttling: sabotage of engine-room valves by her crew, as claimed
by German survivors. Ballard kept the wreck's exact location a secret to
prevent other divers from taking artifacts from the ship, a practice he considered
a form of grave robbing.
The whole stern had broken away; as it was not near the main
wreckage and as of 2015 had not been found, it can be assumed this did not
occur on impact with the sea floor. The missing section came away roughly where
the torpedo had hit, raising questions of possible structural failure. The
stern area had also received several hits, increasing the torpedo damage. This,
coupled with the fact the ship sank "stern first" and had no
structural support to hold it in place, suggests the stern detached at the
surface. In 1942 Prinz Eugen was also torpedoed in the stern, which
subsequently collapsed. This prompted a strengthening of the stern structures
on all German capital ships.
In June 2001, Deep Ocean Expeditions, partnered with Woods
Hole Oceanographic Institution, conducted another investigation of the wreck.
The researchers used Russian-built mini-subs. William N. Lange, a Woods Hole
expert, stated, "You see a large number of shell holes in the
superstructure and deck, but not that many along the side, and none below the
waterline." The expedition found no penetrations in the main armored belt,
above or below the waterline. The examiners noted several long gashes in the
hull, but attributed these to impact on the sea floor.
An Anglo-American expedition in July 2001 was funded by a
British TV channel. The team used the volcano—the only one in that area—to
locate the wreck. Using ROVs to film the hull, the team concluded that the ship
had sunk due to combat damage. Expedition leader David Mearns claimed significant
gashes had been found in the hull: "My feeling is that those holes were
probably lengthened by the slide, but initiated by torpedoes."
The 2002 documentary Expedition: Bismarck, directed by James
Cameron and filmed in May–June 2002 using smaller and more agile Mir
submersibles, reconstructed the events leading to the sinking. These provided
the first interior shots. His findings were that there was not enough damage
below the waterline to confirm that she had been sunk rather than scuttled.
Close inspection of the wreckage confirmed that none of the torpedoes or shells
had penetrated the second layer of the inner hull. Using small ROVs to examine
the interior, Cameron discovered that the torpedo blasts had failed to shatter
the torpedo bulkheads.
Despite their sometimes differing viewpoints, these experts
generally agree that Bismarck would have eventually foundered if the Germans
had not scuttled her first. Ballard estimated that Bismarck could still have
floated for at least a day when the British vessels ceased fire and could have
been captured by the Royal Navy, a position supported by the historian Ludovic
Kennedy (who was serving on the destroyer HMS Tartar at the time). Kennedy
stated, "That she would have foundered eventually there can be little
doubt; but the scuttling ensured that it was sooner rather than later."
When asked whether Bismarck would have sunk if the Germans had not scuttled the
ship, Cameron replied "Sure. But it might have taken half a day." In
Mearns' subsequent book Hood and Bismarck, he conceded that scuttling "may
have hastened the inevitable, but only by a matter of minutes." Ballard
later concluded that "As far as I was concerned, the British had sunk the
ship regardless of who delivered the final blow."
Unsinkable Sam
Unsinkable Sam (also known as Oskar or Oscar) was the nickname
of an alleged German ship's cat who reportedly saw service in both the
Kriegsmarine and Royal Navy during the Second World War, serving on board three
vessels and surviving the sinking of all three.
The black and white patched cat had been owned by an unknown
crewman of the German battleship Bismarck. He was on board the ship on 18 May
1941 when it set sail on Operation Rheinübung, Bismarck's first and only
mission. Bismarck was sunk after a fierce sea-battle on 27 May, from which only
118 from its crew of over 2,200 survived. Hours later, Oskar was found floating
on a board and picked from the water, the only survivor to be rescued by the
homeward-bound British destroyer HMS Cossack. Unaware of what his name had been
on Bismarck, the crew of Cossack named their new mascot "Oscar."
The cat served on board Cossack for the next few months as the
ship carried out convoy escort duties in the Mediterranean and north Atlantic. On
24 October 1941, Cossack was escorting a convoy from Gibraltar to the United
Kingdom when it was severely damaged by a torpedo fired by the German submarine
U-563. Crew were transferred to the destroyer HMS Legion, and an attempt was
made to tow the badly listing Cossack back to Gibraltar, but worsening weather
conditions meant the task became impossible and had to be abandoned. On 27
October, a day after the tow was slipped, Cossack sank to the west of
Gibraltar. The initial explosion had blown off one third of the forward section
of the ship, killing 159 of the crew, but Oscar survived this too and was
brought to the shore establishment in Gibraltar.
Now nicknamed "Unsinkable Sam," he was soon
transferred to the aircraft carrier HMS Ark Royal, which coincidentally had
been instrumental in the destruction of Bismarck. However, Sam was to find no
more luck there, and when returning from Malta on 14 November 1941, this ship
too was torpedoed, this time by U-81. Attempts were also made to tow Ark Royal
to Gibraltar, but the unstoppable inflow of water made the task futile. The
carrier rolled over and sank 30 miles from Gibraltar. The slow rate at which
the ship sank meant that all but one of the crew could be saved. The survivors,
including Sam, who had been found clinging to a floating plank by a motor
launch, and described as "angry but quite unharmed" were transferred
to HMS Lightning and the same HMS Legion which had rescued the crew of Cossack.
Legion would itself be sunk in 1942, and Lightning in 1943.
The loss of Ark Royal proved the end of Sam's shipborne career
and he was transferred first to the offices of the Governor in Gibraltar, and
then sent back to the United Kingdom, where he saw out the remainder of the war
living in a seaman's home in Belfast.
Sam died in 1955.
A pastel portrait of Sam (titled "Oscar, the Bismarck's
Cat") by the artist Georgina Shaw-Baker is in the possession of the
National Maritime Museum, Greenwich.
Some authorities question whether Oskar/Sam's biography might
be a "sea story," because for example, there are pictures of two
different cats identified as Oskar/Sam. The sinking of the Bismarck, and rescue
of a limited number of survivors, took place in desperate conditions, British
ships were ordered not to stop as there was believed to be a U-boat in the area
and many survivors were left to drown. There is no mention of this incident in
Ludovic Kennedy's detailed account of the sinking.
 |
| Speech by the Ship's Commander Captain Ernst Lindemann at the commissioning of the Battleship Bismarck, 24 August 1940, at the Blohm and Voss Shipyard in Hamburg, 1200 hours |
Captain Lindemann speaks:
Soldiers of the Bismarck!
The thousand year history of our German nation and Reich were
written with iron and blood. Almost every generation had to reach for the sword
to fight for the rights of the survival of the Reich and nation or to defend
its existence and its freedom against its hostile surroundings. For us the call
has come again to join in the great struggle for freedom and the survival of
our nation and the existence of the Greater German Reich that was created by
Adolf Hitler. In the words of the ancient poets during the wars of liberation:
"Only iron can save us.
Only blood can set us free."
Today, we are being endowed and entrusted with a new and
awe-inspiring weapon made from steel and iron, our new ship. Today, it will be
brought to life by our young crew which is empowered to blend iron and blood
into a powerful symphony of iron-willed devotion to duty and conviction, and
with red-blooded vigor and fighting spirit the highest military goals shall be
achieved.
This ship, our ship, as we can call it from this day forth, is
the largest, strongest and best battleship that has ever been launched by any
German or foreign shipyard. We feel pride and gratitude that we have been
chosen to take this formidable instrument of power of the German naval
rearmament into possession from the hands of its builders. For more than 4
years German designers, engineers, and workers from many German provinces, and
especially from this large shipyard, have contributed and labored with their
intellect and with the strength of their hands and with their know-how to
complete this proud proof of their labors, by delivering to the German sailors
and soldiers a battleship with unsurpassable fighting ability and
steadfastness. We, the crew of this ship, thank you all from the bottom of our
hearts for the grand piece of workmanship. We take it over from you with the
solemn promise that we will give it from now on our care, our love, and our
devotion.
"The great questions of our time are not only decided by
speeches and votes of the majority, but also by iron and blood." Bismarck,
the creator of the Second German Reich, the iron chancellor, offered these
words 80 years ago to a fatuous congress. For him, who gave this whole epoch
his own name, this man is the namesake of our proud ship. Here in Hamburg, we
view the lofty monument of this great man, which gazes upon us from across the
Elbe River, only a few miles distant from this christening place where the "Old
Man" from the forests of Saxony was laid to rest. We sense his spirit and
his legacy especially closely now. We have now reported here as the defenders
of the nascent Third Reich, to defend it with the sword, with iron and with
blood, and to fight for what he, Prince Bismarck, had begun and created and
what our Führer Adolf Hitler has rescued and salvaged from the deep abyss: the
German Reich's and the Nation's unity and power. With pride and reverence we
sense our duty as the crew of the newest and most powerful battleship in the
world that carries the name of "BISMARCK." And at the commissioning
which I now transact, I cannot quote a better motto for the ship and crew than
the words of Schiller which was the chancellor's favorite verse:
"If you don't put your life on the line,
Life will not be worth living."
"Topsides, stand at attention!"
"Hoist flag and ensign!"
(The Dutch March of Honor)
"Topsides, at ease!"
Fellow crewmen! The battleship "BISMARCK" is now in
commission. Today, the wire will report it to the Führer. Let us remember at
this moment the ending remarks of his speech which he delivered at the
launching of our ship [on 14 February 1939], and this is what he said:
"May the German soldiers and officers who have the honor
one day to sail on this ship always prove worthy of their namesake! May the
spirit of the Iron Chancellor be transmitted on to you, may he escort you in
all your missions during the joyful voyages in peace, but may his spirit be for
you a beacon of strength in the hours when duty demands the severest sacrifice!
With these ardent wishes the German nation greets its newest
battleship, the 'Bismarck'!"
Comrades, something the Führer could only predict 1 ½ years
ago has now turned into reality. Already, numerous opponents have been thrown
to the ground and have been destroyed by the glorious deeds of our armed
forces. Only one, our archenemy, England, remains. We pledge herewith that we
will do honor to the Greater Germany whose historical greatness is also
embodied in the name of our ship, and that we will prove ourselves worthy of
the words of our Führer and observant of his commands. This pledge we summarize
with these words.
Führer command, we obey!
Adolf Hitler, our Führer and supreme commander, Sieg-Heil!
(Deutschlandlied, Horst Wessel Lied and last verse of
Englandlied.)
 |
| Battle of the Denmark Strait, Bismarck returns fire, 24 May 1941. |
 |
| Bismarck at the Battle of the Denmark Strait. |
 |
| Bismarck in Kiel, September 1940. |
 |
| The Bismarck under construction on slipway 9 at the Blohm & Voss Shipyard in Hamburg. |
 |
| February 14, 1939: Launch of the Bismarck at Blohm & Voss Hamburg, Germany. |
 |
| February 14, 1939: Launch of the Bismarck at Blohm & Voss Hamburg, Germany. |
 |
| February 14, 1939: Launch of the Bismarck at Blohm & Voss Hamburg, Germany. |
 |
| February 14, 1939: Launch of the Bismarck at Blohm & Voss Hamburg, Germany. |
 |
| February 14, 1939: Launch of the Bismarck at Blohm & Voss Hamburg, Germany. |
 |
| Bismarck fitting out at Blohm & Voss September 1939. |
 |
| Bismarck fitting out at Blohm & Voss September 1939. |
 |
| Bismarck fitting out at Blohm & Voss September 1939 |
 |
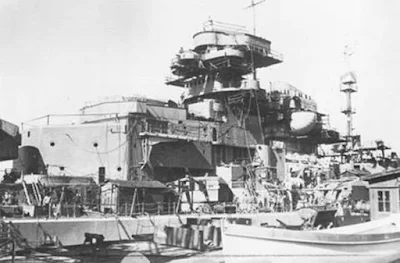
| One of Bismarck's 5.9"/55 (150mm) gun turrets. |
 |
| Bismarck fitting out at Blohm & Voss. |
 |
|
Bismarck's forward 15"/52 (380mm) turrets.
|
 |
| Bismarck at Blohm & Voss shipyard. |
 |
| Bismarck at Blohm & Voss shipyard. |
 |
| Bismarck fitting out in late Dec. 1939 or early Jan. 1940 at Blohm & Voss. |
 |
| August 1940: Bismarck at Blohm & Voss. |
 |
| Bismarck departing Blohm & Voss for her trials, 15 September 1940. |
 |
| Bismarck, date and location unknown. |
 |
| Bismarck, not yet complete, December 1940, moving up the Elbe River to complete work at the Blohm and Voss shipyards. |
 |
| The Bismarck in the Elbe River in December 1940. |
 |
| Bismarck in 1940. |
 |
| Bismarck, date and location unknown. |
 |
| Bismarck, date and location unknown. |
 |
| Bismarck in port in Hamburg. |
 |
| Bismarck departing Hamburg for her sea trials in the Baltic. |
 |
| Bismarck departing for her sea trials in the Baltic. |
 |
| Bismarck in Kiel September 1940. |
 |
| Bismarck on sea trials in the Baltic Sea late 1940. |
 |
| May 5, 1940: Adolf Hitler inspecting the Bismarck at Gotenhafen (Gdynia) Poland. |
 |
| Adolf Hitler inspecting the Bismarck at Gotenhafen (Gdynia) Poland, 5 May 1940. |
 |
| Adolf Hitler inspecting the Bismarck at Gotenhafen (Gdynia) Poland, 5 May 1940. |
 |
| Adolf Hitler inspecting the Bismarck at Gotenhafen (Gdynia) Poland, 5 May 1940. |
 |
| Adolf Hitler inspecting the Bismarck at Gotenhafen (Gdynia) Poland. Admiral Günther Lütjens to the left of Hitler and Kapitän Ernst Lindemann is standing to the right of Hitler, 5 May 1940. |
 |
| Adolf Hitler preparing to leave the Bismarck at Gotenhafen (Gdynia) Poland, 5 May 1940. |
 |
| Bismarck with camouflage paint possibly en route to Norway. |
 |
| The Bismarck conducting sea trials in the Baltic as seen from the afterdeck of the cruiser Prinz Eugen in April 1941. |
 |
| Bismarck. |
 |
| Bismarck seen from Prinz Eugen. |
 |
| Bismarck, date and location not known. |
 |
| Bismarck in Grimstadfjord, Norway, 12 May 1941. |
 |
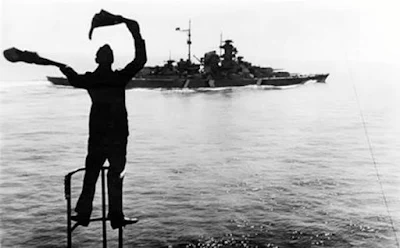
| Photo taken by RAF Flying Officer Michael Suckling of Bismarck in Grimstadfjord, Norway. Taken from a British Spitfire flying over Grimstadfjord, betrays the powerful new battleship Bismarck (lower left). The picture was so important that the pilot who took it returned to Scotland, had prints developed there, and then took off for London. When his plane ran short of fuel, he landed about 120 miles away from the city, managed to borrow a car, and drove the rest of the way, through a blackout, at 50 mph. 12 May 1941. |
 |
| Bismarck firing on the HMS Hood during the Battle of the Denmark Strait, 24 May 1941. |
 |
| Bismarck firing during the Battle of the Denmark Strait, 24 May 1941. |
 |
| Bismarck under fire from HMS Hood and HMS Prince of Wales, 24 May 1941. |
 |
| Bismarck firing during the Battle of the Denmark Strait, 24 May 1941. |
 |
| This is the most well-known photo of the battleship Bismarck and one of the most famous of World War II as well. It was taken from the Prinz Eugen sometime between 0607 and 0609 hours. By then the Hood had already been sunk and the Bismarck hit by three 14-inch shells. The after turrets "Cäsar" and "Dora" are firing against the Prince of Wales in one of the last salvoes of the battle. Although it's daylight, the flash of the guns led to the darkened underexposure of the photo. |
 |
| The explosion of HMS Hood in the Battle of the Denmark Strait, 24 May 1941. |
 |
| HMS Hood seen burning on the left while HMS Prince of Wales makes smoke to the right. Shell splashes can be seen falling near the Prince of Wales, 24 May 1941. |
 |
| HMS Hood seen burning on the left while HMS Prince of Wales makes smoke to the right, 24 May 1941. |
 |
| Bismarck seen from Prinz Eugen following the Battle of the Denmark Strait. |
 |
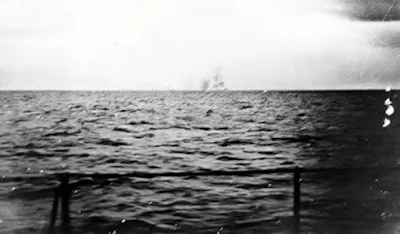
| The Bismarck as photographed by one of No. 825 Squadron's Swordfish, 24 May 1941. |
 |
| HMS Rodney firing on the Bismarck, which can be seen burning in the distance, 27 May 1941. |
 |
| Bismarck, to the right of the shell splashes, can be seen burning, 27 May 1941. |
 |
| Survivors of the Bismarck seen in a POW camp. |
 |
| The wreck of the Bismarck in a portrait by Ken Marshall. |
 |
| Bismarck on trials 1940/41, view from starboard. Note the missing rangefinder for the heavy artillery, which has not yet been installed in September 1940. |
 |
| Bismarck, photographed from Prinz Eugen, in the Baltic at the outset of Operation Rheinübung. |
 |
| Bismarck as seen from Prinz Eugen after the Battle of the Denmark Strait, 24 May 1941. |
 |
| Bismarck firing her main battery during the Battle of the Denmark Strait. |
 |
| British aircraft carrier Ark Royal with a flight of "Swordfish" overhead, circa 1939. |
 |
| Fairey Swordfish 5S of No. 818 Squadron from the aircraft carrier HMS Ark Royal returns at low level over the sea after making a torpedo attack on the German battleship Bismarck and observing her sinking, 27 May 1941. |
 |
| Survivors from the Bismarck are pulled aboard HMS Dorsetshire (40) on 27 May 1941. |
 |
| Bismarck crew members applying a coat of paint to the hull. The 32cm lower main belt which covered 70% of the ship's waterline length can be clearly seen here. Scheerhafen, Kiel, 14-16 March 1941. |
 |
| Bismarck conning tower. The forward armored conning tower as seen from the foremast searchlight platform. Its walls were 350 mm thick and the roof was 220 mm. The 7-meter rangefinder cupola had not yet been installed at the time this photo was taken. The left side of the conning tower has been painted in black as part of the striped camouflage pattern. Hamburg, February 1941. |
 |
| A view of the forward turrets "Anton" and "Bruno" from the forecastle. Summer of 1940. |
 |
| The Bismarck In dry dock in July 1940. Placement of the propellers. |
 |
| Bismarck rangefinder. This is the aft rotating dome over its command post. This station was under the command of the Fourth Artillery Officer, Kapitänleutnant Burkard von Müllenheim-Rechberg who was one of the few survivors from the ship. |
 |
| Bismarck's anchor and chain. |
 |
| Bismarck's foremast searchlight. |
 |
| One of Bismarck's minesweeping paravanes. |
 |
| Another of Bismarck's minesweeping paravanes. |
 |
| Bismarck in the Hamburg yard of her builders, Blohm & Voss, June 1940. |
 |
| Bismarck in dry dock June-July 1940. |
 |
| Captain Ernst Lindemann inspecting the honor guard on 24 August 1940. |
 |
| The Bismarck at high speed in the Baltic Sea. October 1940. |
 |
| Embarking of supplies in Scheerhafen, Kiel. 14-16 March 1941. |
 |
| The Bismarck alongside at Gotenhafen in May 1941, shortly before Operation Rheinübung. |
 |
| The Bismarck during her voyage to Norway seen from a minesweeper of the 5th Flotilla on 20 May 1941. |
 |
| The Bismarck in the Korsfjord in the morning of 21 May 1941. |
 |
| The Prinz Eugen follows Bismarck in the fog with the help of a searchlight. 22 May 1941. |
 |
| Two 38.1 cm shells from the Hood land close to the Prinz Eugen during the initial phase of battle of the Denmark Strait. |
 |
| The Bismarck opens fire against the Hood as seen from the Prinz Eugen. This is one of the first salvoes fired by the German battleship at about 0555-0556 hours. The Bismarck is about 2,500 m. behind the Prinz Eugen. |
 |
| Bismarck astern of Prinz Eugen in the morning of 24 May after the Iceland Battle. |
 |
| Victorious' Swordfish shortly before the attack on Bismarck in the afternoon of 24 May 1941. |
 |
| The Bismarck about to capsize sinking by the stern as seen from the cruiser Dorsetshire between 1036-1038 hours on 27 May. |
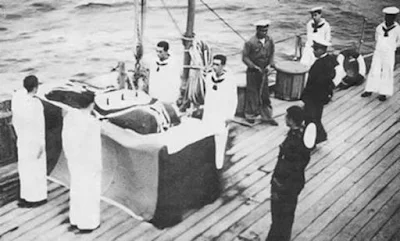 |
| Ceremony aboard the Canarias for the Bismarck's dead. |
 |
| The crew the day of Bismarck's commissioning on 24 August 1940. |
 |
| Bismarck survivors as prisoners of war after they arrived in Britain on May 1941. |
 |
| Bismarck during launching. |
 |
| Bismarck Under Construction. The keel of the Bismarck is laid down on Slipway 9 at the Blohm & Voss Shipyard. 1 July 1936. |
 |
| The Bismarck under construction on slipway 9 at the Blohm & Voss Shipyard in Hamburg. Note the side sloped armor being attached to the torpedo bulkhead. October 1937. |
 |
| Bismarck with her crew. |
 |
| The Bismarck under construction on slipway 9 at the Blohm & Voss Shipyard in Hamburg. Late 1937. |
 |
| The Bismarck under construction on slipway 9 at the Blohm & Voss Shipyard in Hamburg. The ship is completed up to the armored deck. Also note the barbettes for the 15cm secondary battery. |
 |
| The Bismarck under construction on slipway 9 at the Blohm & Voss Shipyard in Hamburg. Mid-1938. |
 |
| The Bismarck under construction on slipway 9 at the Blohm & Voss Shipyard in Hamburg, 10 September 1938, only five months before the launching of the ship and it shows the hull completed up to the main deck. |
 |
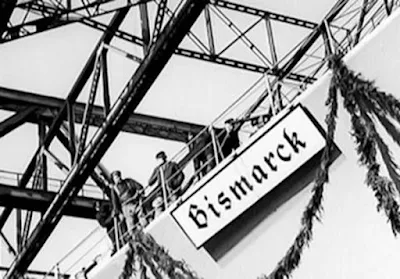
| The Launching of the Bismarck. The hull of the Bismarck the day of her launching at the Blohm & Voss Shipyard facilities in Hamburg on 14 February 1939. As it was customary on these occasions, the launching ceremony was attended by thousands of people, government officials, military personalities, and yard workers. |
 |
| Bismarck Under Construction. The battleship Bismarck fitting out at the Blohm & Voss Shipyard in Hamburg during the summer of 1939. At the time this photo was taken the Atlantic bow was being constructed and the first plates of the armor belt attached to the sides. |
 |
| Bismarck during maneuvers. |
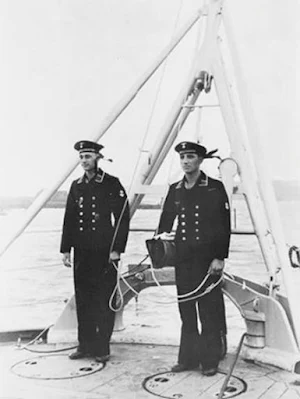 |
| Bismarck Commissioning. Two signal mates at the flagstaff on 24 August 1940. The sailor carrying the battle flag rolled up under his right arm is Obersignalmaat Franz J. Scharhag. |
 |
| Bismarck leaving Hamburg on 15 September 1940. |
 |
| Bismarck in the Kiel Canal on 16 September 1940. The bridge in the background is the Rendsburger Hochbrücke which was built between 1911-1913 and has a height of 41 meters. |
 |
| Bismarck in the Kiel Canal. The Bismarck at the Kiel-Holtenau sluice in the Kiel Canal on 17 September 1940. The tugboats on both sides assist the battleship within the 45-meter wide sluice. |
 |
| Bismarck in the Baltic. The battleship Bismarck following a mine clearance vessel during her first voyage to the naval base of Gotenhafen in the Baltic Sea on 28 September 1940. |
 |
| Bismarck launching, February 1939. |
 |
| Bismarck in the Kiel Canal. The Bismarck is seen passing through the Kiel Canal on her way back to the Blohm & Voss shipyard on 7 December 1940. |
 |
| Bismarck in Hamburg. A view towards Bismarck's forecastle from the foremast. For aerial recognition, swastikas were painted on the stern deck and foredeck, and dark grey was applied to the tops of the main and secondary batteries. The periscopes of the armored command post can be clearly seen in this photo, too. This photo was taken in Hamburg, sometime in February 1941. Temperatures during this season of the year were below zero degrees Celsius and the waters of the Elbe were partially frozen. |
 |
| Bismarck funnel. |
 |
| The Bismarck moored to the pier in Scheerhafen, Kiel on 14-16 March 1941. Note the recently installed 7-meter forward rangefinder is still without its FuMO 23 "mattress" antenna. |
 |
| The Bismarck moored to the pier in Scheerhafen, Kiel on 14-16 March 1941. Bismarck's Administrative Officer, Korvettenkapitän (V) Rudolf Hartkopf (second from the right), and his assistant Oberleutnant (V) Günther Tischendorf (far right) supervise the loading of supplies. |
 |
| Bismarck in Kiel. Bismarck crewmembers applying a coat of paint to the hull. Note the false white wave. This was intended to confuse enemy observers and make them believe that the ship was steaming at high speed. Scheerhafen, Kiel 14-16 March 1941. |
 |
| A view of the forward turrets "Anton" and "Bruno" from the forecastle in the spring of 1941. |
 |
| Adolf Hitler inspecting the Bismarck. The ship's company in formation by divisions on 5 May 1941, the day Hitler visited the Bismarck. The Führer arrived in the yacht Hela, stayed aboard Bismarck for four hours and had lunch at the Officer's wardroom. |
 |
| The Bismarck moored to the pier in Gotenhafen in May 1941 shortly before Operation Rheinübung. |
 |
| Admiral Lütjens inspecting the crew of the Prinz Eugen in the morning of 18 May 1941. Following behind are Captain Helmuth Brinkmann and the First Officer Otto Stoos. |
 |
| The Bismarck approaching the rocky coast of Norway in the morning of 21 May 1941 as seen from Prinz Eugen. |
 |
| Prinz Eugen in Kalvanes Bay. The heavy cruiser Prinz Eugen with merchant ships in Kalvanes Bay, near Bergen, on 21 May 1941. Position 60º 25' 16" North, 05º 01' 20" East. |
 |
| The Bismarck off the Norwegian coast as seen from the Prinz Eugen on the evening of 21 May 1941. The black and white stripes on the hull were painted over while in the Grimstadfjord earlier that day. The false white waves in the bow remained. |
 |
| HMS Hood into Battle. This is the last photo taken of HMS Hood before the engagement with Bismarck and Prinz Eugen in the morning of 24 May. The barrels of the forward quadruple turret of Prince of Wales can be seen. |
 |
| The Bismarck as seen from the Prinz Eugen in the morning of 24 May before the battle of the Denmark Strait. |
 |
| Captain Helmuth Brinkmann, on the bridge of the cruiser Prinz Eugen, observes the approach of the British battlegroup a few minutes before the battle of the Denmark Strait on the morning of 24 May 1941. |
 |
| Swordfish torpedo planes flying over the King George V on the morning of 27 May 1941. The Ark Royal had launched twelve Swordfish in order to attack Bismarck but due to the heavy fire from the British warships stayed away. |
 |
| Bismarck survivors. Hundreds of German sailors trying to reach the cruiser Dorsetshire after the sinking of the Bismarck. |
 |
| The Sinking of Destroyer Mashona. Following the sinking of the Bismarck, German aircraft operating from bases in occupied France were sent to look for Admiral Tovey's force that had run low on fuel and was on its way back home. On 28 May, the destroyers Tartar and Mashona were attacked by German bombers. Mashona was hit by a bomb on her port side and sank with the loss of 46 men. The Tartar rescued about 170 men, including Mashona's commander William H. Selby. |
 |
| The battleship King George V in the Atlantic during the chase of the Bismarck, May 1941. |
 |
| Bismarck's turrets "Anton" and "Bruno." |
 |
| Bismarck's "Cäsar" turret. |
 |
| Bismarck stern view. |
 |
| Bismarck. |
 |
| Bismarck 380mm guns. |
 |
| Base of Bismarck main turret. |
 |
| Bismarck's "Anton" and "Bruno" turrets. |
 |
| Bismarck. |
 |
| Bismarck. |
 |
| Bismarck turrets "Anton" and "Bruno." |
 |
| Bismarck secondary battery. |
 |
| Bismarck superstructure. |
 |
| Bismarck's "Anton" turret. |
 |
| Bismarck. |
 |
| Bismarck main battery. |
 |
| Bismarck's "Bruno" turret. |
 |
| Bismarck. |
 |
| Bismarck. |
 |
| Bismarck and destroyers. |
 |
| Bismarck main battery. |
 |
| The movie poster for the 1960 movie. |