|
| Invasion of Walcheren Island. LVT Buffalo amphibians on the beach, showing troops (Marines) wading ashore in the background. (Imperial War Museum B 11628) |
Operation Infatuate was the code name given to an
Anglo-Canadian operation during the Second World War to open the port of
Antwerp to shipping and relieve logistical constraints. The operation was part
of the wider Battle of the Scheldt and involved two assault landings from the
sea by the 4th Special Service Brigade and the 52nd (Lowland) Division. At the
same time the 2nd Canadian Infantry Division would force a crossing of the
Walcheren causeway.
Background
The city of Antwerp and its port was captured by British 2nd
Army in early September 1944. While 21st Army Group’s priority at the time was
Operation Market-Garden, no sense of urgency was placed in securing the
approaches to the port facilities there. Walcheren Island, at the western end
of the Beveland Peninsula, overlooked the Scheldt Estuary, and was strongly
garrisoned by the German 15th Army who had emplaced strong concrete
fortifications and large caliber guns which made it impossible to transit the
waterway into Antwerp. Because of this delay, the remnants of the 15th Army
“had been given the time to escape and reinforce the island of Walcheren and
the South Beveland Peninsula.”
The First Canadian Army was tasked by 21st Army Group to
open the Antwerp area; but in the meantime, had also been detailed by
Montgomery to capture the channel ports of Boulogne, Dunkirk and Calais, in
order to ease the logistical concerns associated with drawing supplies from the
Normandy beaches. German tenacity in the channel ports meant that the Allied
supply lines would continue to extend the further away the front line advanced.
The channel ports were eventually “masked” when the Canadian army failed to
take the ports, and attention turned to the Battle of the Scheldt. The First
Canadian Army advanced north-west from the bridgehead in Antwerp and, after
heavy fighting in early and mid-October, broke out onto the narrow isthmus
which connected South-Beveland to the mainland.
On 9 October 1944 Field Marshal Montgomery issued a
directive directing the Canadian Army to give absolute priority to the clearing
of the Scheldt over any other offensive operations. and ten days later the
Canadians began their approach to Walcheren Island along the isthmus. To the
south of the Scheldt, the Germans had been cornered in Zeebrugge, surrendering
the Breskens Pocket on November 2. Both South and North-Beveland had been
virtually cleared and the time was right for the assault of Walcheren itself.
For the Allies, failure to take Middelburg after the Battle of Walcheren
Causeway was a disappointing prelude to Operation Infatuate.
Prelude
A three-pronged assault was planned with British Commandos
and part of the 52nd (Lowland) Division landing at Westkapelle in the west of
the island and at Flushing in the south. The 2nd Canadian Infantry Division was
to cross by a water channel close to the causeway in the east. However, in the
Battle of Walcheren Causeway, it soon became clear that the tidal flats around
the water channel were virtually impassable leaving the Canadians with the
hazardous option of a direct assault along the well-defended causeway — an
exposed stretch 40 yards wide and 1500 yards long. The Canadians established a
bridgehead on the island through which the British 52nd Lowland Division
attempted to pass. Against much skepticism and opposition, the plan of
Lieut.-Gen. Guy Simonds (acting commander of First Canadian Army) to breach the
island’s dykes, and flood the interior, was adopted.
The plan to flood the island by bombing breaches in the
dykes at Westkapelle, Flushing, and Veere, was controversial from the start.
General Simonds, the main protagonist, thought that it would enable the
attackers to approach the German positions from both the sea and the
inundated-inland sides with landing craft. But the Canadian engineer, brigadier
G. Walsh, who advised upon the matter pointed out that the breach would be too
shallow for landing craft to pass through. The plan was apparently not discussed
with the Dutch government-in-exile. When Prime Minister Gerbrandy got wind of
the plan, he immediately demanded to see Winston Churchill, but Churchill
denied any knowledge of the plan. When general Dwight D. Eisenhower approved of
the bombing on 1 October, he appears not to have consulted the Dutch either.
The military advantages of flooding the interior of the island were
questionable, as it hampered both attackers and defenders. The German defenses
were concentrated on the high-lying rim of the island; apart from the
land-facing front in Flushing, there were no defensible positions inside the
flooded area. The civilians living on the island were warned with leaflets
dropped from planes to leave the area, but they had nowhere to go.
The bombing of Walcheren in October by RAF Bomber Command
had deliberately breached the dykes around the island and had turned it into a
massive lagoon, rimmed by broken dykes. The Germans had installed defenses on
the dykes to virtually turn them into a continuous fortification bristling with
guns of every caliber. The British Marines placed great reliance on Weasel and
Buffalo amphibious landing craft. The Royal Marine Commandos were to seize the
shoulders of the gap in the dyke and then to fan out north and south to roll up
the remainder of the German defenses by linking up with the southern thrust.
The RAF provided air support and the 79th Armoured Division provided specialist
vehicles in support of the ground assault, naval gunfire support was from
warships and landing craft equipped with artillery (e.g. Landing Craft (Gun))
and Land Mattress multiple-rocket launch systems.
Commando Units
No. 2 Dutch Troop of No. 10 (Inter-Allied) Commando moved to
Bruges in Belgium on 20 October 1944 and was incorporated into No. 4 Commando
Brigade. They split up and were attached to other fighting units where, in the
case of some officers and men, their native language skills helped Allied
liaison with the local population, while others fought alongside their comrades
in arms.
The three RM Commandos of 4th Special Service Brigade, along
with the No.4 (Belgian) and No.5 (Norwegian) troops of No. 10 (Inter-Allied)
Commando, commanded by Peter Laycock, landed at Westkapelle on the western side
of the island. No.4 Commando, with Nos.1 and 8 (French) troops under command,
crossed from Breskens and attacked Flushing. In support were 155 Infantry brigade.
The brigade had trained for this assault in the Ostend area during October.
Landings
After some debate over the sea conditions the operation was
planned for 1 November. On the day of the assault a heavy mist over Dutch and
Belgian airfields limited RAF support for the actual landings, although the
skies over Walcheren itself were clear.
Landing at Flushing (Operation Infatuate I)
No. 4 Commando landed at 05:45 hours just east of the
Oranjemolen, a windmill on the sea dyke at Flushing, with the main part of the
troops arriving ashore at 06:30 hours. No. 4 Commando, under Lt-Colonel Robert
W.P. Dawson DSO, had problems finding a suitable place to get ashore. Dawson
sent a small reconnaissance party (known as Keepforce) ashore in two Landing
Craft Personnel (LCPs). They were followed by Nos. 1 and 2 Troop, who secured
the beachhead with minimal casualties and soon began to take prisoners. The main
body came in at 06:30 hours, but by this time the Germans were totally alert
and opened heavy fire with machine guns and 20 mm anti-aircraft cannon.
Nevertheless, the Commandos got ashore with only a few casualties, although the
Landing Craft Assaults (LCAs) containing the heavier equipment, including
3-inch mortars, hit a stake and sank some 20 yards (20 m) off shore. The
mortars were successfully salvaged.
The Commandos now fought their way through the German
strongpoints. They were somewhat encumbered by the need to leave rearguards
against infiltration. However, they were aided when the leading battalion of
155 Infantry Brigade began to land at 08:30 hours despite having lost two LCAs
to heavy fire from one of the coastal batteries. German prisoners were pressed
into service unloading stores and supplies. A good proportion of the defenders
of Walcheren were poor-quality troops and many suffered from stomach
complaints. Curiously the defense positions were well stocked with food and
ammunition. By 16:00 hours the Commandos had reached most of their objectives
and they decided to consolidate as the day drew to a close.
Landing at Westkapelle (Operation Infatuate II)
Brigadier Leicester’s plan for the attack on Westkapelle
called for three troops of No. 41 (Royal Marine) Commando, under Lt-Colonel E C
E Palmer RM, to land on the north shoulder of the gap blown in the dyke with
the objective of clearing the area between there and the village of
Westkapelle. The remainder of the Commando, along with the two No. 10 (IA)
Commando troops, would then come ashore in M29 Weasels and Buffaloes launched
from Landing Craft Tanks (LCTs). Their mission would be to clear Westkapelle
and then move north. No. 48 (Royal Marine) Commando, under Lt-Colonel J. L.
Moulton DSO, would use the same methods, but come ashore south of the gap. From
there they would advance on Zoutelande some 3 miles (5 km) to the southeast.
Finally, No. 47 (Royal Marine) Commando, under Lt-Colonel C.F. Phillips, landed
behind 48 Commando and drove on to meet up with 4 Commando near Flushing.
The force sailed from Ostend at 03:15 hours and by 09:30
hours they were off the objective. The ships bombarded the German defenses with
everything at their disposal including the 15-inch (380 mm) guns of HMS Warspite,
Erebus and Roberts, the Landing Craft (Gun)s, the rockets of LCT(R)s. The first
German fire at 8:09 was followed by the other batteries. Most of the German
fire was concentrated on the support landing craft rather than those carrying
the troops. Several landing craft were hit including a rocket LCT which
received a direct hit. The RAF was able to provide a squadron (No. 183
Squadron) of explosive rocket-firing Typhoon fighter-bombers just at the point
the LCTs were due to land.
Part of the naval Support Squadron of 27 small craft, under
Commanders Sellar and Leefe, closed to engage the eleven still-operational
German shore-based batteries, on the direction of Captain A.F. Pugsley, R.N.,
DSO, the naval commander of the amphibious landings. This they did with
conspicuous gallantry, but with very heavy casualties. By 12:30pm, nine of the
Support Squadron’s craft had been sunk, eleven put out of action, and a high
percentage of their crews killed or wounded. Ultimately the Support Squadron
was recalled as so many of the craft had been damaged or destroyed, but their
aim, of drawing the fire of the defending batteries from the landing craft
making the primary assault, had succeeded.
In a tribute to the bravery of the Support Squadron, General
Laycock, Chief of Combined Operations, wrote to Captain A.F. Pugsley with the
following words:
I
understand that the success of the landings and the comparatively light casualties
sustained by No. 4 Special Service Brigade at Walcheren was due largely to the
heroic efforts of the Naval Support Craft who, at great cost to themselves,
effectively silenced the coastal defences. I should like to express the
appreciation of all ranks, Special Service Group, and particularly that of
General Sturges and Brigadier Leicester and all ranks of No. 4 Special Service
Brigade for the self-sacrifice shown by all naval personnel during the landings,
which had such splendid results.
The naval haul of gallantry awards was significant. Of
particular note were the actions of Leading Seaman Owen Joseph McGrath who was
Coxswain of a Landing Craft (LCP(L) 144) during the assault on Westkapelle.
McGrath’s citation for the Conspicuous Gallantry Medal (the highest award for
gallantry available to non-commissioned naval personnel short of the Victoria
Cross) reads as follows: “[LCP(L) 144’s] duty was to make smoke on the Southern
flank. Many craft were hit by the accurate enemy fire, and some blew up very
close inshore under the enemy guns. LCP(L) 144 was ordered to close, make smoke
and pick up survivors. This was done at point blank range with an off-shore
wind making effective smoke difficult. By his courageous action Leading Seaman
McGrath rescued over twenty survivors.”
Back on the island of Walcheren, 41 Commando overran a
pillbox in their path and pushed on into Westkapelle where they were met by a
battery of four 94 mm (3.7 in) guns. These were reduced with the help of some
tanks and the Commando then moved north along the dyke.
48 Commando came up against a battery of 150 mm (5.9 in)
guns. The leading troop commander was killed and several men wounded in an
attack on the position. Another attempt was met with intense mortar fire.
Supporting fire was called in from the field batteries in the Breskens area
together with Typhoon attacks. Following this action another troop went in
under cover of smoke and reached the center of the battery putting it out of
action.
The next day 4 Commando, together with the 5th Battalion of
the King’s Own Scottish Borderers, continued with the battle for Flushing. No.
5 (French) Troop of 10 (IA) Commando were involved in an action against a
strongpoint nicknamed Dover. One section of the troop gained the roof of a
cinema and opened fire on the strongpoint with their PIAT. The other sections
moved along the street and through back gardens. As the Troop was preparing for
the final assault, Typhoons attacked the enemy position. That afternoon the
Troop resumed their advance and reached the corner overlooking their objective.
One house remained occupied by the Germans and as they made for the strongpoint
they suffered several casualties from the fire of No. 5 Troop. No. 1 Section
was now by an anti-tank wall and firing PIAT bombs into the embrasures of the
strongpoint at very short range. Corporal Lafont was on the point of breaching
the strongpoint with a made-up charge at the ready when the German defenders
surrendered.
No. 48 (RM) Commando pushed on at first light and took
Zoutelande, meeting only light opposition. 47 Commando took over the advance
but soon came up against a strong fortified position with an anti-tank ditch
and Dragon’s Teeth. The weather had closed in and no air support was available,
so they attacked supported only by artillery. They came under heavy mortar fire
and suffered several casualties. The other half of the Commando having moved
along the dyke were confronted by another 150 mm (5.9 in) battery at Dishoek.
Their approach was obstructed by pockets of resistance to the front of the
battery which were not cleared until nightfall. The three Troops halted in
front of the battery and repulsed a German counterattack just after they had
been replenished with much-needed food and ammunition.
Defensive stakes and mines on the beaches made it difficult
for supply craft to land stores. By the third and fourth days the Commando were
forced to use captured German rations. To the relief of all concerned supplies
were parachuted in on 5 November near Zoutelande.
Nos. 41 and 10 Commando reached Domburg on the morning of 2
November where they encountered strong resistance. That evening Brigadier
Leicester ordered No. 41, less one Troop, to assist No. 47 Commando in the
south, leaving the Troops of No. 10 and one of No. 41 to finish mopping up
Domburg. No. 4 Commando was relieved by 155 Brigade and embarked on Buffaloes
to assault two batteries, W3 and W4, situated north-west of Flushing. They had
been fighting for 40 hours and needed a well-earned rest. After landing in a
gap in the dyke, about which little was known, Lt-Colonel Dawson asked
Brigadier Leicester for a break of some 24 hours to rest his men. This was
agreed, but it was well after dark before the Commando was relieved by 155
Brigade. In the event No. 47 (RM) Commando overcame the opposition at Dishoek
later that day and linked up with 4 Commando. Meanwhile, No. 10 cleared
Domburg, with the Commando’s Norwegian Troop showing particular courage in the
face of heavy opposition which cost them a number of casualties.
In the after-action report of the battle Captain J. Linzel
of No. 10 Commando stated:
This
operation had more impact on me. The objective was to clear the seaway to
Antwerp. We went to Belgium, where the Nr4 Troops Brigade and the No10 Commando
were billeted. We were an attached unit of 14 men. We entered our LCT’s
Buffalo’s amphibious vehicles to go to Walcheren where we experienced heavy
German Artillery. Our vehicle got hit direct by a grenade, setting our flame
throwers and ammunition on fire. This was a chaos. Our burning Buffalo was
pushed into the sea and I can remember that together with 10 other men I
ended-up in another Buffalo and landed at Westkapelle. We experienced some
serious fighting there and a lot of the Brigade were killed. It took us 3 days
to capture the German dyke at Vlissingen, there were about 300 casements.
Captain J. Linzel.
Aftermath
Nos. 4, 47, 48 Commandos then concentrated at Zoutelande and
a two-day pause ensued while they re-supplied. The remaining enemy resistance
was concentrated in the area north-west of Domburg. Nos.4 and 48 Commando set
off on foot, although they used landing vehicles to cross the gap at
Westkapelle, in order to reinforce No.10 and No.41. While No. 41 assaulted the
last remaining battery, W19, No.4 cleared the Overduin woods and pushed on to
Vrouwenpolder opposite North Beveland. No.48 remained in reserve - this phase
of the operation began on November 8.
At 08:15, four Germans approached the Allied troops to ask
for a surrender of all remaining German troops in the area. After some
negotiation 40,000 Germans surrendered and for them the war was over. No.4 SS
Brigade had lost 103 killed, 325 wounded and 68 missing during eight days of
fighting. By the end of November after a massive minesweeping operation of the
Scheldt, the first cargoes were being unloaded at Antwerp.
Units
No. 2 Dutch Troop of 10 IA (Inter-Allied) Commando moved to
Brugge in Belgium on 20 October 1944 and was incorporated into No. 4 Commando
Brigade. They split up and were attached to other fighting units where, in the
case of some officers and men, their native language skills helped Allied
liaison with the local population, while others fought alongside their comrades
in arms.
The three RM Commandos of No.4 Special Service Brigade,
along with the No.4 (Belgian) and No.5 (Norwegian), troops of No.10 (IA)
Commando, commanded by Peter Laycock, landed at Westkapelle on the western side
of the island. No.4 Commando, with Nos.1 and 8 (French) troops under command,
crossed from Breskens and attacked Flushing. In support were 155 Infantry
Brigade. The brigade had trained for this assault in the Ostend area during
October.
Long-term After Effects for the Civilians
The Inundation of Walcheren with which Operation Infatuate
started, had long-term after-effects for the civilian population of Walcheren.
Twice a day, at high tide and ebb tide, the sea water streamed with force
through the breaches in the sea dykes, widening and deepening them. As a
consequence, areas that fell dry at low tide were inundated again at high tide.
Only the areas that were normally above sea level, like the town and village
centers, remained permanently dry. Other low-lying areas, on the other hand,
remained permanently flooded. This played havoc with Walcheren agriculture, as
valuable land was permanently spoiled by salination. Because the pace of the
flooding had been slow, loss of human life due to drowning had been minor, but
most of the livestock drowned. Of 19,000 dwellings 3,700 were destroyed; 7,700
had severe damage and 3,600 minor damage.
Attempts to close the breaches already started in November
1944, but lack of building materials, and of heavy construction equipment, and
the destroyed infrastructure, together with the extensive minefields, hampered
these efforts. When in July 1945 the operations of closing the breaches started
in earnest, the total width of the breaches had already increased to three
kilometers. The great depth of the scoured-out breaches made simply moving
earth into them infeasible. Therefore, surplus caissons that had not been
needed to form the Phoenix breakwaters of the Mulberry harbors were used to
block the deepest part of the breaches, after which normal dyke-building
operations could proceed. The breach at Flushing was finally closed on 2
October 1945, followed by the breach at Westkapelle on 12 October. The third
breach, at Veere, was closed on 23 October. Then the work of draining the flooded
areas could start. To that end a breach was made in the western levee of the
Canal through Walcheren. This made it possible to slowly drain the main mass of
water through the locks at Veere and Flushing by opening them at ebb tide. But
to completely drain the area additional pumping was necessary, which required
opening the drainage ditches that had been silted up. The draining operation
was finished in early 1946.
Further Reading
Walcheren
1944, Storming Hitler's island fortress; Author: Richard Brooks. Osprey
Campaign Series #235; Osprey Publishing. 2011.
 |
| Battle of the Schelde, 2 October-8 November 1944 |
 |
| Walcheren Causeway. |
 |
| The Walcheren Causeway, looking East towards South Beveland. This picture was taken in the autumn of 1946 (at low tide). What appears to be a grassy field at the right is actually impenetrable salt marsh. |
 |
| The Battle for Walcheren Island: Men of the 4th Special Service Brigade wade ashore from landing craft near Flushing to complete the occupation of Walcheren. (Imperial War Museum BU 1244) |
 |
| German prisoners on Walcheren. Around 40,000 were taken after the operation had terminated. (Imperial War Museum CL 1513) |
 |
| The Germans installed this 75mm anti-tank gun in the bandstand at Nieuland, near Middelburg, to cover the cross roads in the town. November 1944. (Imperial War Museum CL 1519) |
 |
| Allied bomb damage to railway sidings at Middleburg station in Holland, November 1944. A scene at the bombed railway sidings of Middleburg station where railway lines were blown over adjoining buildings. (Imperial War Museum CL 1517) |
 |
| British Marine Commandos land on Walcheren at Westkapelle. 1 November 1944, on board an LCI(S). the final phase of the battle to free the approaches to the Belgian port of Antwerp began when Royal Marine Commandos landed at dawn at Westkapelle, the western-most point of the island of Walcheren. LCG survivors being picked up by an LCI(S) acting as a hospital ship. Smoke of battle ashore is in the background. (Imperial War Museum A 26235) |
 |
| Building a Nissen Hut at Wemeldinge, Holland. A group of British soldiers build a Nissen hut in the right foreground, in a snow covered Dutch landscape. (Imperial War Museum ART LD 4911) |
 |
| Among the prisoners taken on Walcheren was this Dutch woman. She is seen here in this RAF photograph with her husband, a German solder, whom she refused to leave. She marched with the German prisoners to the Prisoner of War cages. (Imperial War Museum CL 1512) |
 |
| Pioneers on a Frozen Road at Kapelle near Goes, Zeeland. (Imperial War Museum ART LD 4919) |
 |
| Humber light reconnaissance cars of No. 2777 Field Squadron, RAF Regiment at the 'ready position' outside the railway station in Middleburg, Holland, as Allied forces enter the town. (Imperial War Museum CL 1514) |
 |
| Temporary headquarters of the Army Film and Photographic Unit (AFPU) on Walcheren Island in the Netherlands, 1 - 3 November 1944. (Imperial War Museum BU 1269) |
 |
| A Sherman Crab flail tank coming ashore from an LCT during the invasion of Walcheren Island, 1 November 1944. (Imperial War Museum B 11632) |
 |
| A British medical officer and German POW attend to a casualty during the landings on Walcheren, 1 November 1944. Note the AFPU cameraman filming the incident. (Imperial War Museum BU 1251) |
 |
| Wounded at Breskens await transport to hospital after being evacuated from Flushing during the assault on Walcheren, 2 November 1944. (Imperial War Museum BU 1260) |
 |
| A landing craft gun (medium) (almost certainly LCG (M) 101) sinking with crew abandoning ship after she was hit by shore batteries during the landing by Royal Marine commandos on the island of Walcheren at Westkapelle, the most western point of the island. Smoke of the battle on shore is in the background. One of the LCG's 17 pounder gun turrets can be clearly seen; also note the man just about to strike the water and another preparing to jump, near the turret. (Imperial War Museum A 26233) |
 |
| A landing craft gun (medium) (almost certainly LCG (M) 101) crew fighting to save their shell ridden and sinking craft during the landing by Royal Marine commandos on the island of Walcheren at Westkapelle the most western point of the island, during the final phase of the battle to free the Belgian port of Antwerp. (Imperial War Museum A 26236) |
 |
| Fighting to get a fire under control on board a shell-ridden landing craft gun during the landing by Royal Marine commandos on the island of Walcheren, at Westkapelle the most western point of the island, during the final phase of the battle to free the Belgian port of Antwerp. (Imperial War Museum A 26237) |
 |
| A landing craft infantry (small) going to the aid of LCI (S) 532 which was hit by enemy shells below the waterline during the landing by Royal Marine commandos on the island of Walcheren at Westkapelle, the most western point of the island, the final phase of the battle to free the Belgian port of Antwerp. (Imperial War Museum A 26239) |
 |
| Wounded men being transferred from a landing craft to another acting as a hospital ship during the landing by Royal Marine commandos on the island of Walcheren at Westkapelle, the most western point of the island, the final phase of the battle to free the Belgian port of Antwerp. (Imperial War Museum A 26243) |
 |
| The Coxswain, Leading Seaman Tony Cole (Walthamstow) at the wheel in the Wheelhouse of Landing Craft Tank 532 which helped land Royal Marine Commandos on Westkapelle, the western most point of the island of Walcheren during the final phase of the battle to free the Belgian port of Antwerp. (Imperial War Museum A 26259) |
 |
| Smoke rising up in the distance after a Hawker Typhoon attack as landing craft move in during the landing by Royal Marine commandos on the island of Walcheren at Westkapelle the most western point of the island, during the final phase of the battle to free the Belgian port of Antwerp. (Imperial War Museum A 26262) |
 |
| Royal Marine Commandos leaving a landing ship infantry (small) on the beach during the landing by Royal Marine commandos on the island of Walcheren at Westkapelle the most western point of the island, during the final phase of the battle to free the Belgian port of Antwerp. (Imperial War Museum A 26263) |
 |
| In the distance a landing craft support (rocket) firing at enemy strong points during the landing by Royal Marine commandos on the island of Walcheren at Westkapelle the most western point of the island, during the final phase of the battle to free the Belgian port of Antwerp. (Imperial War Museum A 26264) |
 |
| A landing craft tank entering the beach area during the landing by Royal Marine commandos on the island of Walcheren at Westkapelle the most western point of the island, during the final phase of the battle to free the Belgian port of Antwerp. In the hold of the LCT are vehicles carrying various supplies for the landings. (Imperial War Museum A 26266) |
 |
| Royal Marine Commandos going down the ramp of a landing craft tank in an Alligator amphibious personnel carrier, whilst some more men in a Weasel amphibious carrier are about to follow. The LCT has just beached on the island of Walcheren at Westkapelle, the most western point of the island, during the final phase of the battle to free the Belgian port of Antwerp. Note the badly damaged buildings and sea defenses in the background. (Imperial War Museum A 26268) |
 |
| DUKWs or "Ducks" head towards the shore from a landing craft tank (LCT 952) whilst an Alligator personnel carrier can be seen on the beach. A large plume of smoke is rising high into the air from an enemy strongpoint on fire in the background during the landing by Royal Marine commandos on the island of Walcheren at Westkapelle, the most western point of the island, the final phase of the battle to free the Belgian port of Antwerp. (Imperial War Museum A 26269) |
 |
| Two members of the crew of a landing craft tank watch the fire ashore after they had landed their cargo of Royal Marine Commandos during the landing on the island of Walcheren at Westkapelle, the most western point of the island, during the final phase of the battle to free the Belgian port of Antwerp. LCT 52 can be seen towards the shore. (Imperial War Museum A 26270) |
 |
| Landing craft tanks unloading Royal Marine Commandos in Alligator vehicles onto a beach at Westkapelle, the most western point of the island of Walcheren, during the final phase of the battle to free the Belgian port of Antwerp. Smoke can be seen rising up in the background. (Imperial War Museum A 26271) |
 |
| Landing craft tanks carrying Royal Marine Commandos on way to beach during the landing by Royal Marine commandos on the island of Walcheren at Westkapelle, the most western point of the island, during the final phase of the battle to free the Belgian port of Antwerp. Men in the bows of the LCT can be seen in the foreground whilst several landing craft can be seen ahead of the LCT. (Imperial War Museum A 26275) |
 |
| Royal Marine Commandos in Alligators and Weasels nearing the landing beach in a landing craft tank during the landing by Royal Marine commandos on the island of Walcheren at Westkapelle the most western point of the island, during the final phase of the battle to free the Belgian port of Antwerp. (Imperial War Museum A 26260) |
 |
| DUKWs or "Ducks" head towards the shore from a landing craft tank (LCT 952) whilst an Alligator personnel carrier can be seen on the beach. A large plume of smoke is rising high into the air from an enemy strongpoint on fire in the background during the landing by Royal Marine commandos on the island of Walcheren at Westkapelle, the most western point of the island, the final phase of the battle to free the Belgian port of Antwerp. By dusk the town had been captured and a bridgehead 3,000 yards long to the south had been established. From this bridgehead the commandos pushed north and south the next day, along the dyke beside the sea to Domburg and Zoutelande. Gradually they knocked out the big guns which threatened the Scheldt shipping. 1 November 1944. (Imperial War Museum A 26269) |
 |
| DUKWs or "Ducks" ply their way between the beach and a Landing Craft Tank (LCT 952) during the landing by Royal Marine Commandos on the island of Walcheren at Westkapelle, the most western point of the island, during the final phase of the battle to free the Belgian port of Antwerp. Dark smoke is hanging high in the air whilst what appears to be the remnants of a smoke screen is lingering on the beach. (Imperial War Museum A 26272) |
 |
| The occupation of Walcheren Island is going fast. Flushing is in the hands of the British and troops fanning out to the West are close to the Marine Commandos coming down from the Westkapelle beachhead (where these pictures were taken). This image shows 3" mortars in action from behind the cover of amphibious tanks. (Imperial War Museum BU 1268) |
 |
| The British Deputy Prime Minister Clement Attlee (right, in the DUKW) visited inundated Walcheren in March 1945. (Netherlands Nationaal Archief 900-2361) |
 |
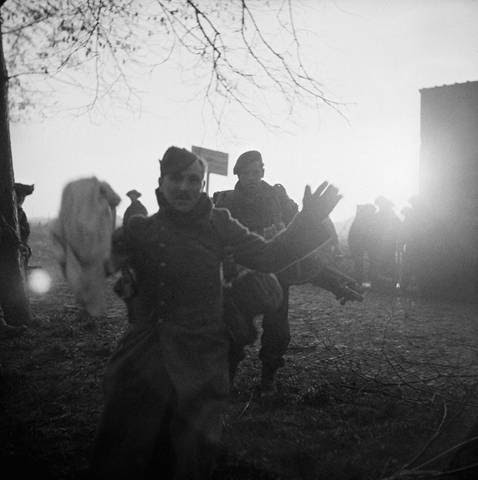
| A German POW captured during the Allied assault on Walcheren Island in Holland, November 1944. British assault troops landed on Walcheren at dawn on 1st November 1944 and most of Flushing was included in the first bridgehead. The landings were supported by fire from British warships. The object of the assault is to silence the enemy guns menacing the Scheldt passage to the port of Antwerp. This particular image shows some of the first prisoners captured after the landing. (Imperial War Museum BU 1247) |
 |
| An infantry landing craft (LCI) approaching the shore to take off wounded from Walcheren, Holland, November 1944. The occupation of Walcheren Island is going fast. Flushing is in the hands of the British and troops fanning out to the West are close to the Marine Commandos coming down from the Westkapelle beachhead (where these pictures were taken). This image shows a ship coming ashore at Walcheren to take off the wounded. (Imperial War Museum BU 1283) |
 |
| An RAF Humber light reconnaissance car in Middelburg, Holland, November 1944. (Imperial War Museum CL 1515) |
 |
| An R.A.F. sergeant shares an alfresco lunch with two Dutch women at Nieuland, near Middelburg, soon after the town had been freed by the Allied. (Imperial War Museum CL 1518) |
 |
| British assault troops landed on Walcheren at dawn on 1 November 1944 and most of Flushing was included in the first bridgehead. The landings were supported by fire from British warships. The object of the assault is to silence the enemy guns menacing the Scheldt passage to the port of Antwerp. This image shows British assault troops operating in Flushing. (Imperial War Museum BU 1246) |
 |
| British assault troops landed on Walcheren at dawn on 1 November 1944 and most of Flushing was included in the first bridgehead. The landings were supported by fire from British warships. The object of the assault is to silence the enemy guns menacing the Scheldt passage to the port of Antwerp. This particular image shows some of the first prisoners captured after the landing. (Imperial War Museum BU 1248) |
 |
| British assault troops landed on Walcheren at dawn on 1 November 1944 and most of Flushing was included in the first bridgehead. The landings were supported by fire from British warships. The object of the assault is to silence the enemy guns menacing the Scheldt passage to the port of Antwerp. This image shows British assault troops advancing through the streets at Flushing where there was sharp fighting. (Imperial War Museum BU 1249) |
 |
| British assault troops landed on Walcheren at dawn on 1 November 1944 and most of Flushing was included in the first bridgehead. The landings were supported by fire from British warships. The object of the assault is to silence the enemy guns menacing the Scheldt passage to the port of Antwerp. This image shows British assault troops advancing through the streets at Flushing where there was sharp fighting. (Imperial War Museum BU 1250) |
 |
| British assault troops landed on Walcheren at dawn on 1 November 1944 and most of Flushing was included in the first bridgehead. The landings were supported by fire from British warships. The object of the assault is to silence the enemy guns menacing the Scheldt passage to the port of Antwerp. This image shows the wounded being attended to by a British medical officer. (Imperial War Museum BU 1252) |
 |
| British assault troops landed on Walcheren at dawn on 1 November 1944 and most of Flushing was included in the first bridgehead. The landings were supported by fire from British warships. The object of the assault is to silence the enemy guns menacing the Scheldt passage to the port of Antwerp. This scene on the Walcheren coast after the British landing has been effected. (Imperial War Museum BU 1253) |
 |
| British assault troops landed on Walcheren at dawn on 1 November 1944 and most of Flushing was included in the first bridgehead. The landings were supported by fire from British warships. The object of the assault is to silence the enemy guns menacing the Scheldt passage to the port of Antwerp. This image shows stores being landed near Flushing after the landing. (Imperial War Museum BU 1254) |
 |
| British assault troops landed on Walcheren at dawn on 1 November 1944 and most of Flushing was included in the first bridgehead. The landings were supported by fire from British warships. The object of the assault is to silence the enemy guns menacing the Scheldt passage to the port of Antwerp. This image shows troops advancing along the waterfront near Flushing with shells bursting ahead. (Imperial War Museum BU 1256) |
 |
| Civilians row an RAF reconnaissance officer back to his unit after carrying out an inspection of Middelburg in Holland, November 1944. (Imperial War Museum CL 1516) |
 |
| Canadian combat medics constructing a field hospital. Battle of the Scheldt, 1944. (Provincial Archives of Alberta) |
 |
| The occupation of Walcheren Island is going fast. Flushing is in the hands of the British and troops fanning out to the West are close to the Marine Commandos coming down from the Weskapelle beachhead (where these pictures were taken). This image shows German prisoners that were taken in the fighting being housed in a barn on the way to the Prisoner of War cages. November 1944. (Imperial War Museum BU 1267) |
 |
| The occupation of Walcheren Island is going fast. Flushing is in the hands of the British and troops fanning out to the West are close to the Marine Commandos coming down from the Westkapelle beachhead (where these pictures were taken). This image shows German prisoners on Walcheren, in a Prisoner of War cage. (Imperial War Museum BU 1280) |
 |
| The occupation of Walcheren Island is going fast. Flushing is in the hands of the British and troops fanning out to the West are close to the Marine Commandos coming down from the Weskapelle beachhead (where these pictures were taken). This image shows a wrecked landing craft on the beach of Walcheren. (Imperial War Museum BU 1281) |
 |
| The occupation of Walcheren Island is going fast. Flushing is in the hands of the British and troops fanning out to the West are close to the Marine Commandos coming down from the Westkapelle beachhead (where these pictures were taken). This image shows the naval crew of an Landing Craft Tank (LCT) at work erecting tents and shelters after their ship had been wrecked. (Imperial War Museum BU 1282) |
 |
| DUKWs or "Ducks" ply their way between the beach and a Landing Craft Tank (LCT 952) during the landing by Royal Marine Commandos on the island of Walcheren at Westkapelle, the most western point of the island, during the final phase of the battle to free the Belgian port of Antwerp. Dark smoke is hanging high in the air whilst what appears to be the remnants of a smoke screen is lingering on the beach. (Imperial War Museum A 26272) |