by Richard Garczynski
Introduction
You could call me an Africa nut—I am interested in all
aspects of the African Campaign to the point of compiling my own chronological
history of the campaign. I hope to use this article and any others that might
follow it as tools for the further development of my history. This article in
particular is meant to be an introduction to many of my future ones. I hope to
show their interconnection, and the reader will be able to use them for cross
reference with one another.
In many places in this article I've listed specific sources.
In other instances, I'm drawing from my notes which I started as a hobby before
I ever dreamt of writing articles. Most of my conclusions are based on simple
map observations. In some cases I just worked from memory. I hope the reader
can follow me.
Geographic Background of Benghazi
Benghazi, "1938 through 1945," was the second city
of Libya, the first city of Cyrenaica, also its capital, and the capital of the
Benghazi district.
It possessed the third best port in Libya—Tripoli's being
better because of its more extensive facilities, and Tobruk being better
because of its more sheltered natural harbor. This can be additionally
documented by the fact that it was wrecked by storms with strong westerly winds
on 3-4 January 1943, and on 13 January 1943.
It was the central point of the largest of Libya's two
railroads which, after the first British offensive, played little or no part in
the fighting.
From Benghazi a major road network fans out. The Via Balbia
runs south to Ghemines, El Magrun, Agedabia, and eventually to Tripoli, to
Barce, and beyond via Coefia and Tocra. The main secondary road runs east along
the railroad through Benia and up into the Jebel El Akhdar (Gebel El Achadar)
to Er Regima and el Abiar, swinging northeast to Barce. Another route to Barce
leaves the Via Balbia at Tocra, running northeast along the coast to Tolmeta
and then back south through the Dahar El Ahmar to Barce. To the south a major
secondary road crosses the Wadi el Gattara, running through Giardina to Soluch
where it forks east to Sceleidima through the Dahar el Abmar to Msus (Zaviyat
Msus) and the open desert; the other fork continues southeast to Antelat at the
south end of the Dahar el Ahmar. Beyond these true roads you encounter camel
routes, goat paths, and other lesser tracks—some suitable for motorized
vehicles, some not. Those are the most used but many more exist, especially
through the Dahar el Ahmar and Jebel El Akhdar. Of these the one from el Abair
across the interior escarpment of the Jebel El Akhdar (the Gebel el Abie
escarpment) to el Charruba is the most noted; from there connections can be
made to numerous points in the Jebel El Akhdar as well as to Melkili and Msus
to the south which were used by Bardini in his escape from Mekili at O'
Connor's approach in January 1941. Rommel found similar usefulness in the
grouping of lesser routes which connect Soluch, Sidi Braham, Msus, el Abiar and
Er Regima in his second offensive to take Cyrenaica and Benghazi.
As for airfields, in the immediate area of Benghazi, Benina
I was one of the three best airfields in Cyrenaica in 1940 and one of the most
important throughout the war. Besides Benina I, the area around Benghazi contained
Benina II, Lete, Berca I, II, and III, and Gascir. None of these was developed
as Benina I but all were useful in dispersing the area's air strength. To the
north, other secondary fields were at Kolmeta near Tolmeta, at Tocra just north
of the Wadi er Sleib, and at Got Bersis near the Wadi Zaza, as well as a major
field at Barce. To the south, more secondary fields were at Terria, Hoscraul,
Ghemines, Soluch I and II, and Carcura, along with another major complex at
Magrun I and II. I should also like to note here the existence of another
secondary field called Got es Sultan which was located somewhere between Er
Regima and el Abiar, but I'm not sure of its exact location. None of these
airfields had much, if any, man-made surface, and they were all susceptible to
the effects of weather—a point which had its effect all too often during the
campaign.
Geological Background of Benghazi
Benghazi itself is located on a low coastal plain of mostly
sand and gravel outwash from the wadis that lacerate the Dahar el Ahmar and, in
some places, also cut the coastal plain. This plain slants upward toward the
Dahar el Ahmar and almost obscures a lesser escarpment running through Benina.
Salt marshes (wet and dry) and dry lake beds are common. Water is available but
brackish in low areas. In 1941, agriculture was being expanded outward from the
traditional and more favorable locales by the Italians and their technology.
The main natural feature of the area was the dominant
frontal escarpment of the Jebel El Akhdar (meaning "Green
Mountains")—the Dahar el Ahmar. I haven't enough geology expertise to
properly describe it, but the entire area appears to be the product of a series
of coastal shelf uplifts and in some cases down-drops (due I think to
continental drift); this would suggest a great number of fault lines and would
give some explanation for the great earthquake of Cirene. Under this regime,
Benina, Er Regima, and el Abiar all could at one time in the past have been as
Benghazi is today. Once the uplifts occurred, erosion started to eat them away,
producing the wadis and giving the coastal plain its grade.
If this article were a book, I would go into detail about
such terms as eroded fault scarps, bahada, play, pediment, alluvium, alluvial
fans, remnants, fault blocks, and the fact that the rocks in this region were
originally flat, but I haven't the room or the time for such an in-depth
background.
The Indefensibility of Benghazi
Contrary to what some wargamers have thought, Benghazi had
no major fixed fortifications such as those of Bardia or Tobruk. The only
military structures associated with the city other than airfields were a string
of forts (presumably of Turkish origin) ringing the city itself at intervals
too great for effective interlocking small arms fire. The idea of holding an
isolated Benghazi under siege, like Tobruk was, and supplying it either from
Italy or Egypt is possible, but it would be difficult and expensive—possibly to
the point of unprofitability.
Either side being isolated in Benghazi would have to face an
enemy which would control excellent airfields on either side of the perimeter
well beyond the defender's artillery range at Magrun to the south and Barce to
the north. Besides this the Axis face the proximity of Malta not only to Benghazi
itself but the Benghazi supply lines, both sea and air. On the other hand, an
Allied occupant would have to deal with the sheer distance to Alexandria in
addition to threats from enemy-held territory in Africa, Sicily, southern
Italy, southern Greece, Crete, and Rhodes.
Natural features conducive to defense do exist in the
area—the Dahar el Ahmar escarpment being the most important. It provides an
excellent frontal position to the east and would have to be the major
consideration of any defense since its height dominates Benghazi itself. (See
Alan Moorehead, The March to Tunis,
page 107.) This might include the town of Er Regima or at least the heights
above it. To the south the Wadi el Gattara cuts the coastal plain almost to the
southern arm of the railroad. To the north the line on which the defenses are
based would be determined by the size of the garrison available. To hold a line
along one of the wadis north of Tocra and the eastern approaches to Tocra would
add only size to the defended area and reduce the efficiency of the defense. I
should think that delaying actions in that area and the area between Barce and
el Abiar, utilizing the wadis which cross the main roads, would give time for
the finishing of the main northern east-west defense line on any one or all
three main wadis which cut the coastal plain to the Via Balbia south of
Tocra—these being (north to south) Wadi es Sleib, Wadi Beberabidas, and Wadi
Zaza. All of these have suitable associated heights in the Dahar el Abmar to
form good defensive lines with some work. The first two and possibly the third
would dominate the Tocra airfield with their artillery.
All or part of this scheme would require a large garrison of
at least 50,000 to 60,000 men, with adequate infantry, troops trained in mountain
fighting, a large mobile reserve for counterattacks, and a sizeable amount of
artillery.
At only one time in the entire campaign did a force large
enough to properly execute such a scheme exist; that was the Italian 10th
Army. Prior to the isolation of the Tobruk the 10th would have been
too small to do the job.
But Benghazi might still have been held using a lesser
scheme with what remained of the 10th if only a screening force had
been left to face the British and the rest had been sent to work building a
lesser fortress using the Wadi el Gattara and the Dahar el Ahmar (the heights
around Er Regima, but cutting west from the Dahar el Ahmar opposite Coefia to
the sea). Here more than anywhere the lack of prepared positions would have
proved most disadvantageous since there is no natural feature between the Dahar
el Ahmar and Coefia on which to base such a line; it would have to be built
from scratch.
In either case the defense of Benghazi would have been made
much easier had the useless Frontier Fence not been built and had some defenses
been built around Benghazi before 1941.
All such efforts are highly speculative. I am sure that
Italian, German, and British plans, or rather studies, of such defensive
operations do, or once did, exist. In any case the height relations—namely the
domination of the Dahar el Ahmar over everything including the lesser or Benina
escarpment—were the key. Once it fell all of the other defenses would become
untenable. In 1940, if the Australians could have been held off, the position
would have been quite secure until the 4th Indian Division could
have been recalled, and by then the garrison might have improved.
One other point should be considered in any thought of
defending Benghazi, and that is the fate of the civilian population. In 1941,
Benghazi had a minimal population of 69,000 in the city alone, while 67,000
Arabs and possibly as many as 25,000 Italians were living in Benghazi and its
adjacent towns. This figure would have been swollen by Italian refugees fleeing
the advance of war from the settlements in the Green Mountains. Evacuation
would be a paramount thought to avoid human suffering and alleviate supply
problems.
In January 1941, Marshall Rudolfo Graziani decided what to
do about Benghazi and provided all of the city's wartime occupiers with the
answer of the port's defense. Without extensive pre-war preparations Benghazi
was indefensible and should be left as an open city to the enemy (after certain
demolitions) to spare the populace. He should therefore take what was left of
his army and join the 5th Italian Army in the defense of Tripoli.
Unfortunately he acted upon his decision one day too late. All other holders of
Benghazi after him were forced to make similar decisions and moves.
I should like to note that Graziani left behind armed police
to maintain order and possibly as many as 20,000 self-decommissioned reservists
who hoped to take this chance to let the war pass them by and go back to their
farms, etc. (I read about this once—I don't know where—before I ever thought of
turning my notes into a book much less writing articles on the subject. If
anyone has read a similar passage, please contact me.)
I realize that the fact of history reduces all my
speculation to so much conjecture, but the "what if" still remains.
The utilization of Benghazi could have changed or delayed Greece and East
Africa. If the Italians could have held the first rush, a Crusader-like battle
in reverse might have developed. The much speculated upon Rommel versus
O'Connor battle would have developed south of Benghazi and many things might
have been different.
In April 1941, once Rommel's first offensive was under way,
the British were faced with the option of holding Benghazi as an isolated
outpost or as part of a front to contain Rommel. The idea of holding an
isolated Benghazi proved to be out of the question mainly due to the efforts of
the Luftwaffe, making the port unsafe. The fact that insufficient troops were
available (9th Australian Division: 26th Brigade 2/24,
2/48; 20th Brigade 2/13, 2/15, 2/17; and 51st British
Field Artillery Regiment) and, of course, the lack of prepared defenses both
compounded the difficulties. These troops might have been enough to hold a line
on the Wadi Gattara while blocking the tracks to Er Regima and el Abiar;
however, due to the state of Benghazi an alternate plan was adopted. This
second idea—of blocking the passes at Tolmeta, Tocra, and Er Regima—also fell
through. Since the 2nd British Army Division failed to hold Rommel
off before Msus, which would have secured the Australians' flank, Benghazi had
to be given up along the Jebel el Akhdar.
In December 1941, Rommel's exhausted army (in many ways
similar to Graziani's) gave up Benghazi—after first rendering it useless—for a
much safer position at El Agheila, while fending off a British attempt to
repeat February 1941.
Then in January 1942, Rommel pulled a rerun of April 1941,
only this time he went for Benghazi instead of Makili via the lesser roads
between Er Regima and Msus, crossing the Wadi Gattara at the foot of the Dahar
el Ahmar to take Er Regima, Benina and El Coefia. This cut off Benghazi and the
7th Indian Brigade which, under Brigadier General Briggs, escaped to
the south via Sidi Brahim and made their way back to the British lines through
the Germans—to which General Auchinleck said, "You got through because you
were bold. Always be bold."
Finally in November 1942, Rommel fell back past Benghazi
again—more smashed than exhausted this time. Again the British tried the same
tricks as in February and December 1941, and—as he had in 1941—Rommel thwarted
them and pulled back what was left of his army to El Agheila. The situation
during this, the last act of the fighting for Cyrenaica, might have been much
different if all of the promises made to Rommel had been kept by Mussolini and
Hitler.
The promises included the following—made by Hitler on 23
September 1942—10th Panzer Division (went to Tunisia instead); 1st
Leibstandarte Adolf Hitler SS Panzer Grenadier Division (stayed in France and
was converted to a panzer division awaiting the Allied invasion threat); 22nd
Airborne Division (47th Regiment sent to Tunisia, the rest remained
in Crete); a Nebelwerfer brigade (only elements of it reached Tunisia); forty
Tiger I tanks (presumably the 501st Heavy Tank Battalion which was
sent to Tunisia); forty self-propelled 150 mm howitzers (only a few reached El
Alamein, the fate of the rest is unknown); assault guns (further data unknown);
jagdpanzers (further data unknown); and these made by Mussolini on 5 July 1942:
185th Folgore Parachute Division (arrived at El Alamein in August
1942 but lacked transport); 16th Pistoia Motorized Infantry Division
(was withheld from El Alamein and was picked up by Rommel in his retreat); 7th
Friuli Infantry Division (was sent to Corsica instead); seven battalions of
infantry, four regiments of artillery, tanks, armored cars, self-propelled
guns, artillery, anti-tank, anti-aircraft (only partial arrivals at El Alamein
and mostly obsolete). Also promised by Mussolini were troops to occupy the
Kufra Oasis. I presume this was the 80th La Spezia Division which
did arrive but never got beyond El Agheila.
The 131st Centauro Armored Division also arrived
and took part in Rommel's rear guard, but the promise of its deployment was
made at an earlier time.
I have some evidence that troops of the Lupi di Toscana
Infantry Division (Wolves of Tuscany) were captured during Rommel's retreat.
The main body of the division, however, was sent to occupy Vichy France.
I have similar evidence on the presence of some troops of
the Cacciatori della Alpi, whose main body was in northern Yugoslavia at the
time.
A further possible reinforcement of the area lie with the
Nimbo Parachute Division stationed in northern Italy.
The idea of holding Benghazi like Tobruk and setting up
another Crusader situation might have materialized, but Malta's growing
strength, the Allied invasion of French North Africa, the ever pressing
problems of Russia (Stalingrad), and the need to occupy Vichy France evaporated
any such hope before it could develop. Of course, Hitler's "victory or
death" order to Panzer Army Africa at El Alamein didn't do anything to
help Rommel's ability to delay the British in order to buy time for defensive
preparations to his rear.
Indispensable Benghazi
Benghazi's foremost value to either side lay in its use as a
port and supply base. The economy of moving vast quantities of men and material
by a quick sea route were always recognized by the logistics people on both
sides. Small ports were utilized by small freighters and coastal vessels
unloading via lighters—or directly to the beach in some cases. As of 17 February
1941, Rommel's Major Otto was organizing the coastal supply system, while the
British were following up their troops as fast as the small ports fell to them
since December 1940. This was one of the original reasons Rommel took El
Agheila and Mersa Brega in 1941, thusly moving his coastal supply line as far
forward as possible and, at the same time, denying the same advantage to the
British. While the small ports provided an advantage to the belligerents,
Benghazi proved to be a necessity to either side. Just as anyone trying to take
Egypt needed Tobruk, anyone trying to take Cyrenaica also needed Tobruk. But
once you had Cyrenaica you needed Benghazi to supply your effort to hold
Cyrenaica or your effort to advance into Tripolitania. The major ports enabled
their holder to speed up the arrival of supplies and reinforcements which would
otherwise consume vast quantities of supplies themselves in being moved
cross-country. In this way their holders were also provided with a new base of
operations much closer to the front.
In Benghazi's case she was more useful to her Axis tenants
than to the Allies, despite Malta, because of Sicily's overshadowing presence
against Malta in 1941 and early 1942, and because of the gauntlet British
shipping had to run past Rhodes, Crete, and Greece. Every time someone gave up
Benghazi, they wrecked the port and then sent in their air force to bomb and
mine it, while submarines patrolled outside it, to slow the new occupant's
efforts to transform it into his new base of operations.
Rommel's two offensives against Cyrenaica were launched in
part to prevent the opposition from turning Benghazi into his new base and in
part because the British had not finished making Benghazi totally useful,
thusly leaving themselves too weak at the front. If the many promises made to
Rommel that I mentioned earlier had been kept, he might well have launched a
third such offensive. There certainly is enough evidence that the British,
Montgomery included, feared such an event.
But Rommel was denied any such chance by his superiors, and
Benghazi was converted once and for all into the new British forward base of
operations. From there Montgomery built up his forces to launch an attack
against the Mersa Brega–Marada position which Rommel's weak forces could in no
way withstand. Rommel had 25,000 Italians; 10,000 Germans; thirty-five tanks;
twenty armored cars; forty 88's; forty-six 50 mm anti-tank guns; and thirty-two
pieces of artillery, while the British pursuing force contained 120 tanks—not
counting the main body which was still far back.
Once Panzer Army Africa had been pushed beyond El Agheila,
Benghazi's function as a supply base became even more important as the distance
to Tobruk lengthened.
At the Buerat line, Rommel had 30,000 Italians, 10,000
Germans, thirty-eight tanks, and an anti-tank establishment that was twenty
percent understrength, while the British found themselves 600 miles from
Benghazi and requiring 5,000 tons of supplies per day (2,380 tons landed and
trucked out of Benghazi, 2,200 tons from Tobruk, and 420 tons from coastal
traffic or longer hauls than Tobruk).
It just so happened that at that juncture in time Benghazi
failed the British when it was wrecked by storms. On 3-4 January 1943, Benghazi
was hit by a storm and made useless for those two days. Then on 13 January,
another storm did an "even better job of it," and no supplies were
unloaded at all until the 17th when repairs were finished. This
dropped Benghazi's 1-31 January 1943 daily landing of supplies from 2,380 tons
per day to 1,800; and made up for the poor showing of the Luftwaffe at that
time. This forced Montgomery to ground his 10th Corps and to use all
of its vehicles to transport supplies from Tobruk and beyond to the front for
maintenance of the 8th Army and preparation for his next attack.
During 8-25 January, among other things, 2,700,000 gallons of fuel were brought
up to the front.
Benghazi's importance as a supply base also made it
important as a base for offensive and counteroffensive operations. Earlier I
mentioned Benghazi "the supply base" and its effect on the fighting
front, but Benghazi itself also had recognized potential as an active base for
attack or counterattack much like Tobruk. That's the other reason why every
push to take Cyrenaica dispatched at least one column to take Benghazi and
eliminate any threat from that quarter. The idea of another Tobruk was covered
quite thoroughly earlier, and either side, while trying to take Cyrenaica,
always dispatched a column to take Benghazi "the supply base" to
further their offensive and prevent it from being used as a counteroffensive
base against their columns operating south of the Green Mountains.
Under the right conditions, with the nature of the coastal
plain south of Benghazi, the decreasing obstacle nature of the Dahar el Ahmar
also south of Benghazi, and the natural defensive nature of Jebel El Akhdar to
the east, along with an effective mobile force in front of the enemy be he
moving east or west, the Churchill axiom of cutting off the turtle's head once
he stuck it out could have been realized. But such distractions as Greece,
Russia, Japan, and others again reduced the idea to conjecture. But conjecture
or not the threat of it hung over other needs, and no chances were taken as
strategy was made to conform. Think of the effect here if the 7th
Indian Brigade wasn't alone in January 1942. If Japan hadn't gone to war, where
would the 7th Armored Brigade have been or for that matter the 70th
British Division and the otherwise diverted 18th British Division?
Rommel's second swing through Cyrenaica was based on far from perfect
intelligence, and if the going went wrong he was prepared to reduce it to a
raid or reconnaissance-in-force.
From all of this a physical rule which governs the behavior
of military forces warring over Cyrenaica arises. In it two points stand
out—Benghazi and Tobruk. Alan Moorehead mentions its existence on pages 246-247
in The March to Tunis. What it boils
down to is that Cyrenaica is approximately half-way between Cairo and Tripoli,
from which the two sides in any conflict over Cyrenaica can take Cyrenaica but
they cannot go beyond or hold it unless they control Benghazi and Tobruk—and
have both operational as a secure base behind their lines.
Italian Tenth Army
Tobruk Garrison
22nd Corps (General Petassi
Manella; Chief of Staff G. de Leone)
Tobruk Fortress (Brigade)
Raggruppamento (7,000 men)
Marine detachment (possibly
regiment) (2,000 men)
61st Sirte Division — General della
Mura (13,000 at full strength—strength unknown)
Parts of four divisions
17th Artillery Regiment (of 17th
Parachute Division)
Two infantry battalions
9,000 stragglers
Total: 32,000
men, 320 artillery pieces (forty 65 mm, seventy-two 75 mm, 140 field, 68
medium), forty-eight heavy anti-aircraft, twenty-four independent anti-aircraft
guns, forty-five M13 tanks, sixty-seven light tanks.
20th Corps (General Bergonzoli)
60th Sabratha Division — General
Bona (13,000 at full strength—strength unknown)
10th and 12th Bersaglieri Regiments
110 artillery pieces
Babini Armored (Brigade)
Raggruppamento
Three battalions of M13 tanks
(reduced to 120 tanks)
27th Artillery Regiment (of 27th
Brescia Division)
Two battalions of Bersaglieri (48
guns)
Troops in rear areas
Delmonte Division (forming)
20th Friuli Division (elements of
87th Infantry Regiment were definitely present in January 1941; information on
the 88th Infantry Regiment and the 35th Artillery Regiment is not available)
Benghazi garrison troops
Benghazi marine detachment
4th Armored Battalion
1st (Libyan) Parachutists Battalion
4th Parachutists Battalion (Italian
volunteers from Libya)
Police units
Possibly elements of the 17th,
25th, 27th, and 55th Divisions
212 artillery pieces
160 light tanks
Addenda
It should be noted that the figure of 2,380 tons per day
mentioned above is a wartime capacity resulting from the complete demolition of
the port on four occasions plus other bombings. The peacetime capacity of the
port has as yet escaped me, but I presume it's in the range of 9,000 to 10,000
tons per day. During Rommel's retreat in December 1941, the Battalion autonomo
CCNN Benghazi made up at least part of the garrison of the city, and anti-tank
ditches were constructed in the area around Barce.
In November 1942, elements of the 11th (Ussari)
Regiment of the 56th Casale Division arrived in Benghazi, reasons
unknown, 7 fate unknown. No information is available on the 12th and
311th Infantry Regiments, or the 56th Artillery Regiment,
which were in Greece at the time with the rest of the division.
Bibliography
Maps
Bengasi—Sonderaugabe
I, 1941; Nur fur den Dienslgebrauch Libyen, 1:400,000 Cyrenaika.
Libyen—Sonderaugabe
II, 1941, 1:2,000,000.
Benghazi—Geographical
Section, General Staff No. 4076, 1:100,000.
Benghazi—World
(Africa), 1:1,000,000, Series 1301, Edition 6AMS, U.S. Army Map Service.
Books
"Hitler
Promises Rommel Reinforcements." The Marshall Cavendish Illustrated
Encyclopedia of World War II, Volume 7, 1972, page 980.
Moorehead,
Alan. The March to Tunis. Harper and Row, 1967.
Playfair, ISO.
The Mediterranean and Middle East, Volumes I, II, III, and IV. HMSO, 1954.
Shores,
Christopher and Ring, Hans. Fighters over the Desert. Arco, 1969, page 32
(airfield information).
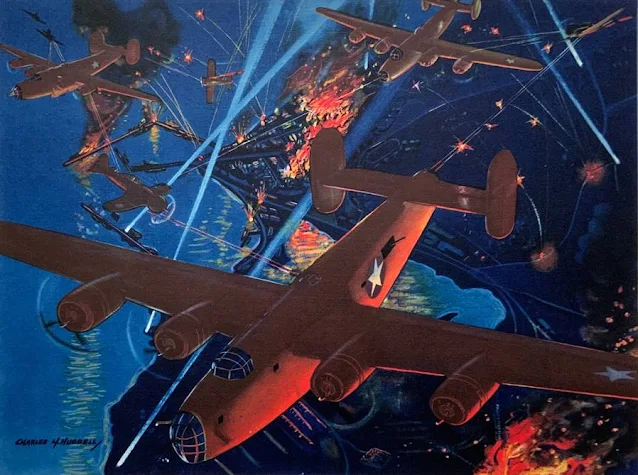 |
| "Bombers Over Benghazi" by Charles H. Hubbell depicting a nighttime raid on Benghazi by Consolidated B-24 Liberator bombers being attacked by Macchi C.200 fighters in July 1942. |
 |
| A map of northern Cyrenaica (Libya) featuring the Via Balbia (blue line) and Tobruk Agedabia road (red line). |
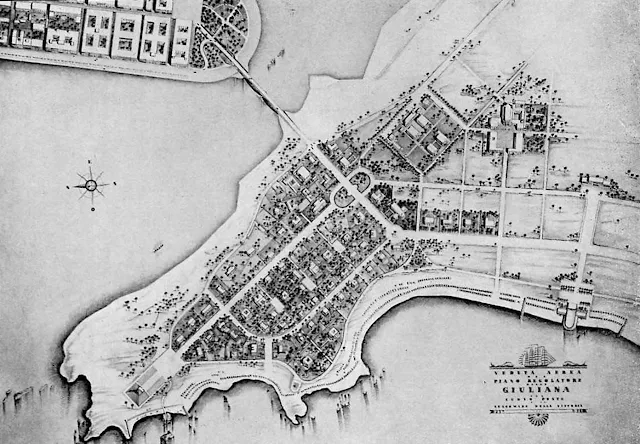 |
| Benghazi, 1930s. |
 |
| Panorama of Benghazi downtown. 1935. |
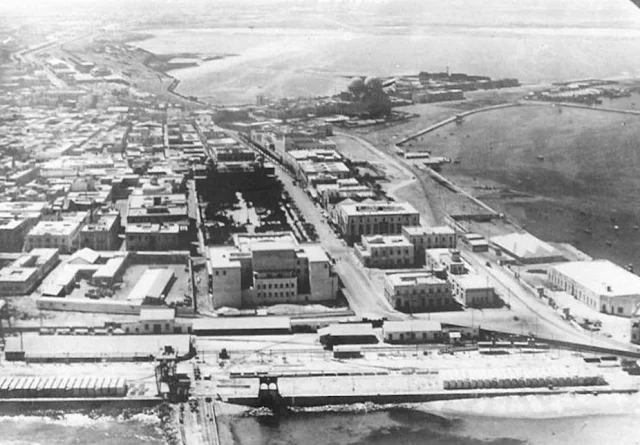 |
| Old Benghazi, Libya, during the Italian colonial period. |
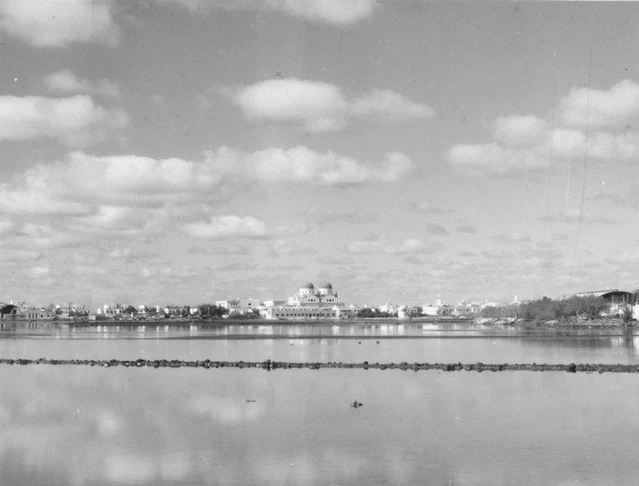 |
| Benghazi Cathedral, Libya, 1942. Benghazi Cathedral was built during the 1930s during the Italian colonial period. |
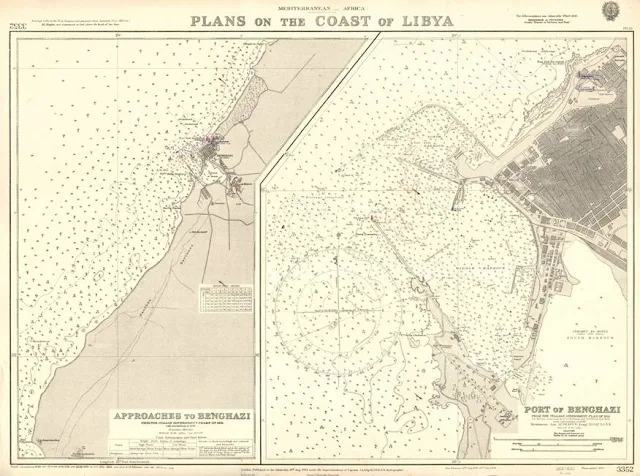 |
Plans on the coast of Libya.
|
 |
| Bengasi, 1940. |
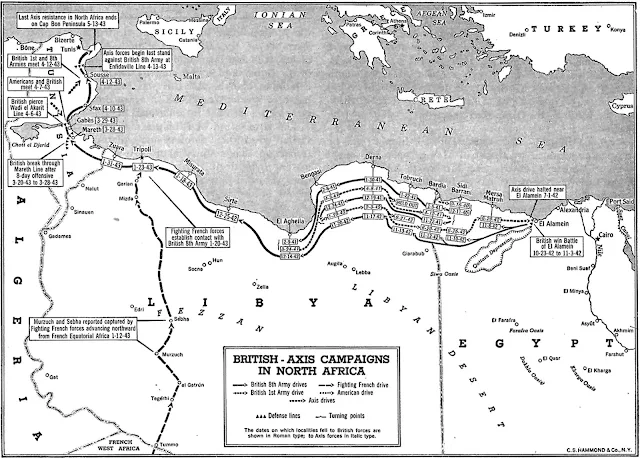 |
| British – Axis Campaigns in North Africa. |
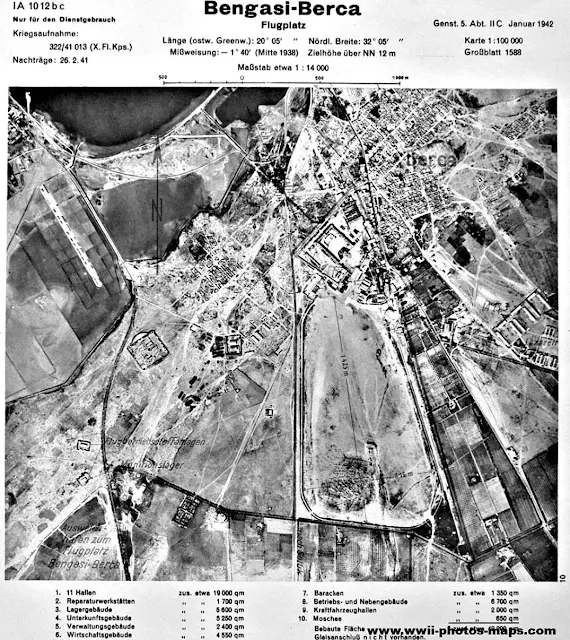 |
| Berca air base, Benghazi, January 1942. |
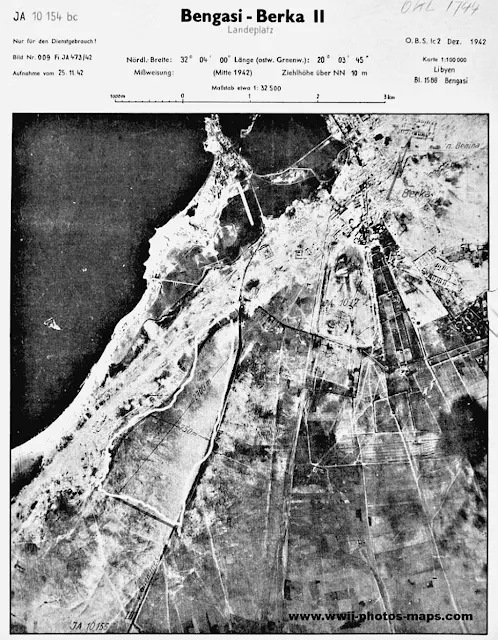 |
| Berka II air base, Benghazi, December 1942. |
 |
| Berka III air base, Benghazi, December 1942. |
 |
| German Luftwaffe oblique aerial photo of Berca airfield, Benghazi, January 1942. a pre-World War II civil airport which may have also been used by the Italian Regia Aeronautica Air Force. After the Italian invasion of Egypt and the arrival of the German Luftwaffe in 1941, it was used by the Axis as a military airfield. After the seizure of Benghazi by the British Eighth Army during the Western Desert Campaign in early 1943, it was used by the United States Army Air Force during the North African Campaign by the 98th Bombardment Group, which flew B-24 Liberator heavy bombers from the airfield between 26 March-4 April 1943. |
 |
| Capital of eastern Libya occupied: The Army of the Nile crowned its two months' campaign on 6 February 1941 by occupying Benghazi, capital of eastern Libya. The resistance encountered here was small, for after a British mechanized force had cut the town's communication in the south, the enemy surrendered without a fight. Above, Italian and native residents watch the ceremony of handing over the town to the victors. |
 |
| A view of the cathedral of Benghazi (Libya) and corniche of Benghazi during early Italian occupation. The colonial Italians created the "Lungomare" (sea-walk) of Benghazi and constructed many other buildings. |
 |
| Littorio Avenue and Italian building in central Benghazi, Libya. 1935. |
 |
| The king of Italy (then colonial ruler of Libya), Vittorio Emanuele III, visiting Benghazi. May 1938. |
 |
| Atiq Mosque in Benghazi with a variety of British Army vehicles parked around the square. |
 |
| Victory Street (Via Vittoria) in Benghazi, Libya, January 1943. |
 |
| Victory Street (Via Vittoria Bengasi) in Benghazi, Libya. 1930s. |
 |
| German military police near a sign to "Benghazi". Agedabia. 21 March 1941. |
 |
| German troops in Benghazi, 21 March 1941. |
 |
| Jemadar Ali Musa Khan and men of 'A' Squadron, Central India Horse, Cyrenaica, December 1941. This photograph was taken soon after Benghazi (Libya) was re-occupied by the British on 24 December 1941 after the Germans had abandoned the city. Earlier in 1941, when operating against Axis forces in the Solum area of the Western Desert, the regiment was subject to frequent attack by low-flying aircraft. |
 |
| Lieutenant Enzo Dini and his wife Elena in Benghazi. 1938. |
 |
| Lieutenant Enzo Dini conferring with his colonel in Benghazi. April 1940. |
 |
| The wreck of the destroyer Borea in Benghazi harbor. In the evening of September 16, 1940 Borea together with destroyers Aquilone and Turbine was berthed in Benghazi harbor. At 19:30 steamers Maria Eugenia and Gloria Stella escorted by Fratelli Cairoli arrived from Tripoli bringing the total number of vessels present in the harbor to 32. During the night of September 16 and 17, nine Swordfish bombers of 815 Squadron RAF carrying bombs and torpedoes, and six from 819 Squadron RAF armed with mines took off from Illustrious and approximately at 00:30 arrived undetected over Benghazi harbor. The anti-aircraft defenses opened fire but were unable to stop the attack. After passing over the harbor to determine their targets, the Swordfish bombers made their first attack at 00:57 hitting and sinking Gloria Stella and severely damaging torpedo boat Cigno, harbor tug Salvatore Primo and an auxiliary vessel Giuliana. The bombers then conducted a second assault at 1:00 striking and sinking Maria Eugenia. |
 |
| Borea was also targeted during the second sweep, with the first bomb exploding between the destroyer and the steamer Città di Livorno but causing no damage to either ship. A short while later, a second bomb hit Borea on her port side, around 40/39 mm cannon platform. The bomb penetrated all the way down into the hold and exploded breaking the ship in two causing rapid flooding and sinking in shallow waters of the harbor. Due to rapid sinking most of the crew was able to easily abandon ship either by jumping or simply walking off the bridge and swimming towards the destroyer Aquilone. There was a single casualty, a sailor who at the moment of the attack was sleeping in the engine room, near the area of bomb explosion. This photo shows the wreck of the destroyer Borea, left, in Benghazi harbor at a later date. |
 |
| German transport column on the Agheila-Agedabia road, south of Benghazi, under cannon attack from Bristol Blenheim Mark IV, Z5867, of No. 113 Squadron RAF. The first two lorries are running off the road. |
 |
| Stuart tanks proceed along the waterfront in Benghazi, November 1942. |
 |
| The local inhabitants of Benghazi line the streets as the British troops arrive, 29 December 1941. |
 |
| Abandoned Italian aircraft on a Benina airfield, Benghazi, Libya, in 1941. In the foreground is an Savoia-Marchetti SM.81 Pipistrello transport plane, a Breda Ba.88 Lince reconnaissance plane is visible in the background. 26 February 1941. |
 |
| Outdoor portrait of RAAF officers in front of an Italian CR.32 fighter plane, c. 1941. From left, Thomas Hamilton Trimble (later Squadron Leader 2 Operational Training Unit); Alan Charles Rawlinson (later Wing Commander, DFC, 78 Wing Headquarters); Flight Lieutenant Lindsay Eric Shaw Knowles (later No. 3 Squadron), killed during operations on 22 November 1941, aged 24; Peter St George Bruce Turnbull (later DFC, Squadron Leader, 76 Squadron); Duncan Campbell (later Squadron Leader, No. 3 Squadron) killed during operations on 5 April 1941, aged 26. |
 |
| Local people gather round Humber armored cars in Benghazi while in the background smoke can be seen filling the sky from a burning oil tanker, November 1942. |
 |
| Macchi C.200 at Benghazi's airport, 1942. |
 |
| Macchi C.200 at Benghazi's airport 1942. |
 |
| Vertical aerial-reconnaissance view of the Italian tanker Portofino, on fire in Benghazi harbor following an attack by aircraft of the USAAF in the evening of 6 November 1942. |
 |
| Local children are given a ride on a Bren gun carrier in Benghazi, November 1942. |
 |
| A medic tending to wounded German prisoners who until recently had been their captors near Benghazi, November 1942. |
 |
| General Montgomery, GOC 8th Army, inspecting a coastal defense gun at Benghazi, 7 December 1942. |
 |
| A Sherman tank with a Christmas greeting painted on its hull, Benghazi, 26 December 1942. |
 |
| Destruction of Benghazi railway. 1943. |
 |
| Member of the Hebrew Brigade, Benghazi, 1944. |
 |
| Al Avir Camp, near Benghazi. 1944. |
 |
| Members of the Hebrew Brigade, Benghazi. 1944. |
 |
| The Commander-in-Chief inspect Sudanese troops outside Benghazi Cathedral, 1944. |
 |
| Jewish Brigade soldiers at an archaeological site in Benghazi area, c. 1943-1944. |
 |
| Benghazi, 1943. |
 |
| Allied soldiers in Benghazi, 1943. |
 |
| From "Alex" to Benghazi. Men of the Merchant Navy back 8th Army victories. 31 December 1942 to 6 January 1943, Alexandria to Benghazi. Men and ships of the Merchant Navy backing up the Eighth Army's victorious advance in North Africa. They carry vital supplies from Alexandria to Benghazi, where the Royal Navy and Army co-operate in landing the stores and sending them on to the men in the fighting line. A quay-side scene at Benghazi with the twin domes of the Cathedral in the background. |
 |
| Inside Benghazi Church, Libya, North Africa. Captured Nazi swastika flag (Reichskriegsflagge) displayed by ten Australian soldiers. |
 |
| The Atiq Mosque in Maydan al-Huriya, 'Municipality Square,' during the Italian colonial era, in Massjid, Benghazi, Libya. |
 |
| The Atiq Mosque in Maydan al-Huriya, 'Municipality Square,' during the Italian colonial era, in Massjid, Benghazi, Libya, early 1930s. |
 |
| Column of motorized troops driving through Benghazi, 21 March 1941. |
 |
| Jewish Brigade soldiers at an archaeological site in Benghazi area, c. 1943-1944. |
 |
| Jewish Brigade soldiers at an archaeological site in Benghazi area, c. 1943-1944. |
 |
| The Jewish flag side by side with the British flag in Benghazi, 1943. |
 |
| Benghazi, Libya. With the capture of Benghazi, after the rapid advance across the Western Desert, General Sir Archibald Wavell's Army of the Nile established control of the whole of Cyrenaica. A general view of the handing over ceremony in Benghazi's Civic Square. 11 February 1941. |
 |
| Benghazi, Libya. Bomb damage caused by RAF raids on the city. 26 December 1941. |
 |
| Berca airfield near Benghazi, Cyrenaica. c. 1943. Gum trees line both sides of a water covered road to No. 454 (Baltimore) Squadron RAAF, General Reconnaissance Squadron's airfield. |
 |
| Berca airfield near Benghazi, Cyrenaica. c. 1943. Flood waters surround the camp occupied by No. 454 (Baltimore) Squadron RAAF, a General Reconnaissance Squadron, and play havoc with the airfield. |
 |
| Benghazi, Cyrenaica, Libya. 5 January 1942. The scene at El Berca airfield showing wreckage of the many Axis aircraft destroyed and a densely filled cemetery behind. |
 |
| Benghazi, Cyrenaica, Libya. 27 November 1942. A lorry in a huge crater near the docks. All around the harbor are the remains of buildings which once held Rommel's supplies in ruins after months of air attacks by Allied bomber aircraft. |
 |
| Benghazi, Libya. A view of the harbor after the town's occupation by Allied forces. 26 December 1941. |
 |
| Benghazi, Libya. Sunken Italian ships in the harbor with the deserted town in the background. 26 December 1941. |
 |
| Benghazi, Libya. Bomb damage to the mole in the harbor. 26 December 1941. |
 |
| Benghazi, Libya. The ruins of the opera house after it had been hit by RAF bombs. 26 December 1941. |
 |
| Benghazi, Libya, 1941. Photograph taken at the time of the British withdrawal from Benghazi, 3 April, 1941. Prior to their evacuation, the British detonated 60 tons of explosive. The smoke from this explosion may be the same smoke cloud pictured. |
 |
| Benghazi, Libya. South African armored cars entering the city after it had surrendered to Allied forces. 26 December 1941. |
 |
| Benghazi, Libya. South African armored cars in the center of the deserted, bullet and shell damaged city after its surrender to the Allies. 26 December 1941. |
 |
| Benghazi, Libya. South African armored cars entering the city after it had surrendered to Allied forces. 26 December 1941. |
 |
| Here we see troops from a South African armored car unit (probably the 4th South African Armoured Car Regiment), part of the 7th Armoured Division), celebrating Christmas in Benghazi in December 1941, during the advance after Operation Crusader. The port only remained in Allied hands for just over a month, before falling to Rommel during his Second Offensive. The leading armored car is probably a Marmon Herrington Mk II, which carried a Boyes anti-tank gun and a 7.7mm machine gun in the turret. |
 |
| British guard duty west of Benghazi, 17 February 1941. |
 |
| Rommel in Benghazi, Libya, listening to reports from the battlefield. January 1942. |
 |
| Benghazi, Libya. Australian troops of the 19th Brigade, 6th Division marching into the Civic Square of undefended Benghazi on the morning of 11 February 1941. |
 |
| Australian troops and vehicles in the Civic Square of Benghazi at the ceremony of handover by the Mayor to the Commander of the Australian forces, Brigadier H C H Robertson. 11 February 1941. |
 |
| Infantry troops of the 6th Division entering the civic square of Benghazi for the ceremony of handing over the city to the Commander of the Australian Forces. 11 February 1941. |
 |
| Benghazi, c. 1940. Soldiers and civilians watch a parade as soldiers march past them along a street on the waterfront. Note the Union Jack flying on the British Consulate building. The parade was probably in honor of a visit by the Italian leader Benito Mussolini. |
 |
| German armored column arriving in Benghazi. |
 |
| Benghazi, c. 1940. The Italian leader Benito Mussolini (1) and Marshal Balbo (2) stand among Italian soldiers during their visit to Benghazi. |
 |
| Benghazi, Libya. c. 1940. Benito Mussolini (1) raises his hand to the troops lining the street in a guard of honor during a visit to the area. He is accompanied by Marshall Balbo (2) and other officers of the Italian Army. |
 |
| Benghazi, Libya. c. 1940. Benito Mussolini (1) and Marshall Balbo (2) sitting in the back of a motor vehicle with a police motorcycle escort behind on their arrival outside a building. |
 |
| Benito Mussolini (1), and Marshall Balbo (2) walking along a flag lined street after his arrival in Benghazi. Note the crowd of local people following the Italian Army officers. |
 |
| A bust of Benito Mussolini, the fascist leader of Italy, which was souvenired from Balbo's Palace and decorated with a digger hat and scarf, holds pride of place in a RAAF Mess. The label reads "With the compliments of a Light Anti-Aircraft Battery in Tripoli". |
 |
| Italian prisoners captured during Operation Compass, January 1941. |
 |
| Benghazi, c. 1940. A group of Italian officers stand around a table examining an Italian machine gun. |
 |
| Benghazi, Libya. The mixed population of Italians, Arabs, Greeks and Jews welcomed Australian troops of the 19th Brigade, 6th Division in the Civic Square of Benghazi. |
 |
| This square in Benghazi, was the pride of the Italian colonists. Facing the square is the magnificent palace built for Marshal Graziani, former Italian commander-in-chief in Libya, according to Rome messages, has tendered his resignation. c. March 1941. |
 |
| Benghazi, Libya. A street scene in the deserted city. 26 December 1941. |
 |
| Benghazi, Libya. The remains of an Italian seaplane burnt out at its moorings in the harbor. It was destroyed as a result of RAF actions. 26 December 1941. |
 |
| A sunken Italian CANT Z.501 Gabbiano floatplane at Benghazi, Libya. 27 December 1941. |
 |
| Benghazi, Libya. Italian shipping damaged in the harbor. 26 December 1941. |
 |
| Benghazi, Libya. Sunken Italian ships in the harbor with the battered town in the background. 26 December 1941. |
 |
| Benghazi, Libya. A crater caused by the explosion of a mine dropped from a German aircraft. The men in the centre of the photograph include, Major G.G. Hayman (Senior Ordnance Mechanical Engineer), Major D. Macarthur-Onslow (Divisional Cavalry Regiment) and Lieutenant Colonel B.W. Pulver (Deputy Assistant Director Ordnance Services) all from 6th Division, AIF. March 1941. |
 |
| Benghazi, Cyrenaica, Libya, c. 1943. View of the landing field used by No. 454 Squadron RAAF, a General Reconnaissance Squadron, in the Western Desert. After three days of unceasing rain the landing field had been reduced to a sea of mud. Note the Martin Baltimore aircraft in the background. |
 |
| Benghazi, Cyrenaica, Libya, c. 1943. Informal portrait of 33496 Corporal J. J. Armstrong (left, in the gumboots) and 33718 Leading Aircraftman E. A. Gover (perched on top of an empty petrol drum), surrounded by a sea of floodwaters on the edge of the airfield used by No. 454 (Baltimore) Squadron RAAF. Both airmen are from Sydney, NSW, and ex-members of No. 451 (Spitfire) Squadron RAAF. |
 |
| Benghazi, Libya, c. 1943. 20236 Leading Aircraftman (LAC) J. A. (Joe) Dorney, Driver Motor Transport (DMT), of Gunnedah, NSW (left), and LAC 33323 R. F. (Pinto) Peet, DMT, of Brighton Le Sands, NSW, both members of No. 454 (Baltimore) Squadron RAAF, a General Reconnaissance Squadron, stand beneath the Australian flag and roll a cigarette. |
 |
| Benghazi, Cyrenaica, Libya, c. 1943. No. 454 Squadron RAAF, a General Reconnaissance squadron, based in the Western Desert, which forms part of a Naval Co-operation group in the Middle East has set up a high record of serviceability which all hands in the Maintenance section are determined to keep up. The ground crew members are seen here working on a Martin Baltimore aircraft of the squadron. |
 |
| Benghazi, Cyrenaica, Libya, c. 1943. Two members of No. 454 (Baltimore) Squadron RAAF, a General Reconnaissance Squadron, walk along a road which runs close by the landing field used by the squadron. Note the gum trees on the side of the road. |
 |
| Berca, Cyrenaica, Libya, c. 1943. Fitters and flight mechanics of No. 454 (Baltimore) Squadron RAAF at work on an aircraft. |
 |
| Benghazi, Libya. After escaping from a prison camp these South Africans were cared for by friendly Arabs. They were found when Allied troops entered the city on 25 December 1941. |
 |
| Benghazi, Libya. Two South African soldiers who escaped from an Italian prison camp with the Arabs who befriended them. 26 December 1941. |
 |
| Benghazi, Libya. After escaping from a prison camp these South Africans were cared for by friendly Arabs. They were found when Allied troops entered the city on the 1941-12-25. In this scene they are shown taking leave of their hosts. 26 December 1941. |
 |
| Six prisoners of war from camp 116 (Palm Tree) in Benghazi, Libya. They had been living in the camp for about three months. 1942. |
 |
| Camp 116 (Palm Tree), for prisoners of war, in Benghazi, Libya. 1942. |
 |
| Prisoner of war camp 116 (Palm Tree) in Libya, Benghazi, 17 July 1942. |
 |
| Air force raid on Benghazi Harbor, Libya, as seen from prison camp 116 (Palm Tree), c. 1942. Caption from back of file print reads: "The result of a very successful Air Force raid on Benghazi Harbor one late afternoon when three ships were smashed. This incidentally raised our hopes of not being shipped away. Note blankets airing on barbed wire of prison camp." |
 |
| Benghazi, Libya. Bomb damaged buildings as they appeared to Allied troops who entered the city on Christmas day. 26 December 1941. |
 |
Benina, Cyrenaica, Libya. 8 December 1942. All round Benghazi Cathedral there is widespread damage done by Allied bombs during attacks on the harbor. But the building itself is not seriously damaged. Scars from flying masonry and bomb splinters are the only marks left on its walls by Allied raiders.
|
 |
| Benghazi, Cyrenaica, Libya. 8 December 1942. The Benghazi Cathedral in Cyrenaica received only a few scars from bomb splinters and flying masonry on its walls after the intensive attacks by Allied heavy bomber aircraft. There is widespread damage among the dock buildings and warehouses close by. |
 |
| Benina, Cyrenaica, Libya. 8 December 1942. A wrecked building on the waterfront at Benghazi, target of the 'Mail Run' bomber aircraft for months. On the horizon is an oil tanker which has been burning for more than three weeks. |
 |
| Benghazi, Cyrenaica, Libya. 14 January 1942. The harbor is a mass of sunken Axis shipping in Benghazi harbor following a sustained Allied bombing campaign. |
 |
| Benghazi, Cyrenaica, Libya. 28 November 1942. Looking over Benghazi towards the harbor. In the foreground are buildings damaged during air raids by Allied bomber aircraft. |
 |
| Benghazi. the Piazza Municipio, recently the scene of the handing over of the city to the Australian forces by the local civil authorities after the Italian army had retreated. 1 March 1941. |
 |
| Benghazi, North Africa. A photograph of Italian officers of the XXIII Corps, under General Bergonzoli, souvenired by a member of B Company, 2/11th Australian Infantry Battalion, the Battle of Bardia, Libya, January 1941. |
 |
| View of ships in Benghazi harbor, Libya, c. 1942-1943. |
 |
| Wrecked Italian vehicles, including an AB 41 armored car, at left, in Benghazi, Libya. |
 |
| Unidentified British soldier stands looking at German sign posts in Benghazi, Libya, 10 January 1942. |
 |
| Australian 40mm anti-aircraft gun in Benghazi, Libya. |
 |
| A palm lined street of Benghazi. 1 March 1941. |
 |
| Wearing battle dress Admiral Sir Henry Harwood, Commander-in-Chief, Mediterranean Fleet, visited Benghazi where he made a tour of inspection. |
 |
| Admiral Sir Henry Harwood in battle dress (left), touring the dockside at Benghazi. Imperial War Museum photo A 14236 |
 |
| Admiral Harwood (left) touring the harbor at Benghazi to see things for himself. Imperial War Museum photo A 14222 |
 |
| One of the columns that decorates the fine roadway around the water front of Benghazi depicts the suckling of Romulus and Remus by a wolf. 1 March 1941. |
 |
| Along the harbor front at Benghazi. 1 March 1941. |
 |
| Benghazi, Libya. Crown Sergeant J. Berg, Lance Corporal W.T. Thompson, Private M. Cole, and Private K. Hall take a rest on the Lungamarie Mussolini. |
 |
| Benghazi Commonwealth Cemetery 1939-45. 2010. |
 |
| Benghazi Commonwealth Cemetery 1939-45. 2010. |
 |
| Grave of Lieutenant-Colonel Geoffrey Charles Tasker Keyes, VC, MC (18 May 1917 – 18 November 1941) War Grave Cemetery, Benghazi, Libya. 2012. |
 |
| Sunken Axis ships in the harbor at Benghazi, December 1941. |


No comments:
Post a Comment