 |
| The cruisers HMS Edinburgh (Town class cruiser), HMS Hermione (Dido class cruiser) and HMS Euryalus (Dido class cruiser) steaming in line abreast whilst they escort a convoy (Operation Halberd - convoy not visible). (Imperial War Museum A5745) |
Operation Halberd was a
British naval operation that took place on 27 September 1941, during the Second
World War. The British were attempting to deliver a convoy from Gibraltar to
Malta. The convoy was escorted by several battleships and an aircraft carrier,
to deter interference from the Italian surface fleet, while a close escort of
cruisers and destroyers provided an anti-aircraft screen.
The Italian fleet
sortied after the convoy was detected, but turned back after learning the
strength of the escorting force. Air attacks by Italian bombers and fighters
damaged several ships, and forced one of the merchant vessels to be scuttled.
The rest of the convoy arrived at Malta and discharged their cargo.
Operation Halberd was at
the time the largest Malta resupply effort of the war. Nine merchant ships
carrying 81,000 tons of military equipment and supplies sailed from Liverpool
on 16 September and from the Clyde on 17 September as part of convoy WS
(Winston Specials) 11X, passing Gibraltar on 24 September 1941, with a close
escort under the command of Rear-Admiral Harold Burrough. The nine ships were:
MV
Breconshire (9,776 GRT) 'Convoy Commodore' Auxiliary Supply Ship
Ajax
(7,549 GRT) Blue Funnel Line
City
of Calcutta (8,063 GRT) Ellerman's City Line
City
of Lincoln (8,039 GRT) Ellerman & Bucknall
Clan
Ferguson (7,347 GRT) Clan Line
Clan
MacDonald (9,653 GRT) Clan Line
Dunedin
Star (12,891 GRT) Blue Star Line
Imperial
Star (12,427 GRT) Blue Star Line
Rowallan
Castle (7,798 GRT) Union-Castle Line
Italian submarines
deployed to ambush the British battleships thought to be planning a bombardment
raid against the Italian coast. Dandolo, Adua and Turchese patrolled south of
Ibiza while Axum, Serpente, Aradam and Diaspro patrolled east of the Balearic
Islands. Squalo, Bandiera and Delfino patrolled Southwest of Sardinia and
Narvalo was off the African shore of the Sicilian narrows. Light cruisers Muzio
Attendolo and Duca degli Luigi di Savoia Duca degli Abruzzi of the 8th cruiser
division sailed from Palermo with Maestrale-class destroyers Maestrale, Grecale
and Scirocco of the 10th destroyer flotilla to take position off La Maddalena.
Battleships Vittorio Veneto and Littorio were prepared to sortie from Naples
with Granatiere, Fuciliere, Bersagliere and Gioberti of the 13th flotilla, and
Nicoloso da Recco, Emanuele Pessagno and Folgore of the 16th flotilla while cruisers
Trieste, Trento and Gorizia from Taranto with Corazziere, Carabiniere, Ascari
and Lanciere of the 12th flotilla prepared to join them. Sardinia deployed
thirty Macchi C.200, twenty Fiat CR.42 Falco and twenty-six Savoia-Marchetti
SM.79 and SM.84 torpedo bombers against the convoy while Sicily deployed
fifteen C.200, three Reggiane Re.2000, and nine Junkers Ju 87 with twenty-four
Fiat BR.20, SM.79 and SM.84 as high-level bombers and plus three with
torpedoes. More Italian aircraft were operational, but were assigned other
missions including bombing Malta.
Ships of the
Mediterranean Fleet operating from Alexandria began making heavy radio traffic
in the hope of diverting Luftwaffe attention to possible preparations for a
major operation in the eastern Mediterranean. On 24 September Admiral Somerville
shifted his flag from Nelson to Rodney and Nelson sailed west into the Atlantic
at 18:15 escorted by Garland, Piorun and Isaac Sweers to give the impression
the strength of Force H was being reduced. Nelson turned back after dusk to
join the merchant ships from convoy WS 11X, now redesignated convoy GM 2 as the
second convoy from Gibraltar to Malta. Force H separated from the merchant
ships in the early hours of 25 September so Axis aerial reconnaissance might
think only Force H was at sea. Fulmars from Ark Royal provided air cover over
the convoy.
Italian aircraft found
Force H on the afternoon of 25 September, and assumed the battleships were on a
bombardment raid against the Italian coast. A CANT Z.506 seaplane observing
Force H at 09:32 on 26 September reported a single battleship with an aircraft
carrier incorrectly identified as HMS Furious. Since Ark Royal had been seen
leaving Gibraltar, the Italians assumed Furious might be flying off aircraft to
reinforce Malta while Ark Royal attacked Genoa. The Italian fleet sailed from Naples
to take a defensive position with the 8th cruiser division off northern
Sardinia, but was ordered not to engage the British fleet unless the Italians
held a decisive superiority of forces.
Force H rejoined the
convoy at 07:10 27 September. Sixteen destroyers formed a bent line screen
ahead of two columns of merchant ships. The port column was led by the cruiser
Kenya, followed by Ajax, Clan MacDonald, Imperial Star, Rowallan Castle and
City of Calcutta. The starboard column was led by the cruiser Edinburgh
followed by Clan Ferguson, MV Dunedin Star, HMS Breconshire and City of
Lincoln. Rodney took position behind the port wing of the screen followed by
Prince of Wales. Nelson took position behind the starboard wing of the screen
followed by Ark Royal in formation with the anti-aircraft cruisers Euryalus and
Hermione. The cruiser Sheffield took position astern of the merchant ships,
while the destroyers Piorun and Legion assumed plane guard positions astern of
Ark Royal.
Italian aircraft
correctly identified Ark Royal at 08:10, and at 10:45 reported the convoy speed
of 16 knots (30 km/h), which indicated that merchant ships were with the
convoy. The battleships from Naples rendezvoused with the cruisers from Taranto
at 10:40, and were joined by the 8th cruiser division at 11:48. The Italian
fleet was faster than the battleships of Force H, but was inferior to the
British force in firepower. The Regia Aeronautica gave priority to fighter
defence of bomber strikes, and the six fighters providing air cover over the
Italian fleet could not travel more than 100 kilometres (62 mi) from their
base. Since Italian aircraft had reported only a single British battleship, the
Italian fleet received authorization at noon to engage the British formation.
The Regia Aeronautica was requested to provide increased air cover for the
Italian fleet by 14:00.
The Regia Aeronautica
launched a strike of 28 SM.79 and SM.84 torpedo planes with 20 Cr.42 fighters.
The convoy came under air attack at 13:00. The strike was met by defending
Fulmars and heavy anti-aircraft fire. Three bombers pressed through the barrage
of starboard wing destroyers to launch torpedoes at Nelson. Nelson turned to
comb the torpedo tracks, and inadvertently steadied on the reciprocal course of
a torpedo which struck the port side of the forecastle. Nelson slowed to 15
knots, but maintained position in the convoy. The Italian plane had released
the torpedo at a range of only 450 yards (410 m) and endured concentrated
anti-aircraft fire from Prince of Wales before being shot down by one of the
Fulmars. Six more torpedo planes and 1 fighter failed to return from the
strike. Friendly fire from Rodney and Prince of Wales shot down two Fulmars,
and a patrolling Swordfish had been shot down by the Italian fighters before
the strike ended at 13:30.
The Italian fleet was
shadowed by British aircraft from Malta beginning at 13:07. At 14:30 the
Italian fleet was about 40 miles from the convoy, but "...decided to
return home around 14:30 on the 27th when..." it "... learned that
the British had two battleships, a carrier and six cruisers at sea."
Aircraft from Ark Royal shadowed the Italian fleet from 15:15 to 17:50. Cr.42
fighters arrived at 15:30 to provide air cover, but the squadron leader of the
first flight was shot down by friendly fire from an Italian destroyer. Two more
Italian pilots were lost when another flight of ten C.200s ran out of fuel and
ditched at sea. At 14:46 Prince of Wales, Rodney, Sheffield, Edinburgh, and six
destroyers steamed toward the Italian fleet; but were recalled at 17:00 before
making contact, and rejoined the convoy at 18:30. Nelson, Rodney, Prince of
Wales and Ark Royal turned west to return to Gibraltar escorted by Duncan,
Fury, Gurkha, Lance, Legion, Lively. Garland, Piorun, and Isaac Sweers.
Euryalus fell in astern of the port column of merchant ships while Sheffield
and Hermione joined the starboard column as the remaining destroyers closed
into a night steaming formation. The night steaming formation was attacked by a
few torpedo bombers, and Imperial Star was struck by a single torpedo. Oribi
took the damaged freighter in tow. Italian Motoscafo armato silurante (MAS
torpedo boats) deployed through the Strait of Messina, but failed to find the
convoy.
Hermione detached from
the convoy to bombard Pantelleria so that airfield would be out of action when
the convoy arrived in Malta. The damaged Imperial Star was scuttled without
loss of life to maintain convoy speed of advance, and the convoy arrived in
Malta on 28 September. Retiring Force H was attacked by three submarines; and
Adua was sunk by Gurkha and Legion. Another Ark Royal Fulmar fell to friendly
fire from Prince of Wales, raising British aircraft losses to three Fulmars
from friendly fire and one Swordfish from enemy action. Italian aircraft losses
were 21 including seven bombers and one fighter from enemy action, one fighter
from friendly fire, and ten fighters from fuel exhaustion.
Admiral Somerville was
knighted in recognition of his successful command of Force H during Operation
Halberd. It was the second time Somerville had received that honor, and it
occasioned a memorable congratulatory message from Admiral Cunningham:
"Fancy, twice a knight at your age."
References
Hague, Arnold (2000). The Allied Convoy System 1939–1945.
Annapolis, Maryland: Naval Institute Press.
Greene, Jack; Massignani, Alessandro (1998). The Naval War
in the Mediterranean 1940–1943. London: Chatham Publishing.
Merlins over Malta
Malta Convoys
The story of HMS Lightning - a WW2 destroyer
Mediterranean Convoy Operations (London Gazette)
 |
| Corvettes which had safely brought the convoy from England entering Gibraltar Harbour. (Imperial War Museum A 5620) |
 |
| Corvettes which had safely brought the convoy from England entering Gibraltar Harbour. (Imperial War Museum A 5621) |
 |
| Corvettes which had safely brought the convoy from England entering Gibraltar Harbour. (Imperial War Museum A 5622) |
 |
| View of the convoy. (Imperial War Museum A 5623) |
 |
| View of the convoy. (Imperial War Museum A 5624) |
 |
| Another view of the convoy with HMS Nelson in the foreground. (Imperial War Museum A 5625) |
 |
| The aircraft carrier HMS Ark Royal with the convoy in the background. (Imperial War Museum A 5626) |
 |
| The aircraft carrier HMS Ark Royal with the convoy in the background. (Imperial War Museum A 5627) |
 |
| The aircraft carrier HMS Ark Royal with the convoy in the background. (Imperial War Museum A 5628) |
 |
| A view of HMS Ark Royal and HMS Nelson from HMS Hermoine, September 1941. (Imperial War Museum A 5629) |
 |
| A view of HMS Ark Royal and HMS Nelson from HMS Hermoine, September 1941. (Imperial War Museum A 5630) |
 |
| The convoy on its way eastward through the Mediterranean. (Imperial War Museum A5631) |
 |
| The 4-inch guns of HMS Sheffield firing during an enemy attack. The ship has made a wide turning as shown by the wake. Broom and bucket are in evidence on the left where officers and men wearing steel helmets with anti-splinter curtains, are at action stations. (Imperial War Museum A5776) |
 |
| An Italian torpedo bomber with an anti-aircraft barrage bursting round the aircraft. Italian air attack on British convoy proves futile and costs eleven bombers. September 1941, on board the cruiser HMS Hermione. on its way through the Mediterranean a large British convoy to Malta (Operation Halberd), with a Royal Navy escort under the command of Vice Admiral Sir James Somerville, was discovered by an Italian reconnaissance aircraft. Later an intense attack from the air was attempted by the Italians, but the aircraft from HMS Ark Royal, and the anti-aircraft fire from the warships, got the convoy through. An Italian torpedo bomber with an anti-aircraft barrage bursting round the aircraft. (Imperial War Museum A5632) |
 |
| The Italian torpedo bomber (as seen in the previous photo) on fire and crashing. (Imperial War Museum A5633) |
 |
| An Italian torpedo bomber on fire and crashing whilst HMS Ark Royal steams on during Operation Halberd, a large British convoy to Malta with a Royal Navy escort under the command of Vice Admiral Sir James Somerville. (Imperial War Museum A5634) |
 |
| The Italian torpedo bomber (as seen in previous three photos) on fire and crashing. (Imperial War Museum A5635) |
 |
| The Italian torpedo bomber (as seen in previous four photos) on fire and crashing. (Imperial War Museum A5636) |
 |
| The Italian torpedo bomber (as seen in previous five photos) on fire and crashing. (Imperial War Museum A5637) |
 |
| The Italian torpedo bomber (as seen in previous six photos) on fire and crashing. (Imperial War Museum A5637) |
 |
| A close-up of remains of the burnt out torpedo bomber. (Imperial War Museum A5640) |
 |
| HMS Nelson seen from HMS Hermione. (Imperial War Museum A5639) |
 |
| HMS Nelson after being hit by a torpedo dropped by an Italian torpedo bomber. (Imperial War Museum A5641) |
 |
| HMS Nelson after being hit by a torpedo dropped by an Italian torpedo bomber. (Imperial War Museum A5642) |
 |
| HMS Nelson after being hit by a torpedo dropped by an Italian torpedo bomber. (Imperial War Museum A5643) |
 |
| Three cruisers, HMS Edinburgh, HMS Sheffield, and HMS Kenya which accompanied the convoy. (Imperial War Museum A5644) |
 |
| HMS Sheffield (center) underway in the Mediterranean during Operation Halberd, with HMS Edinburgh (left) and HMS Kenya (right), other cruisers of the convoy to Malta. (Imperial War Museum A5645) |
 |
| Three cruisers, left to right: HMS Edinburgh, HMS Sheffield, and HMS Kenya which accompanied the convoy. (Imperial War Museum A5646) |
 |
| Another view of the convoy proceeding through the Mediterranean. (Imperial War Museum A5647) |
 |
| Another view of the convoy proceeding through the Mediterranean. (Imperial War Museum A5648) |
 |
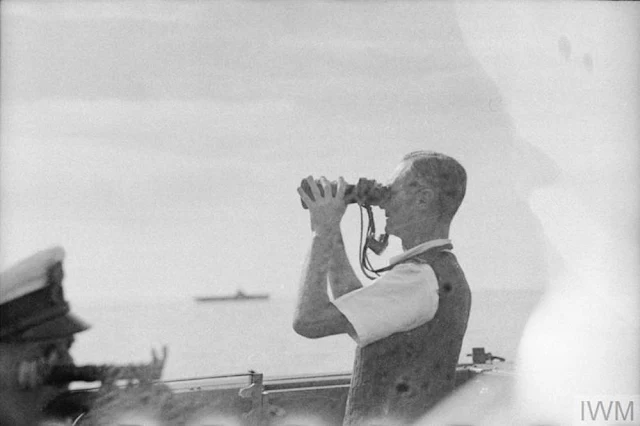
| Admiral Sir James Somerville, KCB, DSO, with Captain G Oliver, RN, and Lieut J B Wainright, the Navigating Officer of HMS Hermione, after she had rammed and sunk an enemy U-boat. (Imperial War Museum A5649) |
 |
| Admiral Sir James Somerville, KCB, DSO, leaving HMS Hermione. (Imperial War Museum A5650) |
 |
| Captain G N Oliver, RN, on the bridge of HMS Hermione. (Imperial War Museum A5651) |
 |
| Captain G N Oliver, RN, on the bridge of HMS Hermione. (Imperial War Museum A5652) |
 |
| The anti-aircraft cruiser HMS Euryalus astern of HMS Hermione. (Imperial War Museum A5653) |
 |
| The anti-aircraft cruiser HMS Euryalus astern of HMS Hermione. (Imperial War Museum A5654) |
 |
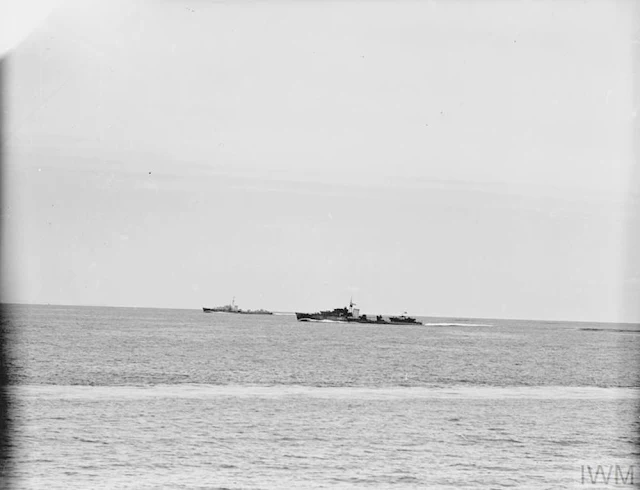
| HMS Gurkha and HMS Legion steaming in the Mediterranean. (Imperial War Museum A5655) |
 |
| HMS Prince of Wales opens fire with her two pounder pom-poms and 5.25 inch guns during an enemy bombing attack on the Malta convoy she was escorting (Operation Halberd). She shot down two enemy aircraft in the first few minutes. (Imperial War Museum A5737) |
 |
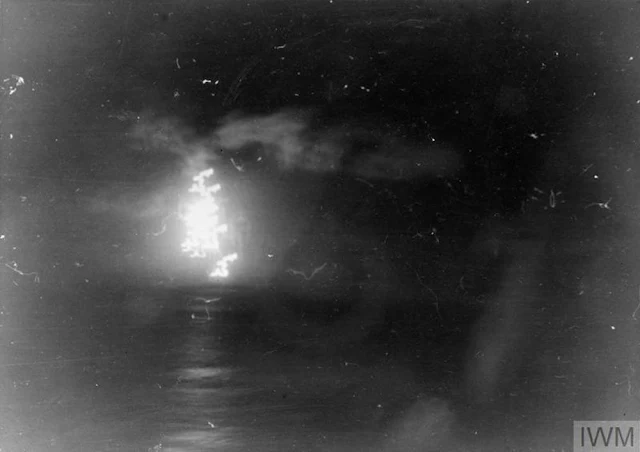
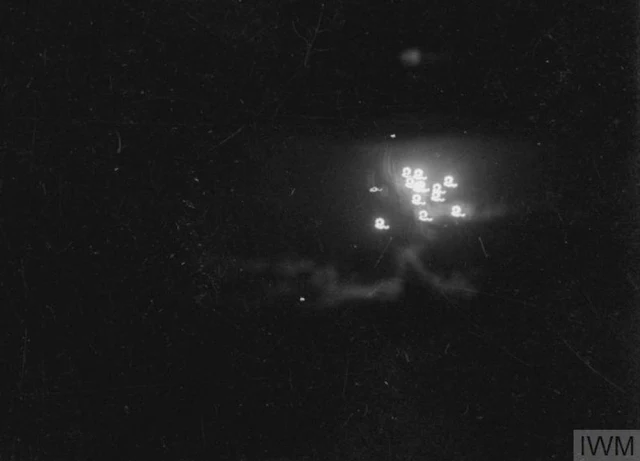
| Star shells bursting and illuminating the harbor and wharves of Pantellaria during the bombardment by HMS Hermione. (Imperial War Museum A5656) |
 |
| Star shells bursting and illuminating the harbor and wharves of Pantellaria during the bombardment by HMS Hermione. (Imperial War Museum A5657) |
 |
| Star shells bursting and illuminating the harbor and wharves of Pantellaria during the bombardment by HMS Hermione. (Imperial War Museum A5658) |
 |
| Star shells bursting and illuminating the harbor and wharves of Pantellaria during the bombardment by HMS Hermione. (Imperial War Museum A5659) |
 |
| Star shells bursting and illuminating the harbor and wharves of Pantellaria during the bombardment by HMS Hermione. (Imperial War Museum A5660) |
 |
| Star shells bursting and illuminating the harbor and wharves of Pantellaria during the bombardment by HMS Hermione. (Imperial War Museum A5661) |
 |
| Star shells bursting and illuminating the harbor and wharves of Pantellaria during the bombardment by HMS Hermione. (Imperial War Museum A5662) |
 |
| The Torpedo Officer and Principal Control Officer, finds time for a shave with an electric razor, at his action station during a lull on board HMS Sheffield, while the ship is escorting a Malta convoy in the Mediterranean (Operation Halberd). (Imperial War Museum A5755) |
 |
| The convoy entering the harbor at Malta with HMS Edinburgh leading. (Imperial War Museum A5768) |


